I love answering your questions. If you ask them in the comment section, I have no way to answer you (if you haven't heard from me, that is why). If you use the "EMAIL ME" in the left column of this page, I will be able to respond to you. You can also use it if you want to be added to my newsletter. Laura
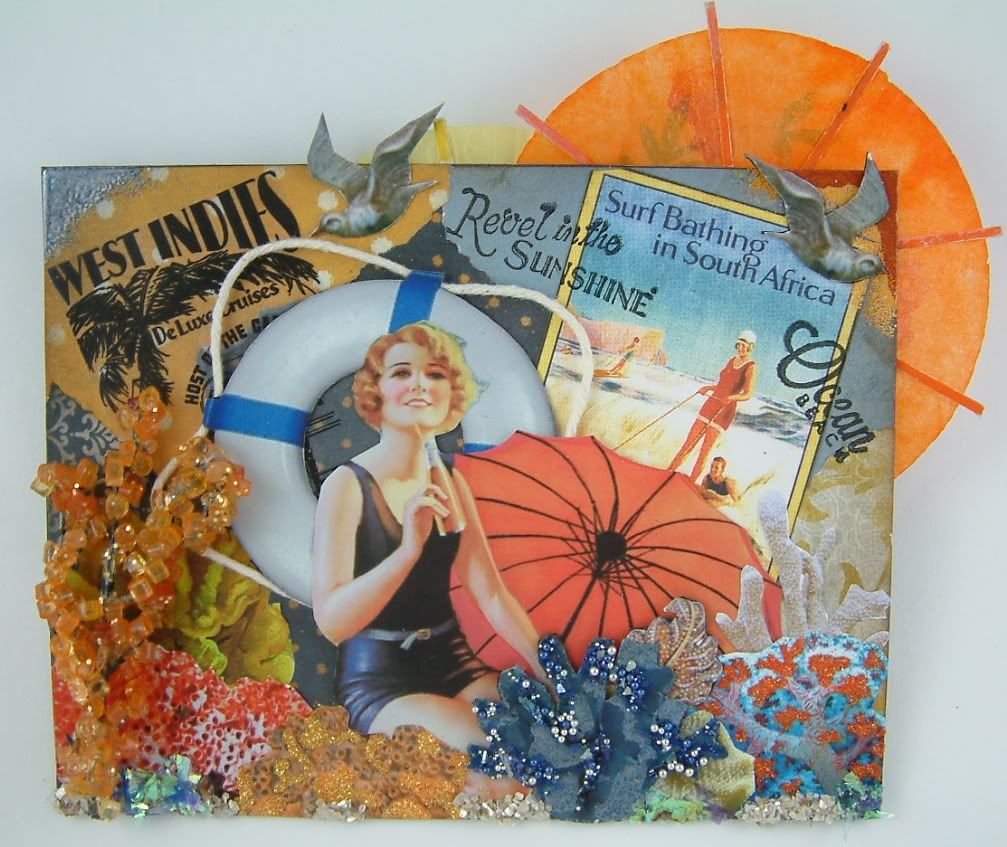
I started by covering the postcard
with various patterned paper and then inked the edges.Next, I added beach stickers and posters and
then stamped “Revel in the Sunshine” and “Ocean”.To add more dimension I added cording to the
lifesaver behind the woman.The image of
the woman is from Alpha
Stamps Beach Umbrellas collage sheet.Lastly I add images of coral.For
dimension and sparkle I added glitter, mica flakes, microbeads and beads.
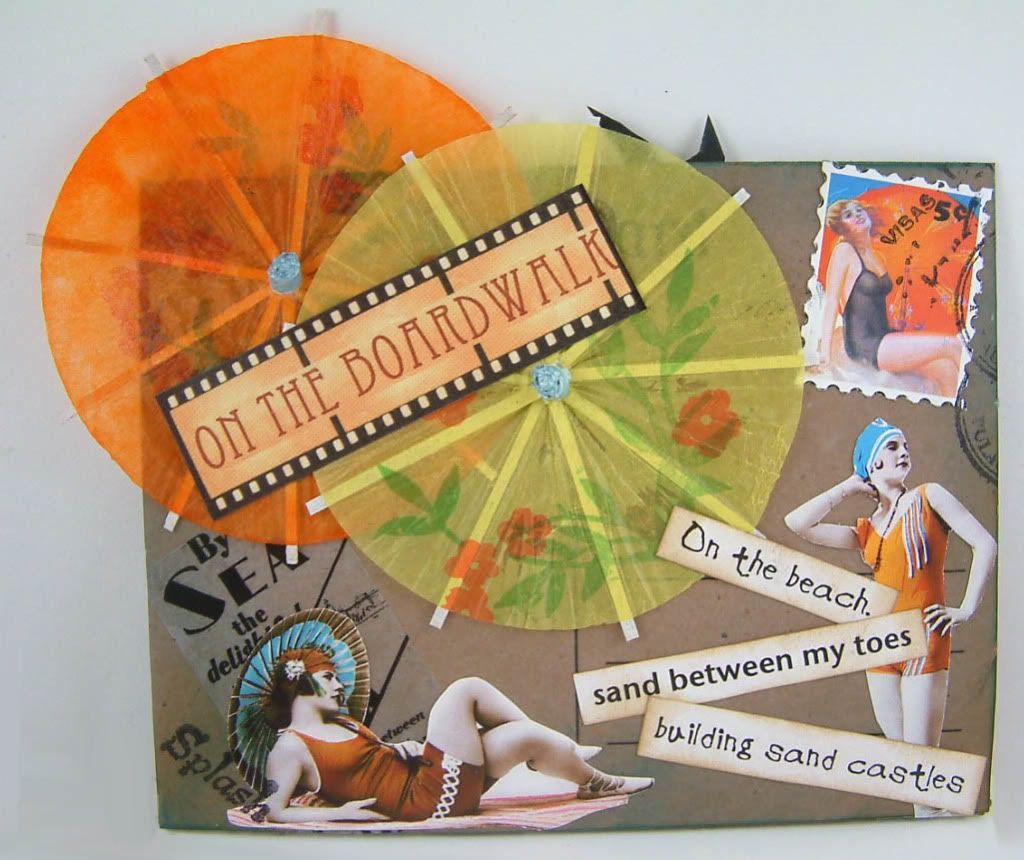
Back of the Postcard
The umbrellas on the back of
the postcard are paper drink umbrellas.
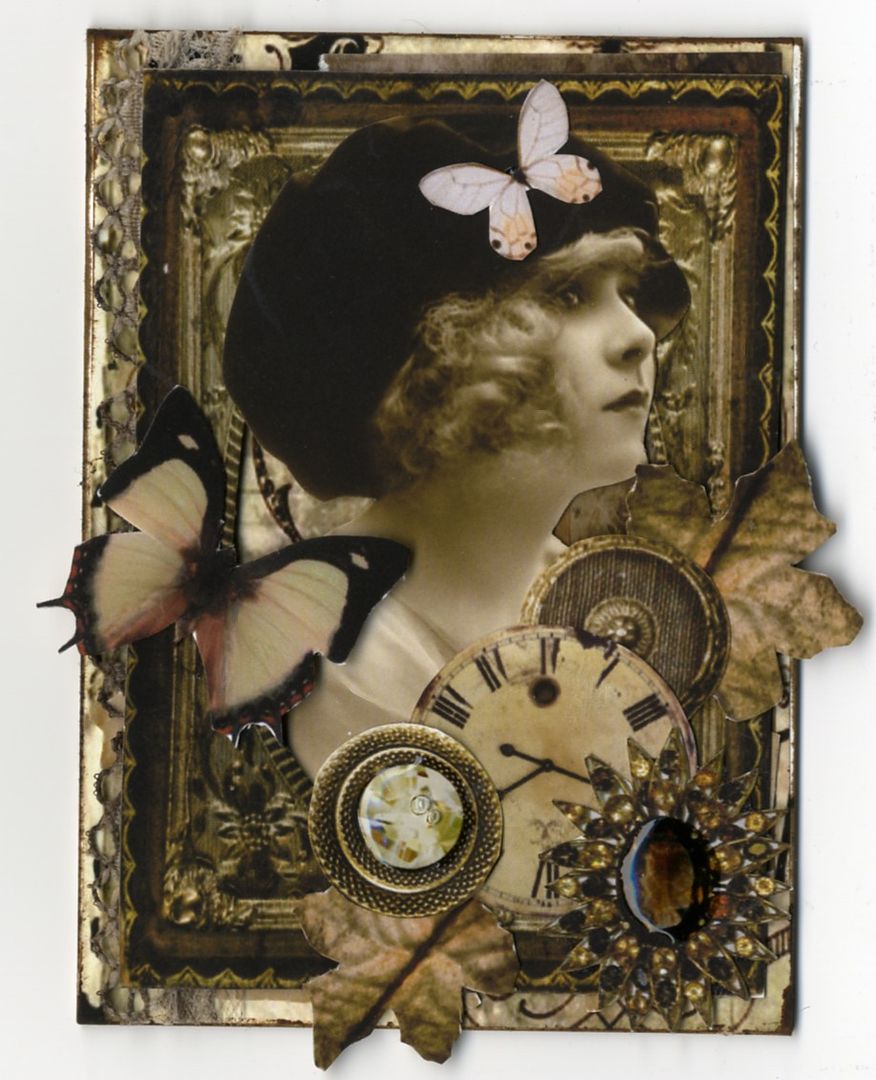
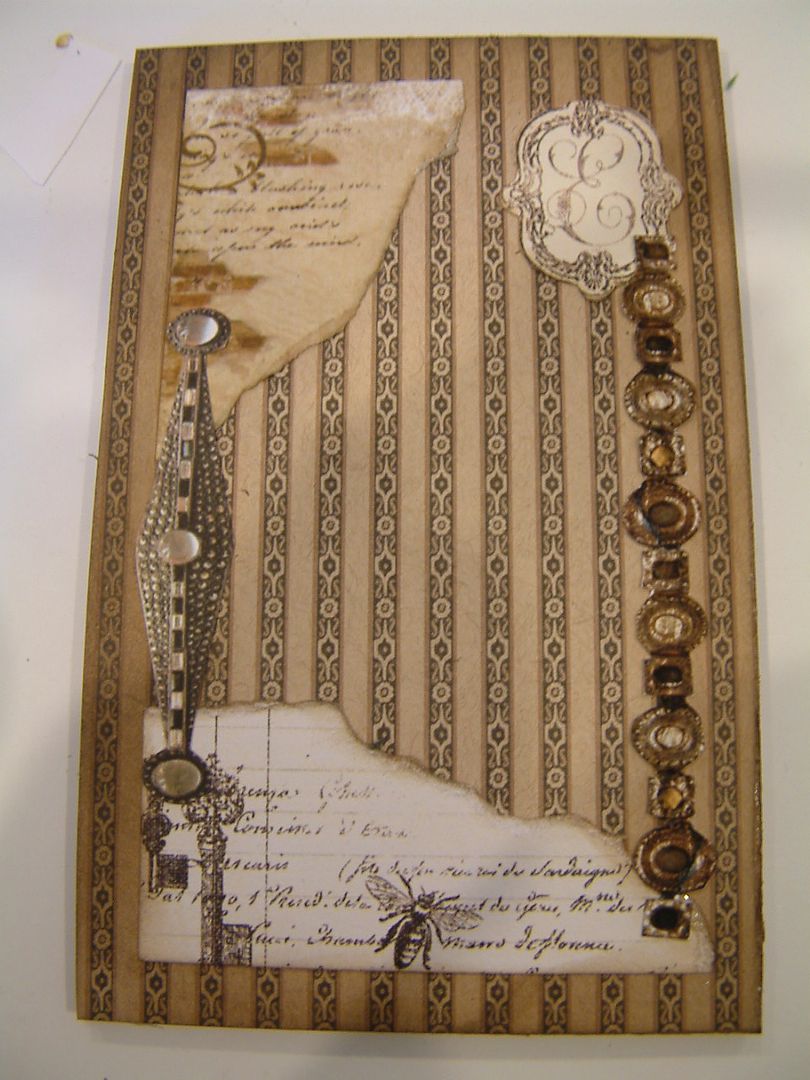
The background of this piece
is layers of different patterned paper and a picture frame. I dyed the lace peeking out on the left with Ranger Alcohol ink. In the right lower corner I used images of leaves, buttons and jewelry.I added dimension with Glossy Accents. As a final accent I added butterflies.
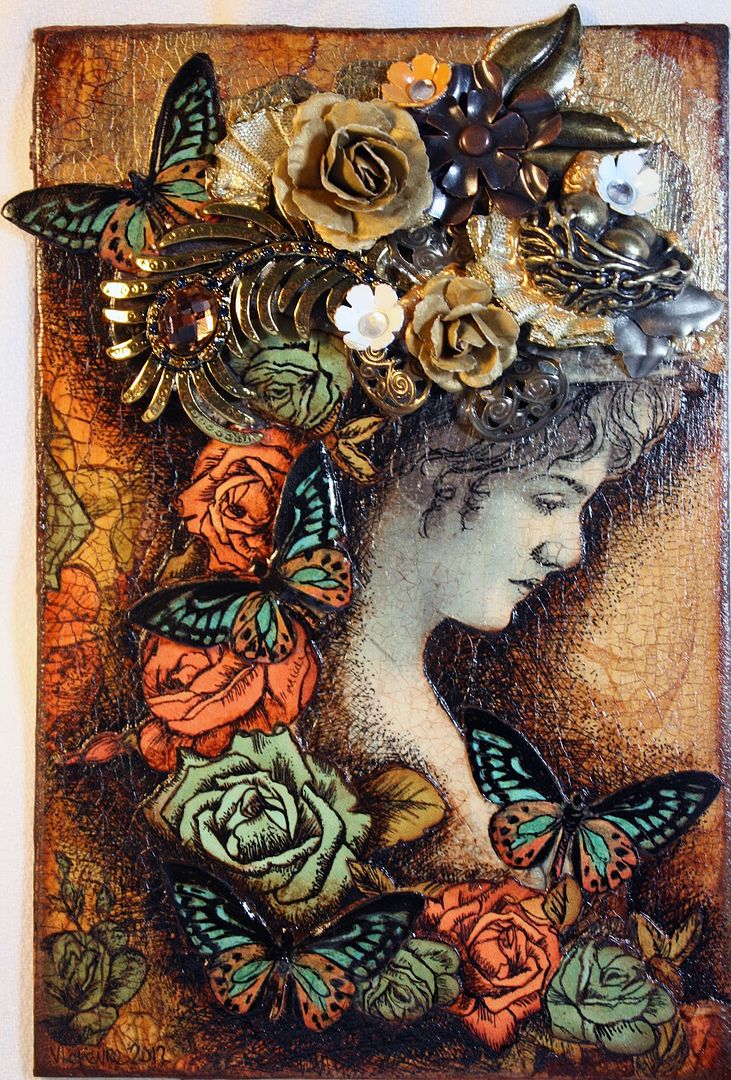
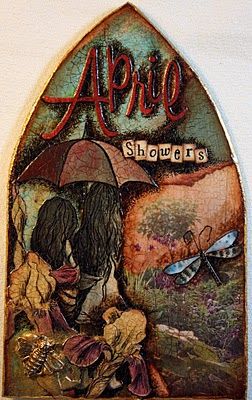
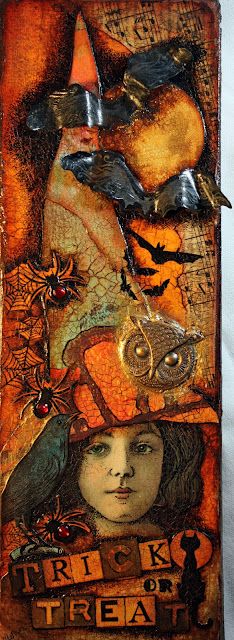
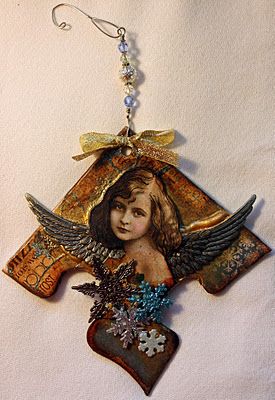
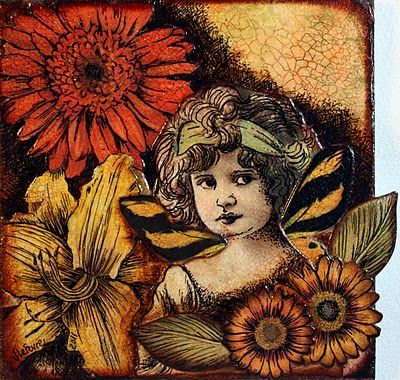
I’d like to introduce you all to my talented friend Victoria LeFevre’s art.Victoria has such a unique vintage style and I must say she is one of my favorite artists.She hand colors and draws in the details on the vintage images and photos that she incorporates into her art.She has a fabulous eye for composition and color.Victoria’s inspiration comes from old family photos, her children and pets and her garden.It’s always such a treat to see her latest piece.Below is just a small sampling of her art.
Domino Book – I'm tickled to say that I own this beauty!
I hope you’ve enjoyed Victoria’s Art and that you’ll want to see more at her blog Victoria’s Art Vision.
Last month I created this tutorial for Gingersnap’s Creations as their muse for March.I thought I post it here in case some of you missed it.
VIDEO TUTORIAL – There is now a YouTube video tutorial for this project. The video also covers 5 other altered tin projects. You’ll find the segment about this project at minute 12:59 in the video below.
WRITTEN TUTORIAL & SUPPLY LIST
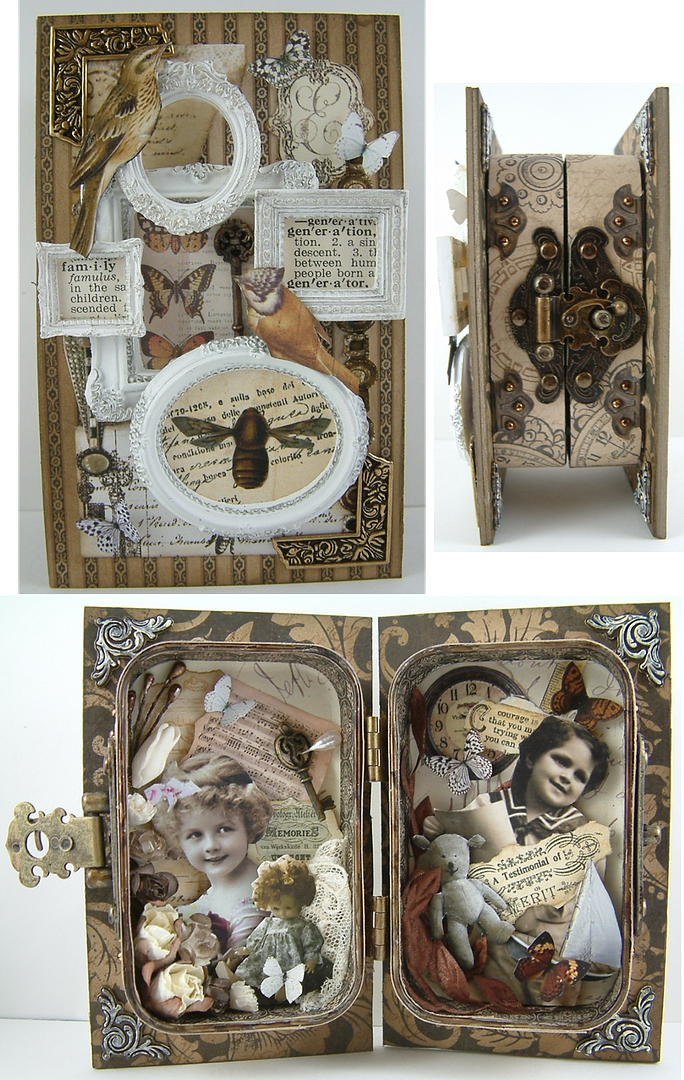
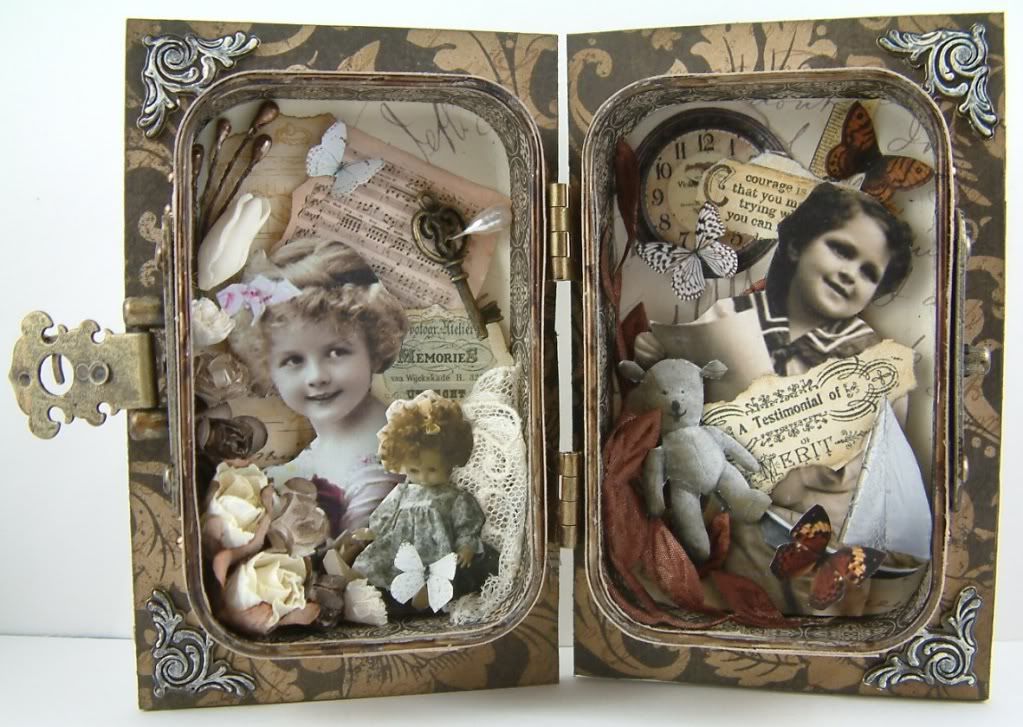
In this tutorial, I’ll walk you through creating a vintage Altoid’s Tin book using chipboard and two Altoids tins.The fun part of this project is that by hinging two tins together it creates niches that you can load up with all kinds of embellishments.
What You’ll Need
Chipboard
Two Altoids Tins
A glue that works with metal – I used Glossy Accents
A tacky paper glue – I used Tombo Multi
One large or two small hinges
A latch
Decorative Paper
Staz-on Ink or Ranger Alcohol Inks
Pencil
Ruler
Scissors
Paper Cuter
Embellishments and Ephemera
Vintage Images
GATHER YOUR SUPPLIES
Start by collecting paper, embellishments and the vintage photos you want to use. You can see in the image below that I’ve pulled several items that I thought I might use for my book.
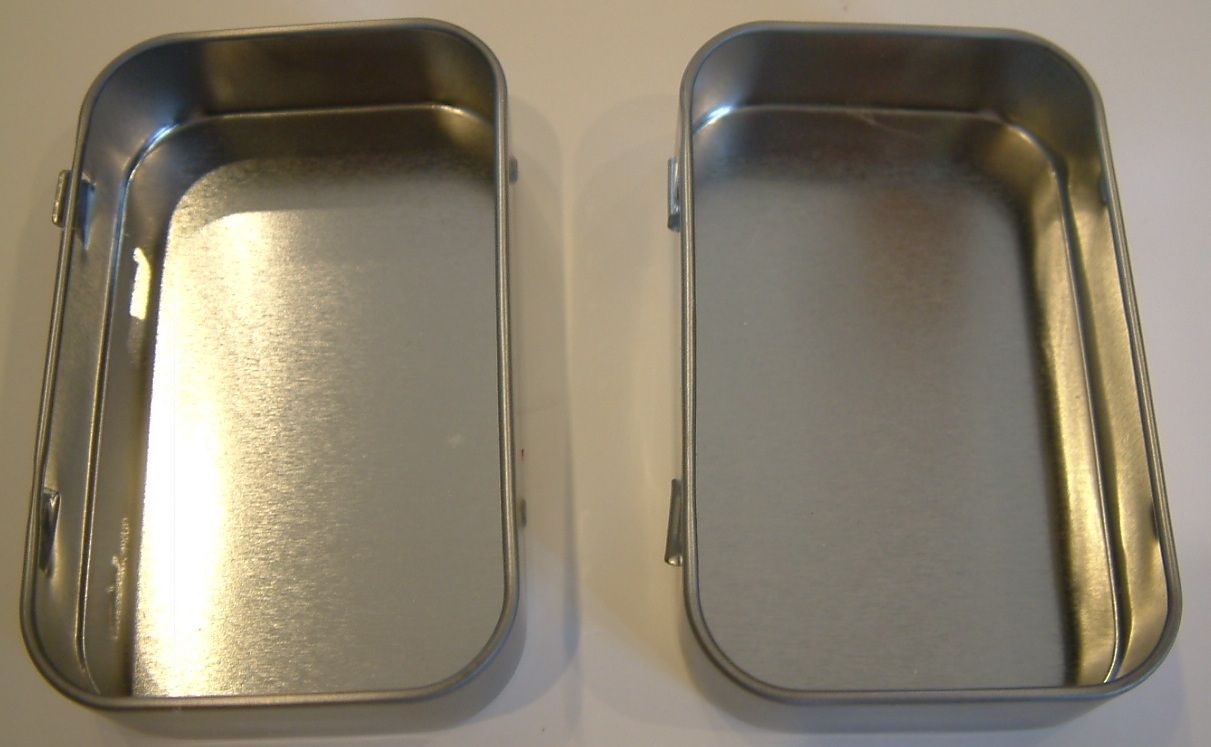
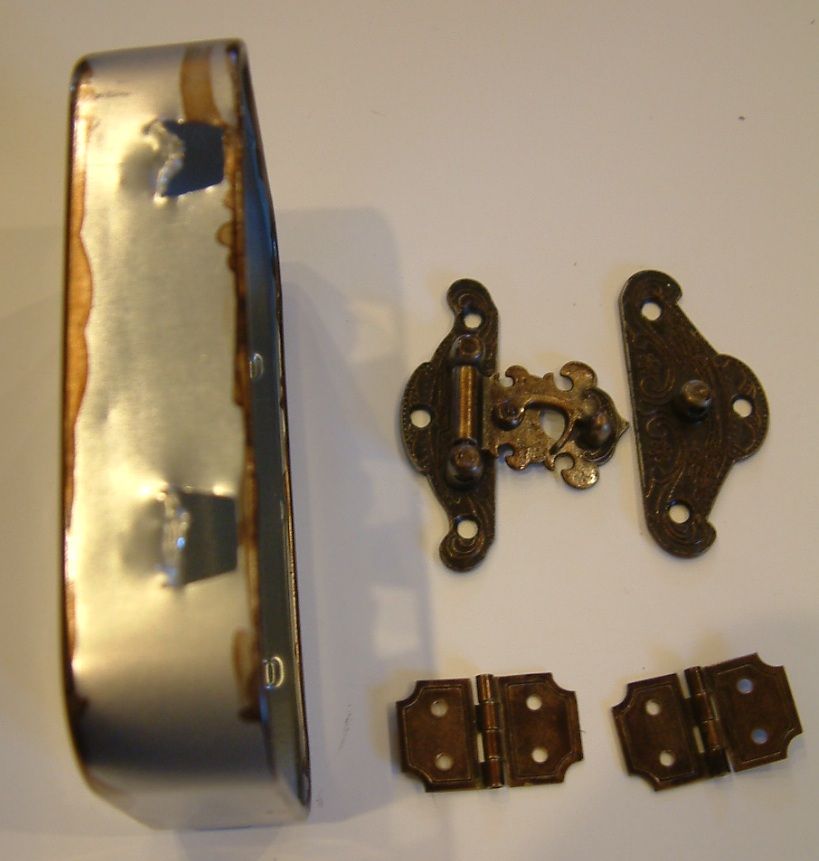
THE TINS
I used blank Altoid’s tins for my book that measured 3 11/16" long by 2 1/4” wide by 3/4" deep (without the lid). I purchased my tins at Alpha Stamps. All the measurements in this tutorial are based on these tins. You can use any tins you like just as long as you have two of them.
First, remove the lids from the tins and set them aside.You will not need them for this project.
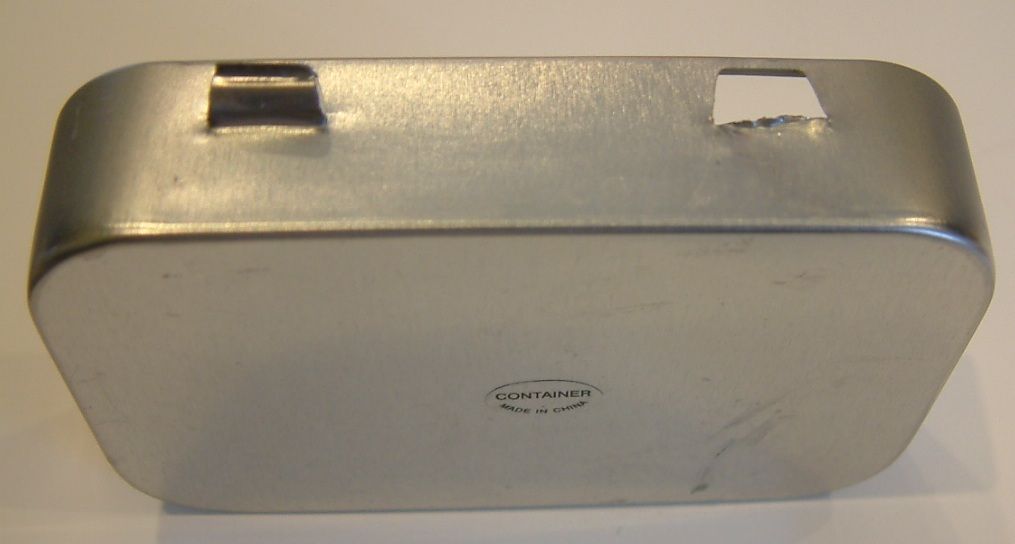
Next, either snip off the hinges or bend them flat.You will be covering the sides of the tin with paper so you don’t want the hinges sticking up.
You’ll be covering most of the surface of the tin with paper except for the edges.Ink the edges of the tins using Ranger Alcohol Ink or Staz-On.Both products adhere to metal.You can always choose to keep the original color of the tin if it works with your color scheme.I used Mushroom Ranger Alcohol ink to color the edges of my tin, my hinges and my latch.
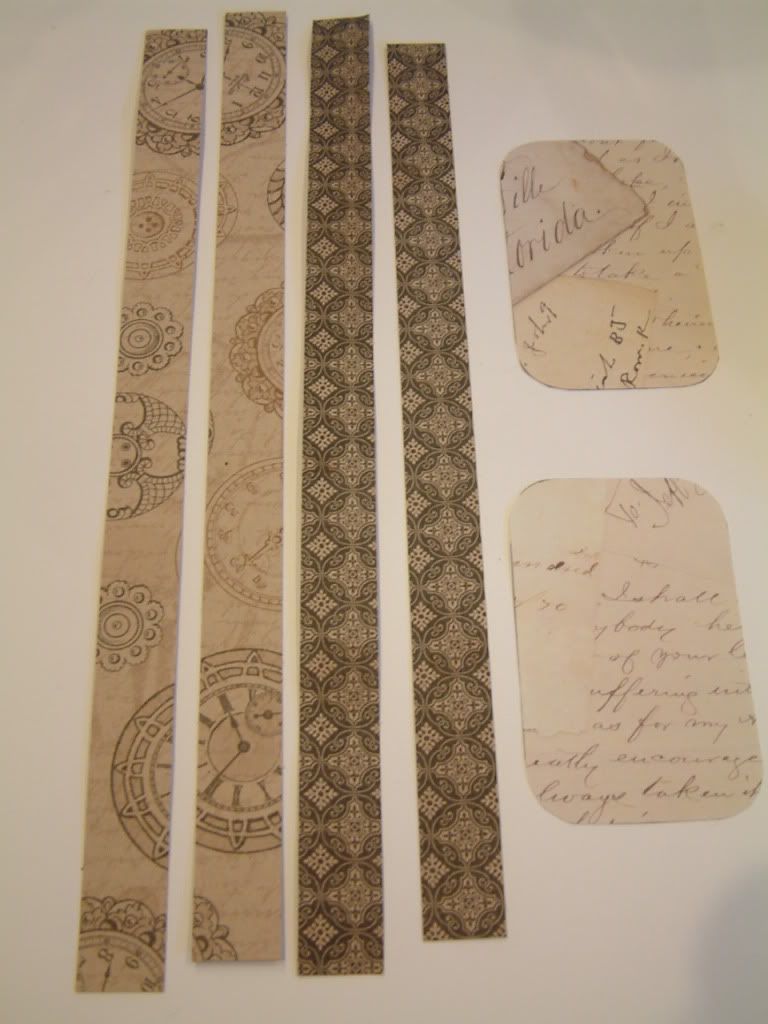
You will be covering the outside sides, the inside sides and the inside bottom of the tins with paper.You don’t need to cover the outside back of the tin with paper as it will be glued to your covers.If you are using the same tin as I did, then below are the paper measurements:
Inside sides – cut two strips of paper ¾” wide by 12” long.
Outside sides – cut two strips of paper ¾” wide by 12” long.
Inside bottom - Use a sharp pencil and the bottom of the tin as a template.Trace the shape on your paper twice and cut.
Glue the paper to the tins.To glue the paper I used Tombo Multi glue which is a very tacky paper glue.Glue the strips to the outside of the tins.Next glue the strips to the inside of the tins, and lastly glue the paper to the bottom inside of the tins.
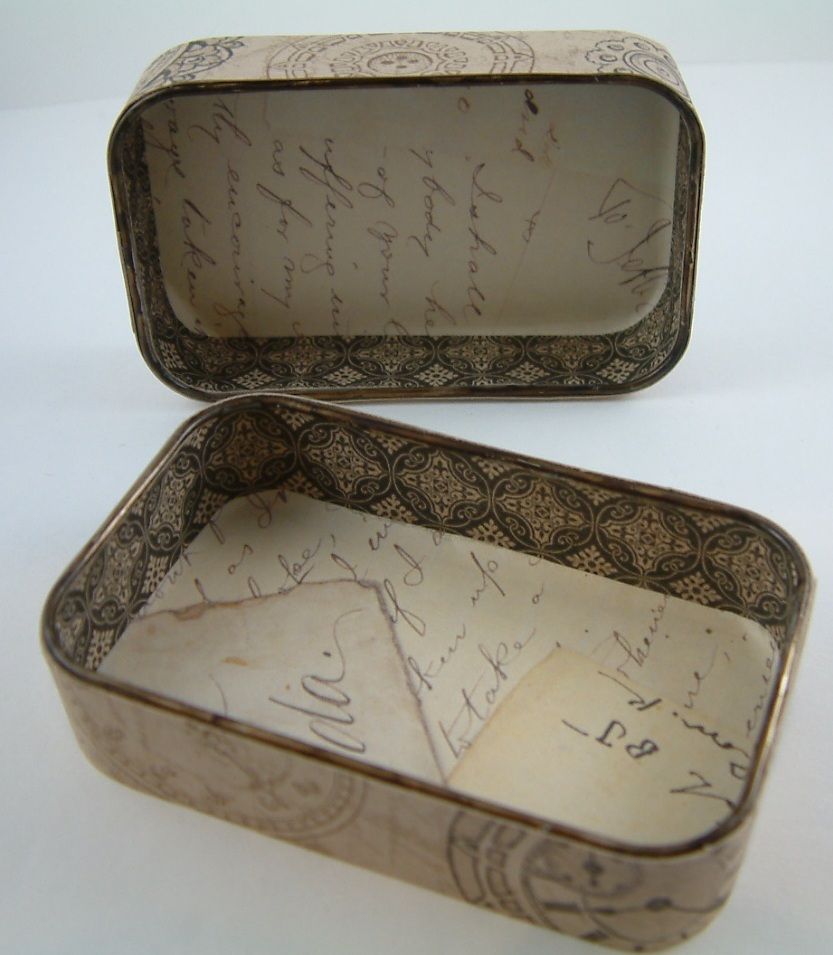
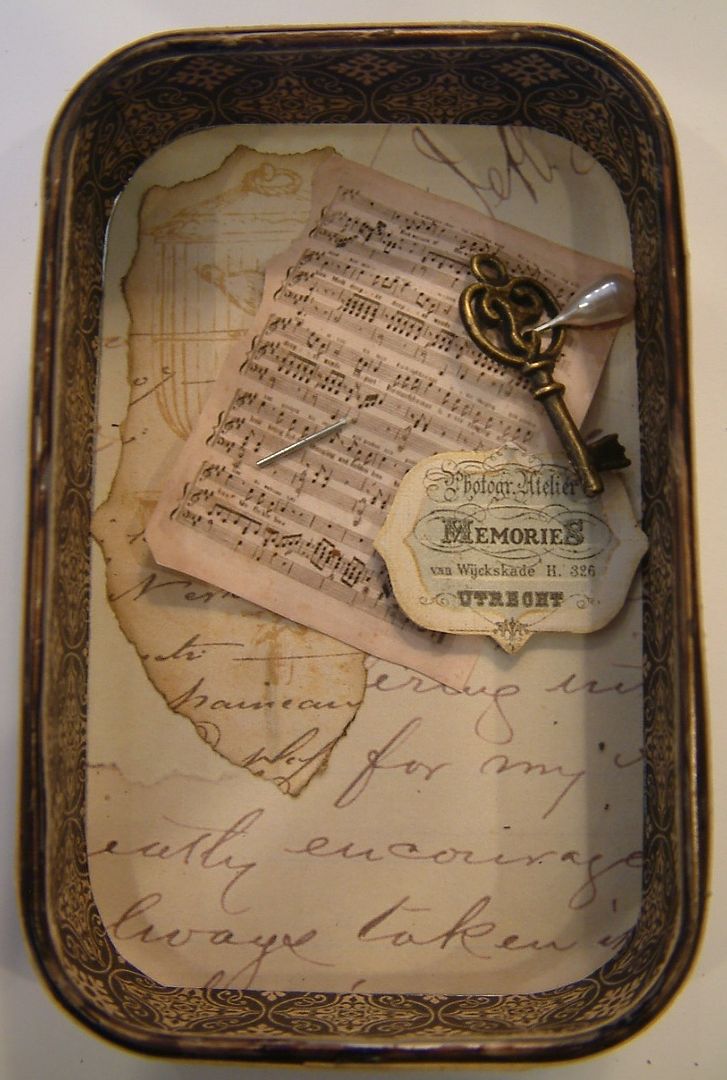
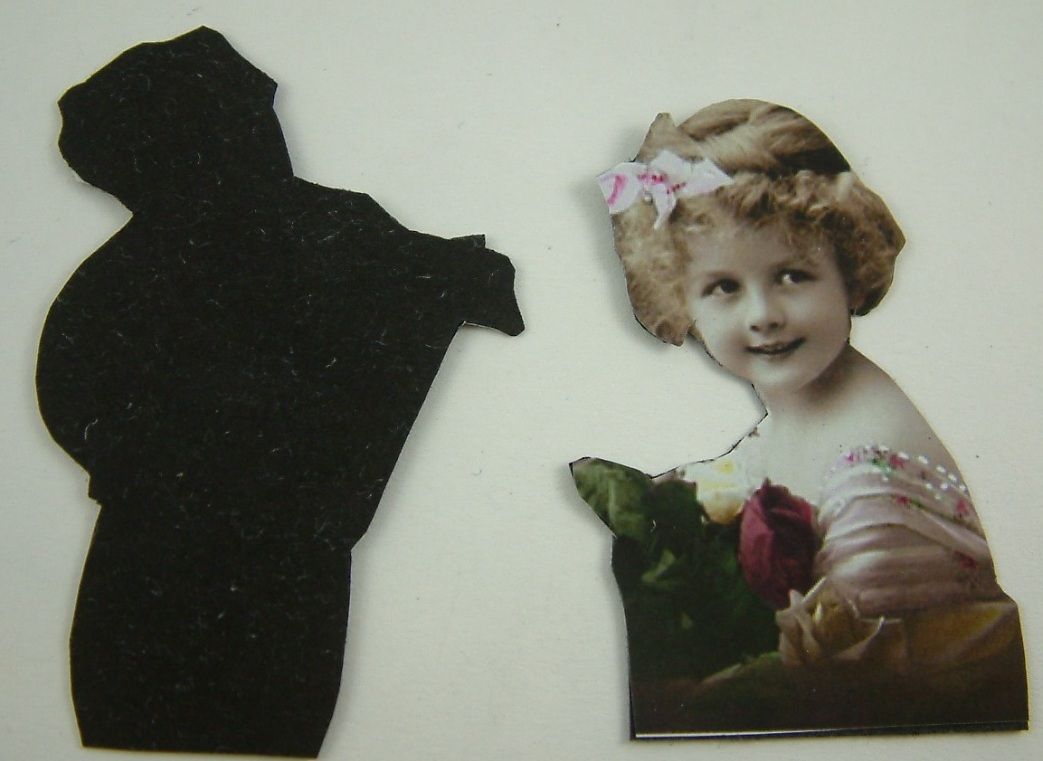
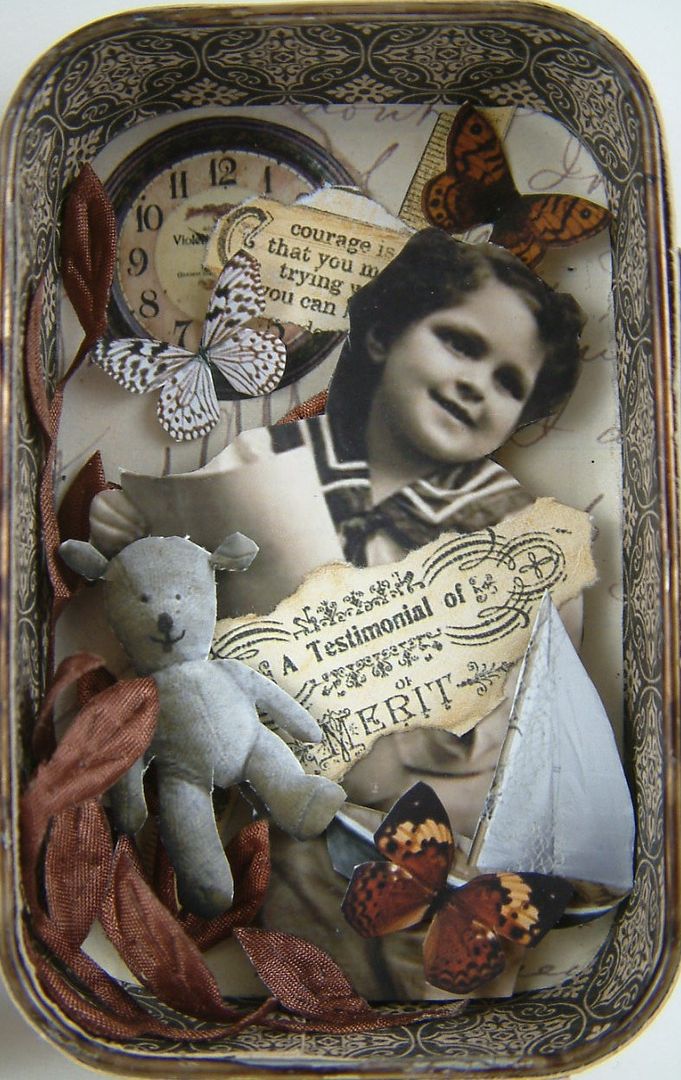
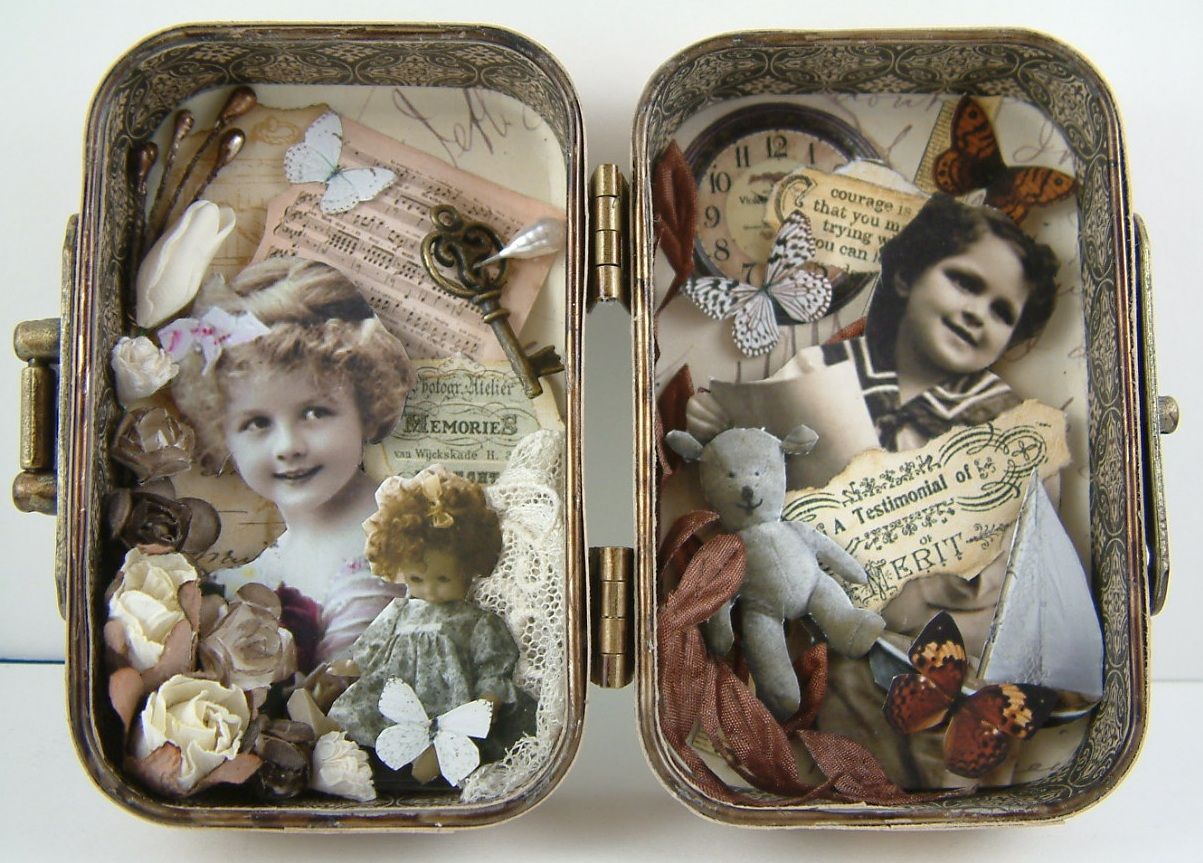
Decorate the insides of your tins.I started with the background elements.
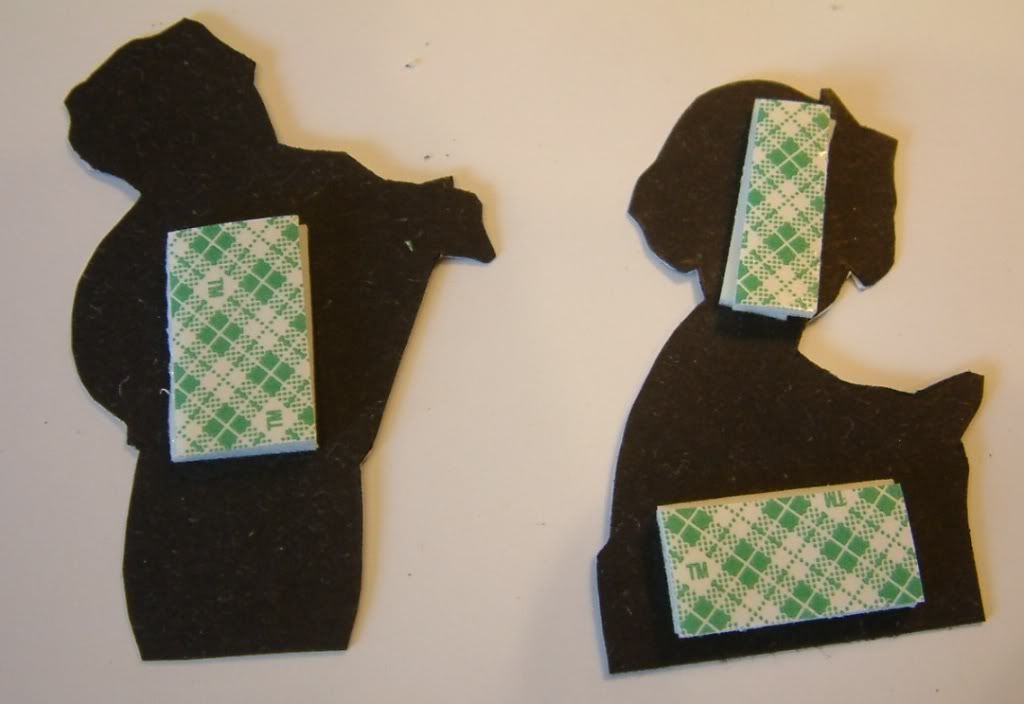
Next, I prepped my pictures.To popup the images, I first backed them with heavy cardstock for support and then added two layers of double stick tape.
After adding my photos I added images and dimensional embellishments.
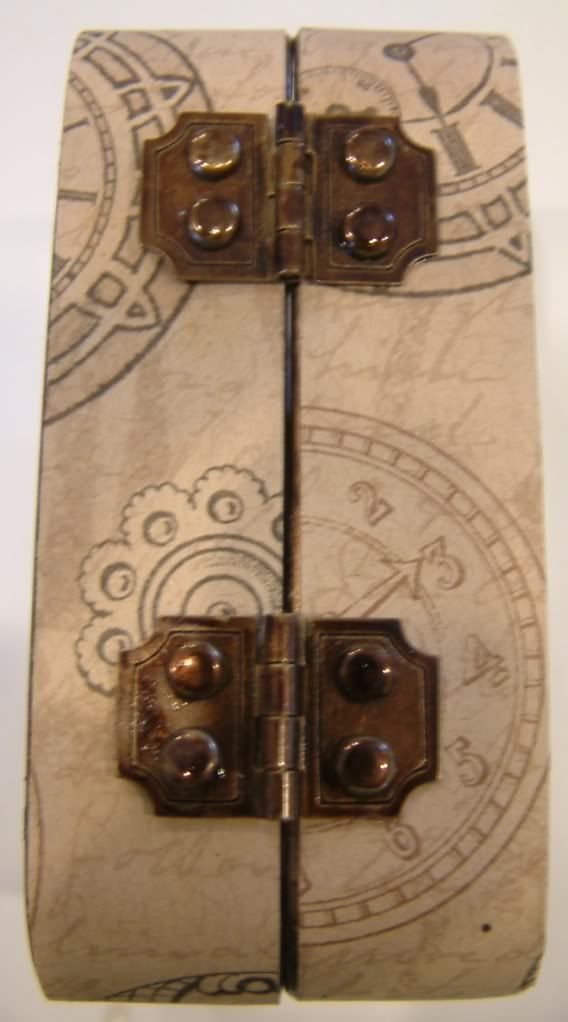
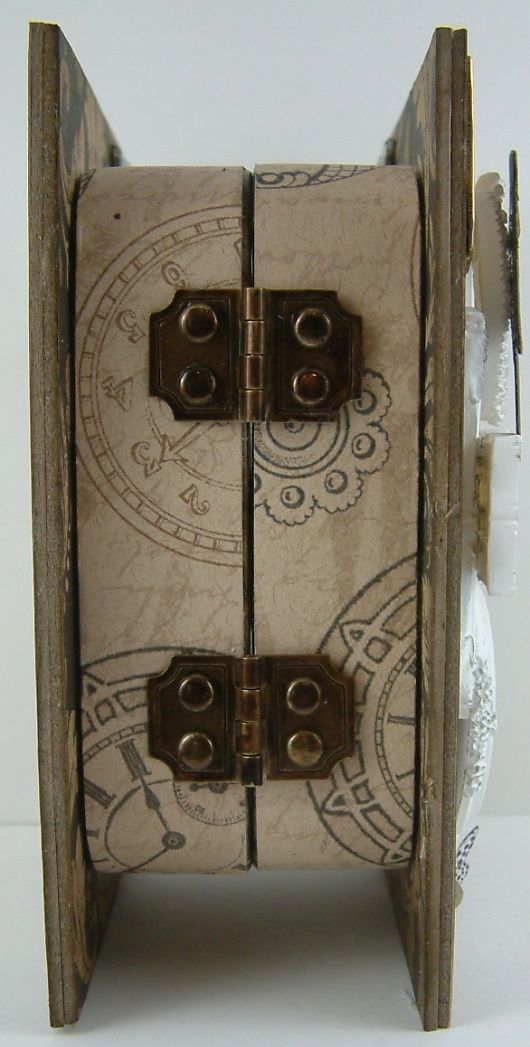
To attach the tins, put your tins together with the decorated insides facing each other. Attach your hinge or hinges to one side of the tins. I used Glossy Accents to glue on my hinges. Be sure your tins are facing the right direction and that you are gluing your hinges to what will be the back of your tins. You don’t want to glue on your hinges, then open the tin, only to find that one of the tins is upside down or the tins are hinged on the wrong side (been there, done that).
Once the glue from the hinges was dry, I glued brads with the prongs removed, to the holes on the hinges.The brads are colored with Mushroom Alcohol Ink.
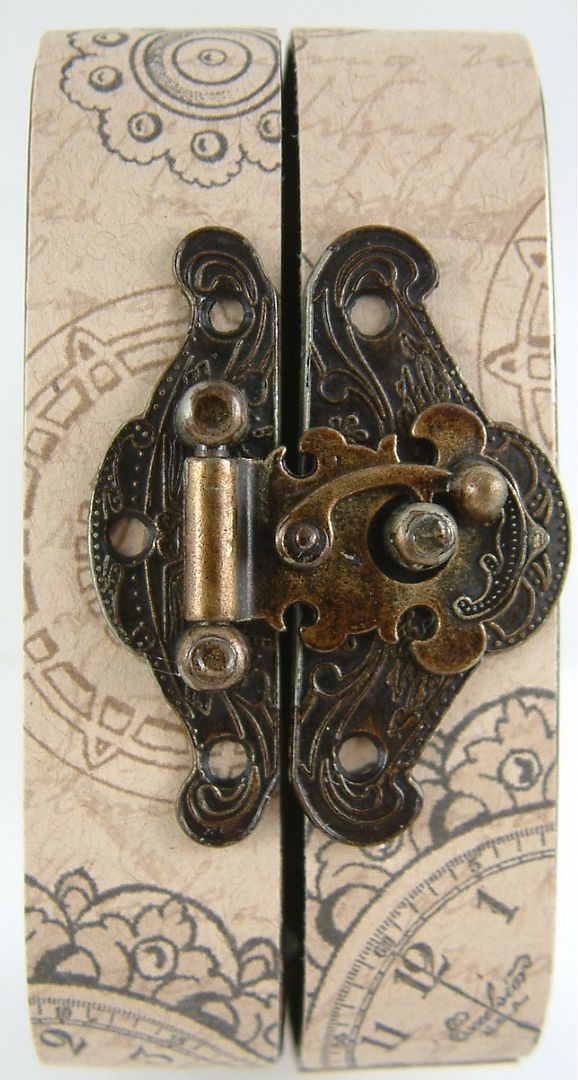
On the front side of your tins (opposite side from where you glued the hinges) glue a latch to your tin.Another option for a closure is to use ribbon.Glue ribbon to each undecorated back of the tins (in the middle of the tin).
For additional decoration I added paper hinges and brads with the prongs removed to the holes on the latch and paper hinges.
Below are the finished hinged tins with latch.
THE BOOK COVERS
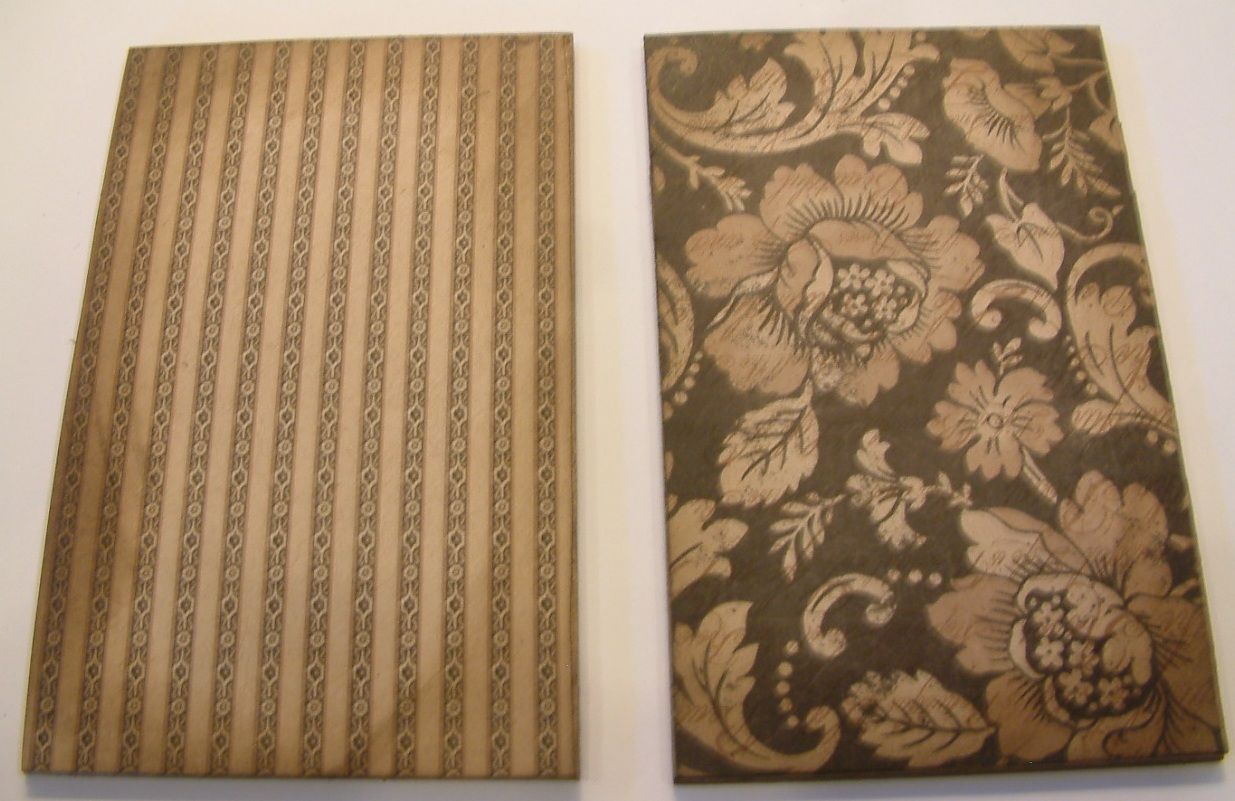
For the front and back book covers, cut two pieces of chipboard that measure 3” wide by 4 3/4” wide. The covers will be about 1/2” larger than the tins on each side. If your chipboard is thin or you just want thicker covers you can glue layers of chipboard together. You want the covers thick enough that they won’t bend when you stand up the completed book.
Cover your chipboard with decorative paper on both sides.You can add flat elements at this stage like images, rub-ons, stamping etc. but don’t decorate the covers with dimensional embellishment as it will make assembling the book harder.In addition to covering my chipboard with paper, I also inked the edges with Ranger Distressed Ink.
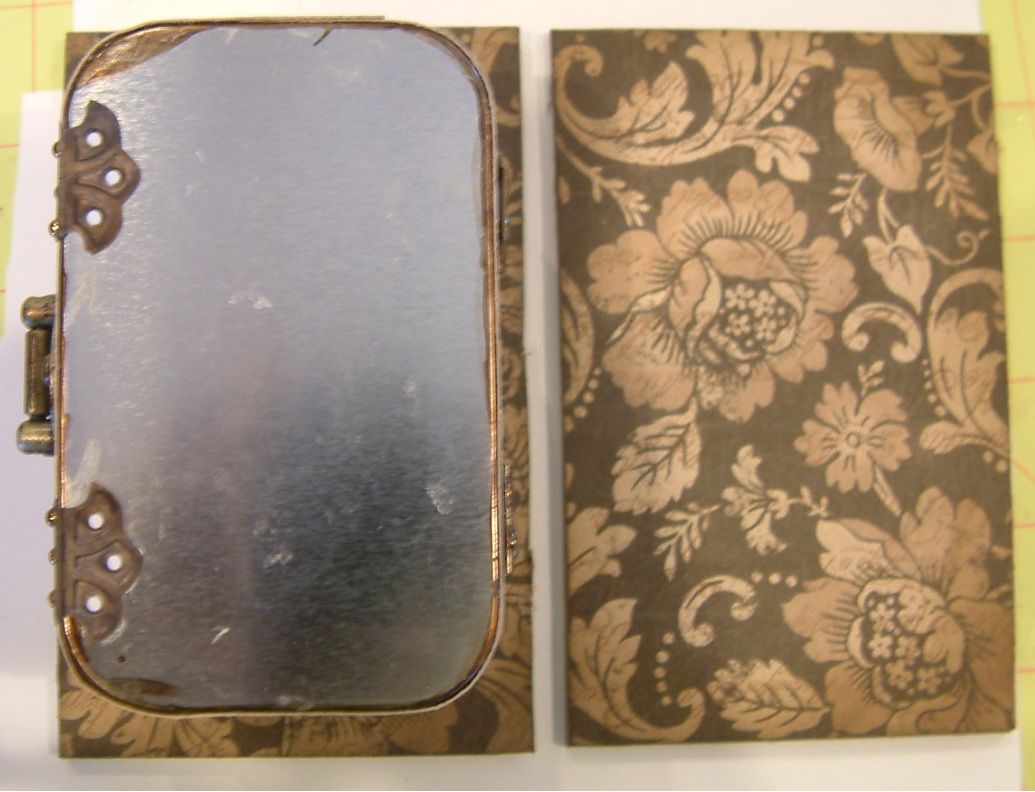
Assemble the book by gluing the tins to the chipboard covers.Start by gluing the tins to the center of the front cover.Next, glue the tins to the center of the back cover.Before gluing, make sure that your covers and tins are facing the right direction.I used Glossy Accents to glue my covers to the tins.
Decorate the front cover.I started with bits of paper ephemera to create a frame.
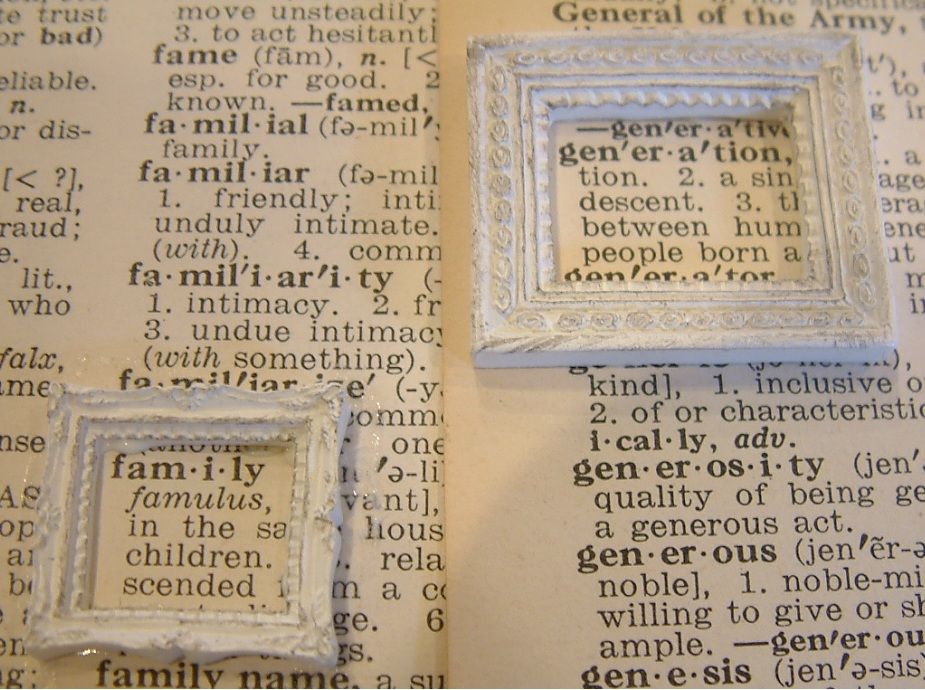
I glued resin frames to words from a vintage dictionary.
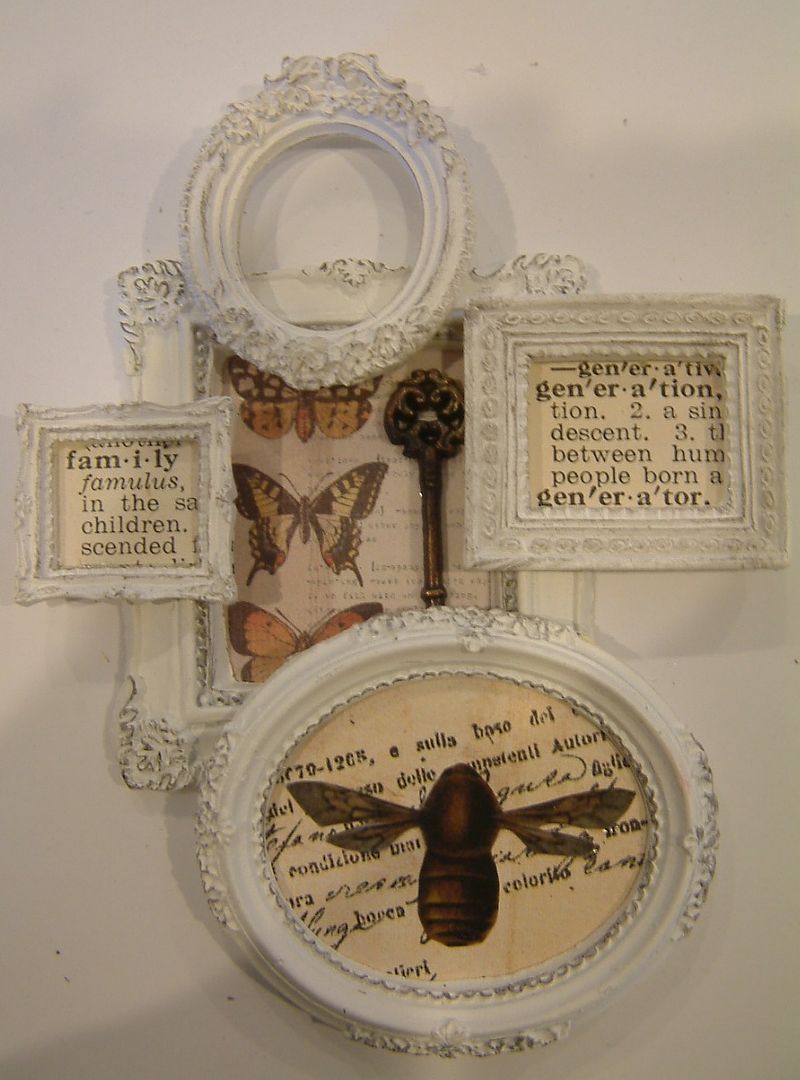
I collaged together resin frames, paper ephemera and a metal key.
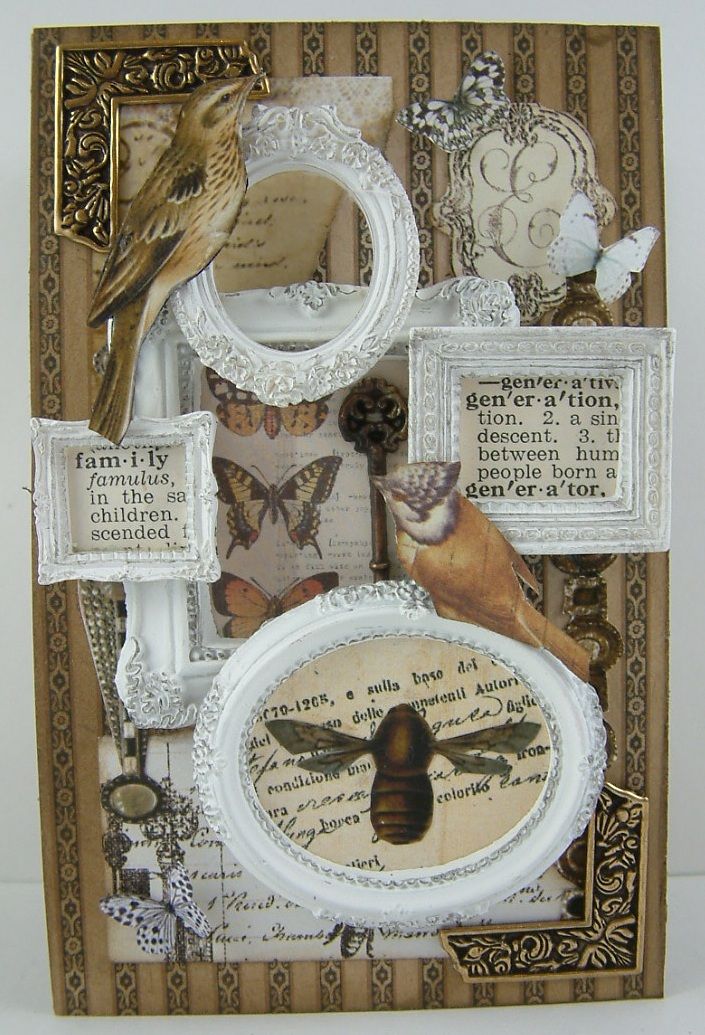
After attaching the resin frame collage, I added other paper and metal elements to finish the cover.
Finished Front Cover
You can also decorate the back cover, inside covers and outside of the tins if you wish.Just make sure that anything you add does not get in the way of opening and closing the book.
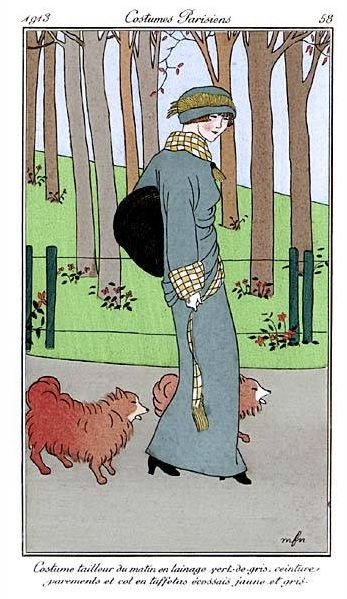
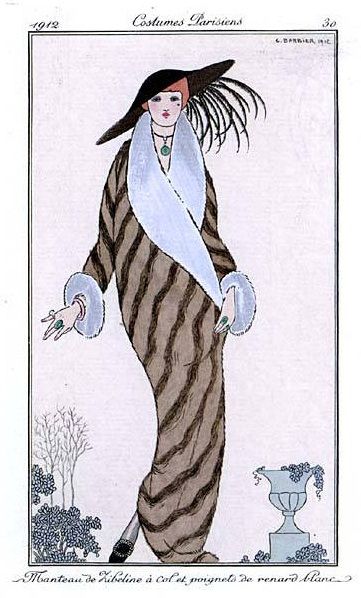
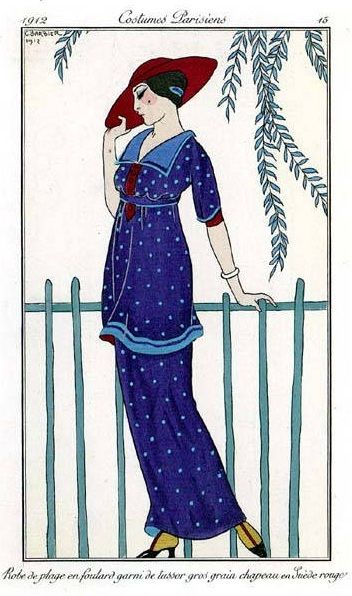
Below are a series of vintage fashion plates.You are free to use these in your art.To download an image, click on the image to expand it, right-click and select Save As.
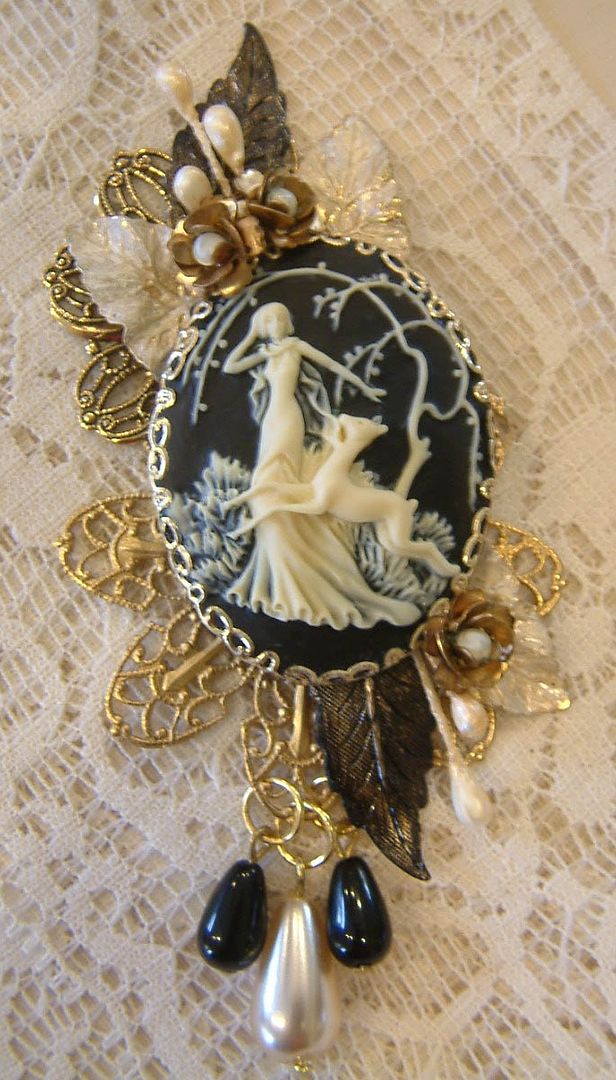
Alpha Stamps is carrying a fabulous new art deco cameo.I thought it would be the perfect centerpiece for a brooch.I used filigree from Alpha Stamps to create the base.I framed the cameo with a gold metallic sticker.To accent the piece I used metal leaves and flowers.Below is a list of the Alpha Stamps products I used:
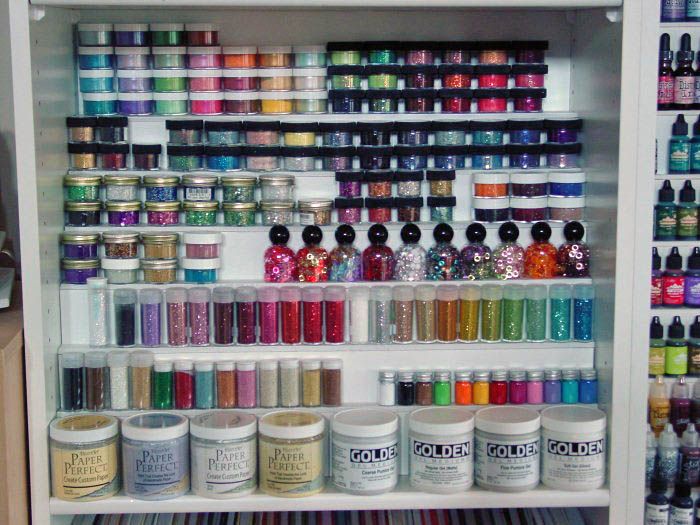
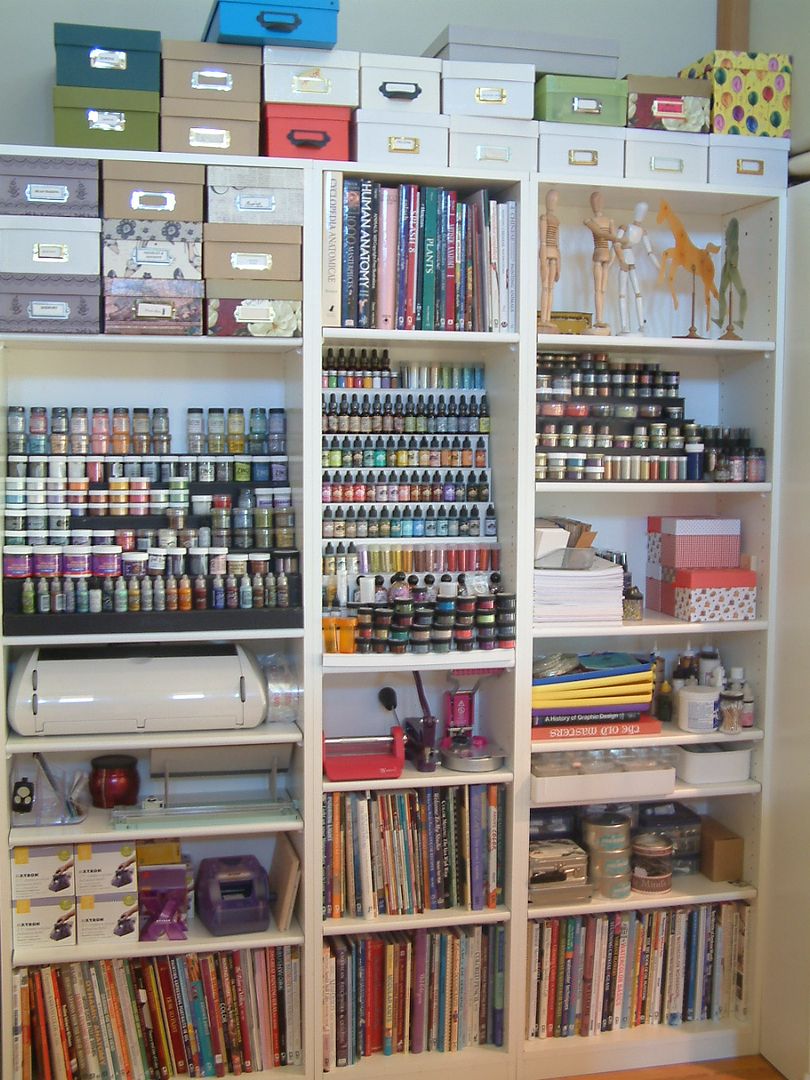
In this tutorial Naomi shares her creative idea for storing and displaying your craft supplies using custom built foam core shelves. The first time I saw these shelves in Naomi’s and Karol’s studios I thought what brilliant idea. Naomi wanted to be able to see all of her supplies; particularly her paints, inks, glitter, embossing powder etc. (basically anything with color). I know I’ve been frustrated in the past because I used one product and I could have used another, which was a better color match or maybe I forgot what I had. Unfortunately most of my supplies are in drawers. I’ve also purchased the same product twice because I didn’t realize I already had one. Not only is this a great idea, in that you can see what you have, it’s also a beautiful way to decorate with your supplies.
Foam Core product shelves are not complicated to make and a few simple tools are all that are required. The key to achieving a good result is planning and measuring.
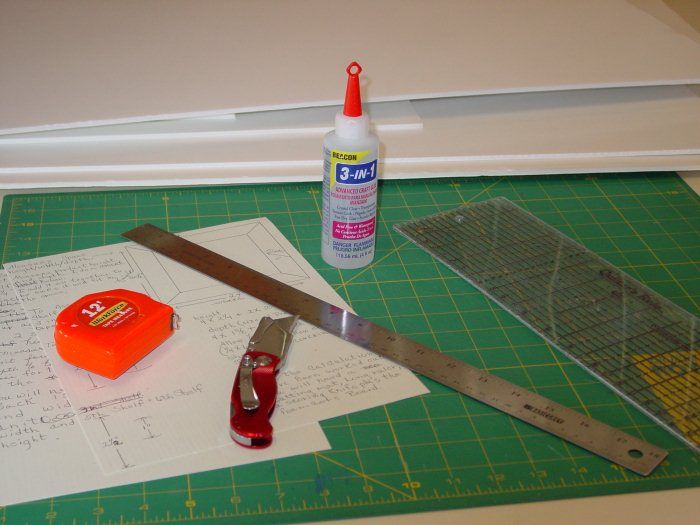
What You’ll Need
1. Cutting knife with a new blade (the key to cutting foam core is that the blade must be sharp. If the foam core starts to tear when cut, then the blade is too dull.)
2. Foam core board (the amount will depend on the shelves you plan to make)
3. Cutting board or surface that won’t be damaged by the cutting knife
4. Measuring tape
5. Paper & pencil
6. 3-in-1 glue
7. Long plastic or metal ruler for cutting (I use a quilting ruler)
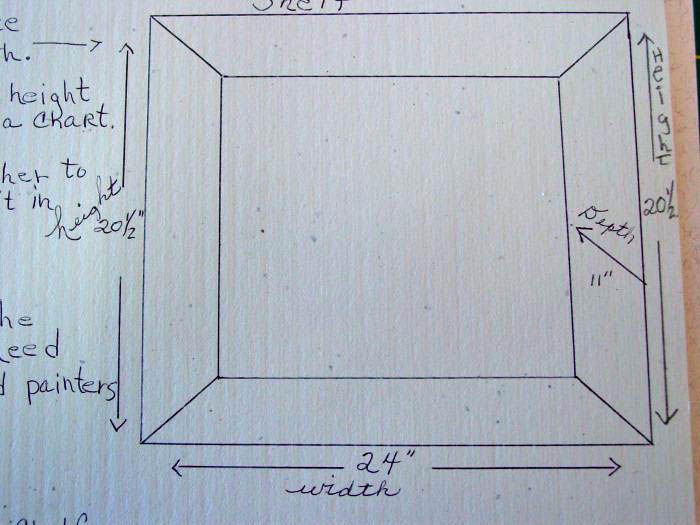
Measure the Available Space
Measure the inside width, depth and height of your available shelf space. The available space in my bookcase was 24” wide by 20 ½”high by 11” deep.
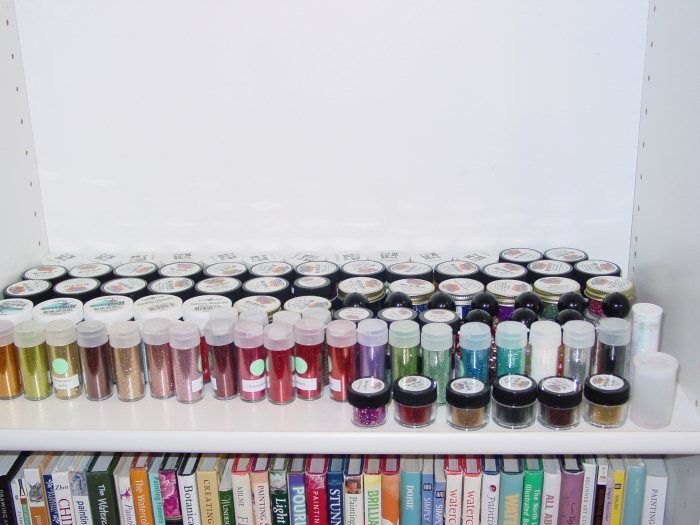
Arrange Your Products
In this step you are going to figure out how many shelves to make and their size. Place your products in your space. Organized the products in rows that simulate how you would like them organized on the foam core shelves. In order to accommodate more products on your shelves you might want to stack smaller containers (like embossing powder) one on top of the other.
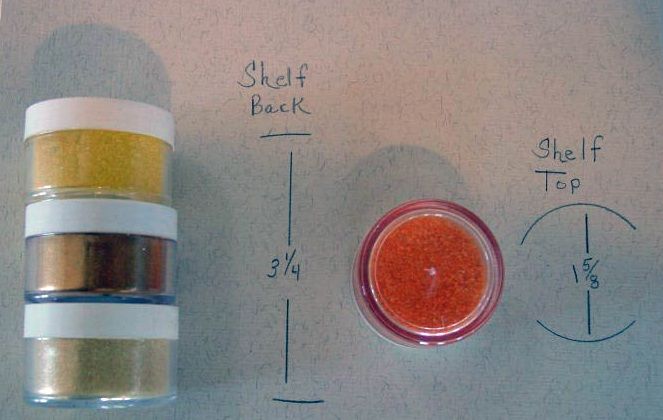
Measure Your Products
For each row of products, measure and write down the height of the products and the depth of the products. You will use these measurements to determine the width of each shelf and the step up between shelves (or the back of each shelf). Since I decided to stack three bottles high to save on shelf space, I measured all three together to determine the height. The height of the product or stacked products determines the height the back of the shelf. The depth of the product determines the depth of the top of the shelf. If the products on one shelf are different heights and depths use the largest measurement of each to determine the back and top shelf measurements.
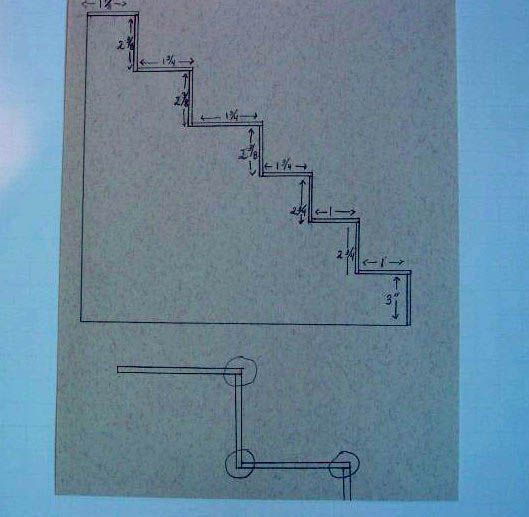
Using your measurements, create a drawing showing the height of each row of products and the depth.The total height should not add up to more than the height of your available space.The total depth should not add up to more than the depth of your space.The diagram below is for reference only and is not drawn to scale. The circled areas on the diagram indicate how the backs and tops of the shelves fit together. The foam core board is usually ¼” thick.You can see in the diagram below that the top of the shelf glues on top of the back of the shelf.To insure that the tops and backs are flush you need to add ¼” to the measurement of the depth of each shelf.So for example, if your product measured 1” deep you need to use 1 ¼” as your depth measurement.
Cutting the Tops and Backs
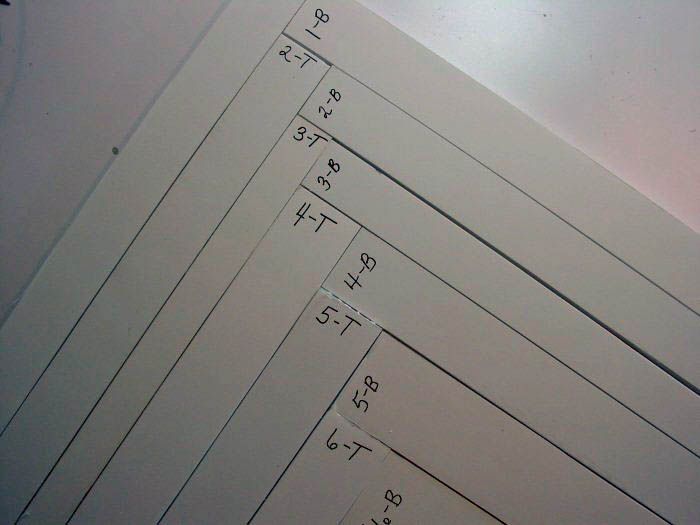
Using your chart, cut strips of foam core for the tops and backs of each shelf. All of the pieces you cut should be the same length (as in the width of your available space). The depth of the pieces might vary (as the products on each shelf are different depths). A good way to keep track of your pieces is to number them (you might want to number your chart as well). I used a system where “T” stood for top and “B” stood for back. The number stood for the order of the tops and backs (where “1” is the first shelf and “2” the second etc.)
Creating the Shelf Supports
You will be using the strips you cut for the backs and tops of the shelves to create a template for the two stair step end pieces that support the shelves.
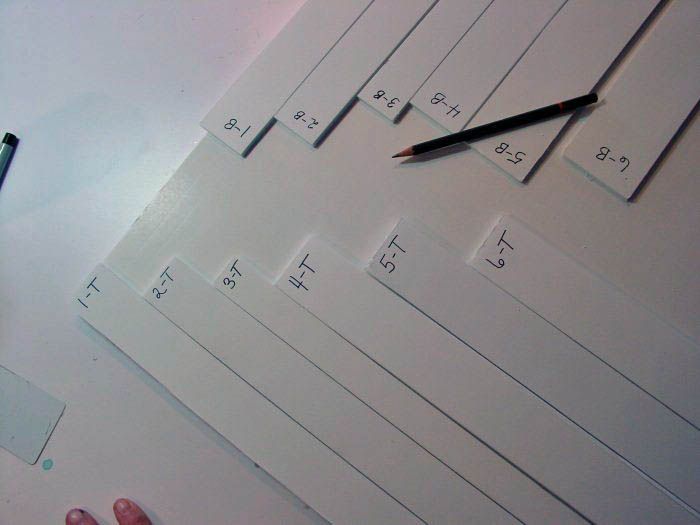
On top of a large piece of foam core board layout the backs and tops in order as shown in the picture below.You can see that the tops are on the left side and the backs are on the right side.They are fitted together on one corner of the foam core board.
Next, pull away the back pieces making sure not to move the top pieces.
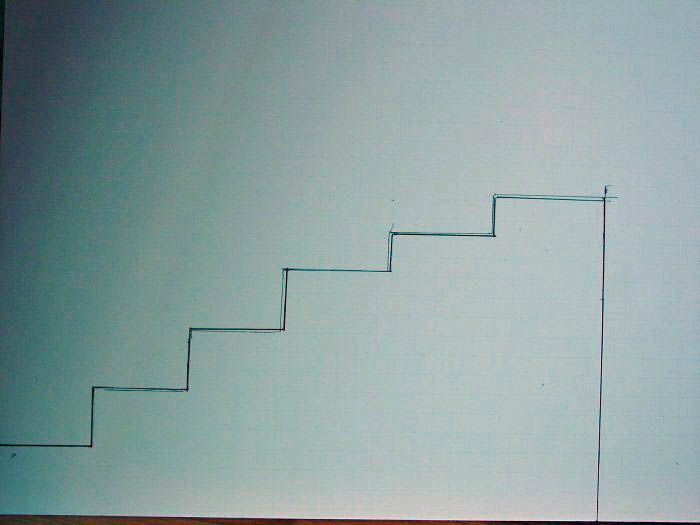
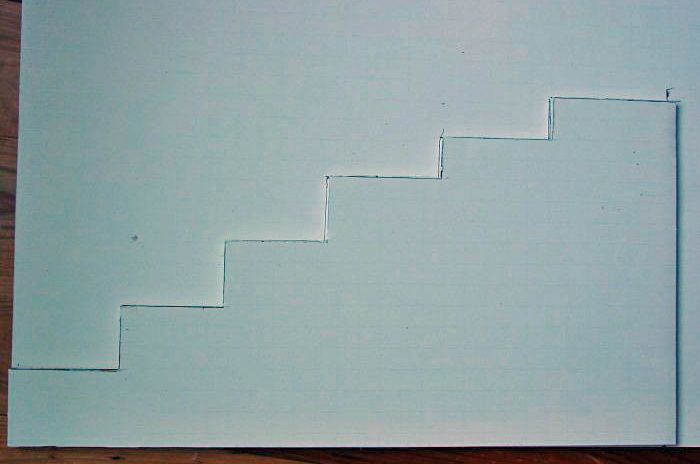
Draw a stair step line along the top of the strips and down the side of the last strip (in the image above the last strip is “6-T”). Finally, draw a line down the opposite end of all of the strips.On the end not pictured above all of the strips should be even. Cut the foam core along the lines as in the picture below.
Use the support piece you just cutout as the template for the second piece.
Sometimes my little Tuffy gets in the way.He likes to be in the thick of things.
Assembling the Shelves
Using 3-in-1 glue began attaching the pieces together. Be generous with the glue. Extra can be peeled off after it dries.
Start by attaching bottom back piece and the top back piece to the end support pieces (for this example it would be B1 and B6). See the picture below. If something doesn’t fit you can always make adjustments as you go by cutting away more of the foam core from the piece or re-cutting the piece. Anywhere, where foam core touches another piece of foam core it needs to be glued.
Continue gluing the rest of the back pieces to the side support pieces.
Glue the top pieces to the backs and side support pieces.
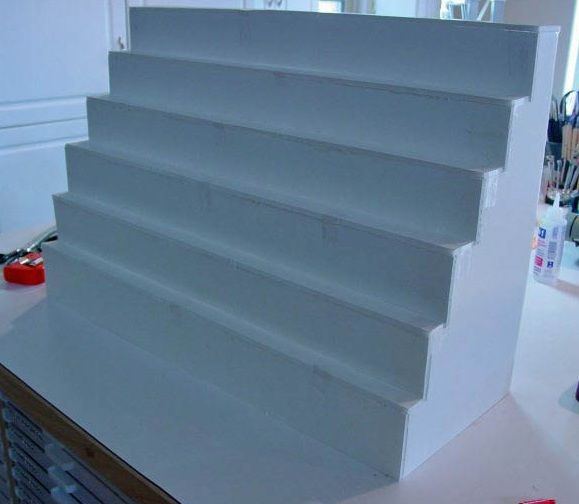
That’s it you’re finished!
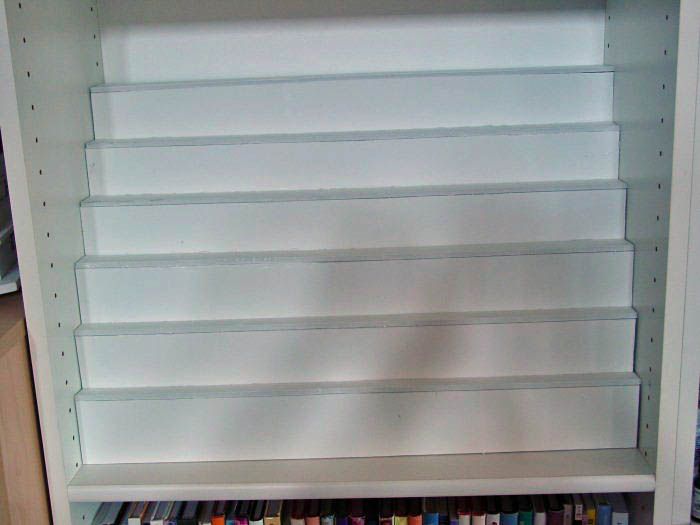
In the picture below you can see the finished shelves in my bookcase.
Now all your products have their own space and are easy to find. Notice how my large products are setting on the bookcase in front of the foam core shelves.If you want the first row of products to sit directly on the bookcase shelf make sure to remove enough space from you depth measurement to accommodate these products.