Sit back and hold on cause I’m going to throw a lot of eye candy, products and how to’s at you in this post. You can click on the pictures to see them in more detail.
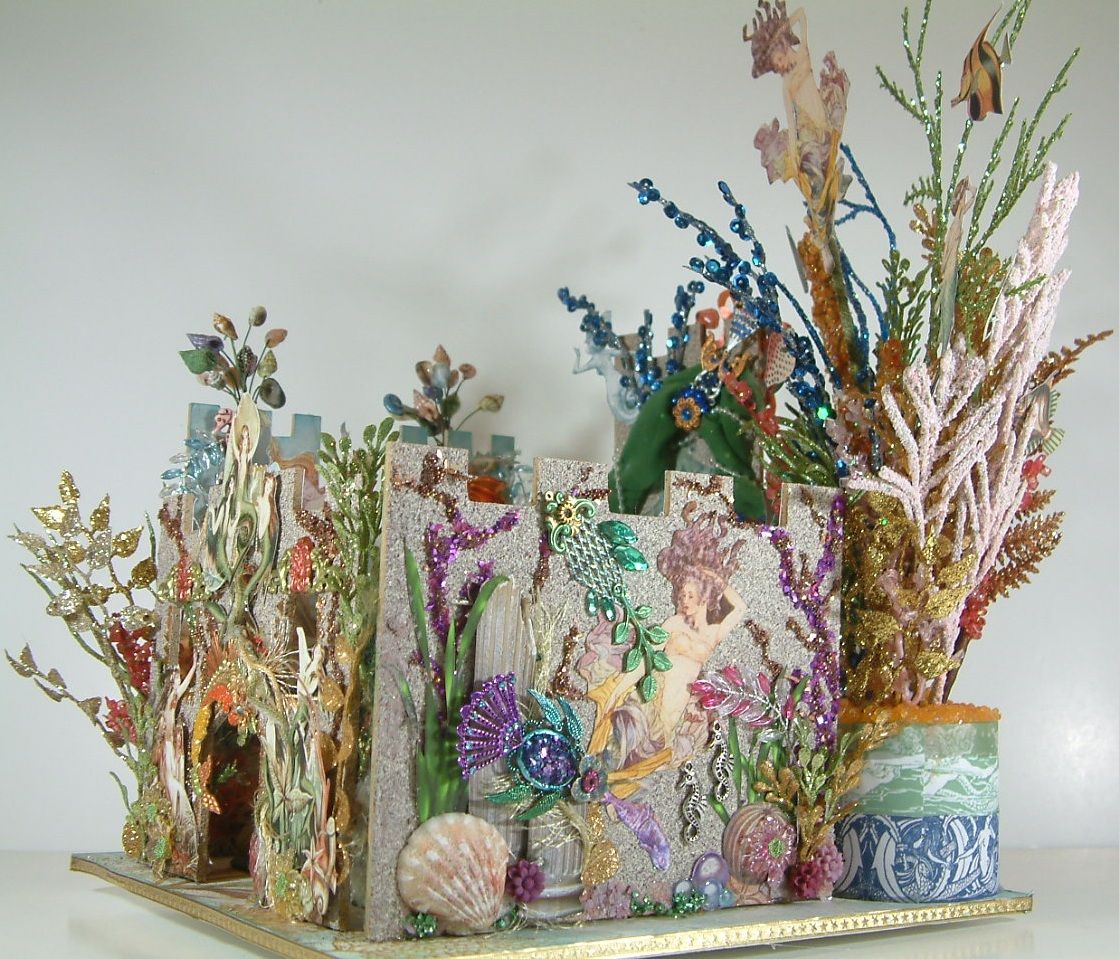
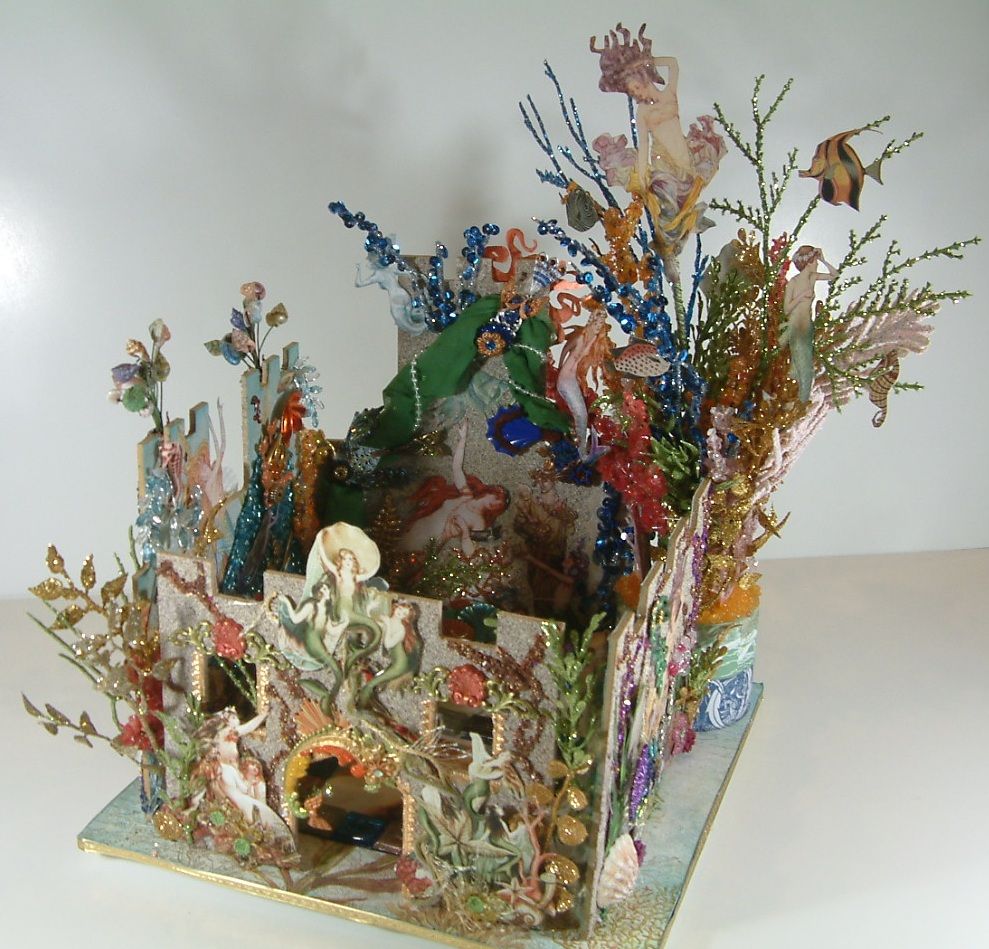
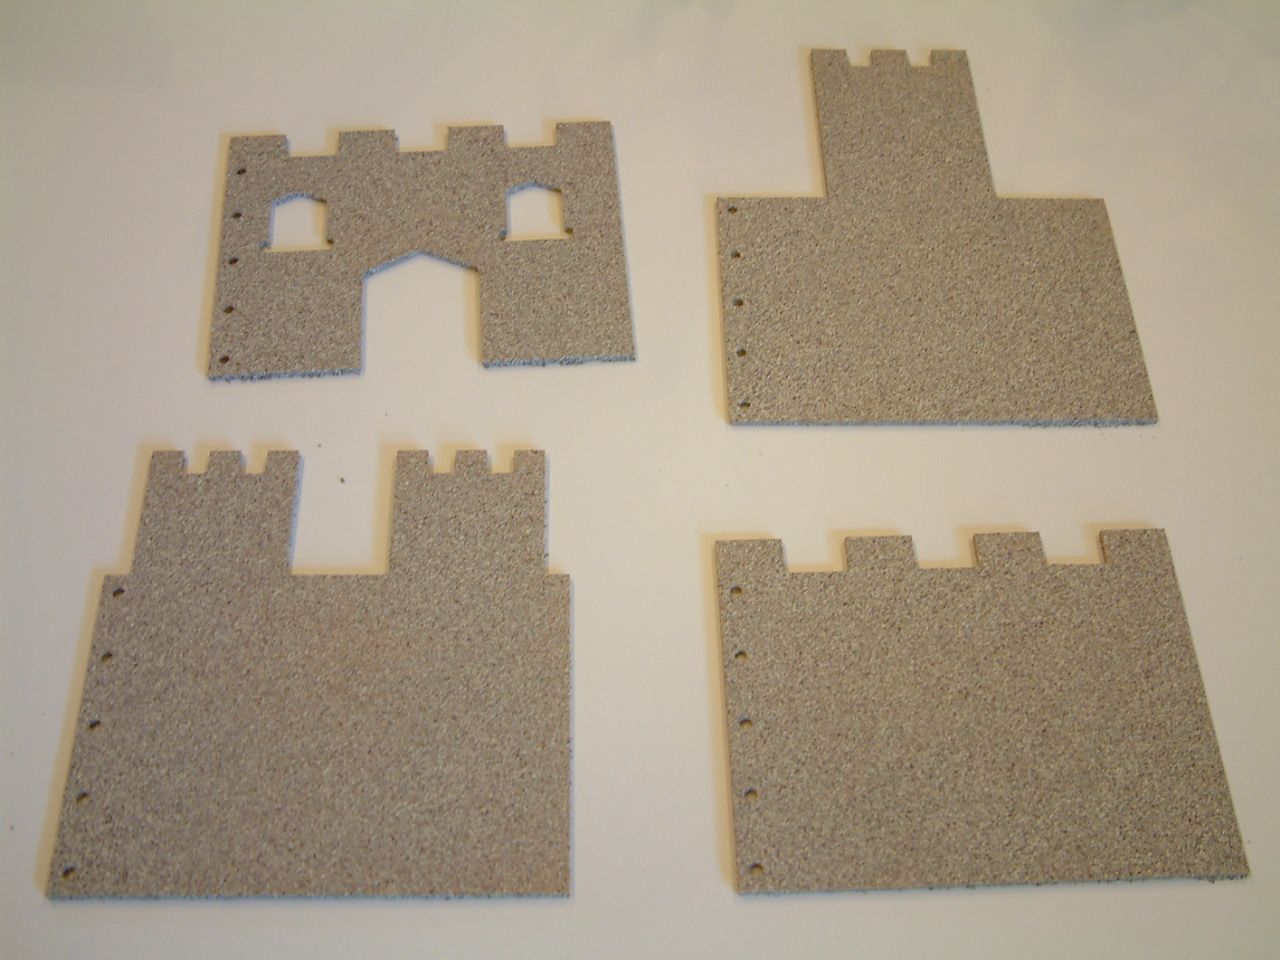
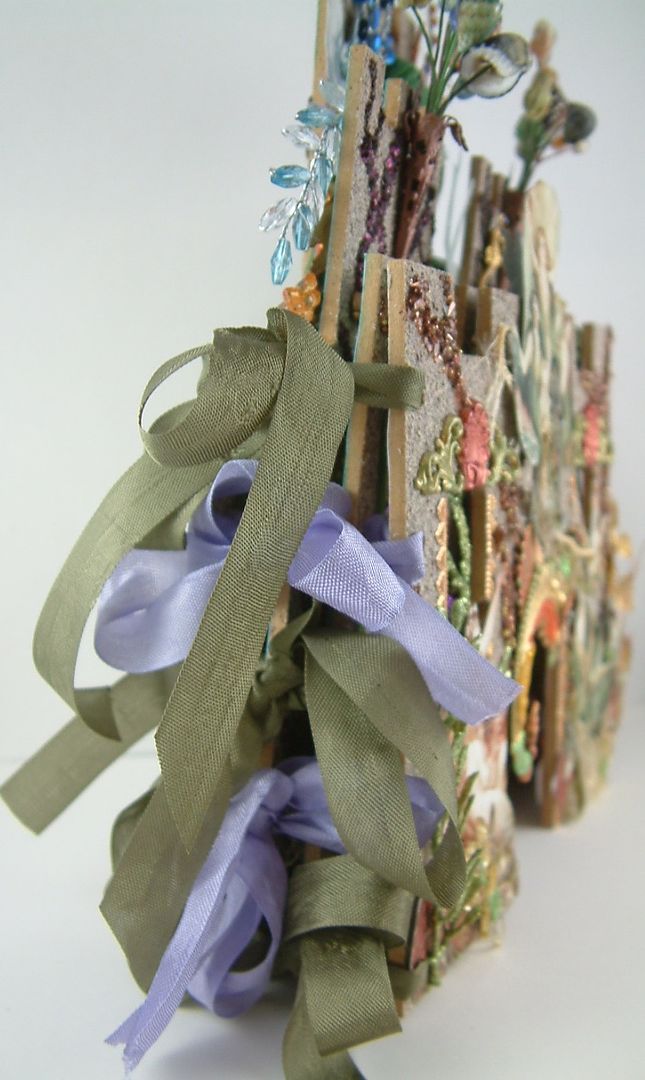
I had a blast designing this Mermaid Sand Castle book for Alpha Stamps. The pages are made out of quality press boards and the package comes with four different pages. To give the pages the look of a sandcastle, I first sprayed the front of each page with a product called Stone Touch by Plasti-kote. It comes in a spray can and can be found at hardware and paint stores. The product comes in several different colors and finishes. Here is a link to their website. http://www.plasti-kote.co.uk/Product/pcode---4651/pccode---3620. The company is based in the UK and their site has information on where you can buy the product in Europe. I’ve had my can for a while so I don’t remember where I bought it in the US. Krylon also makes of line of textured spray paints called “Make it Stone!”. The Krylon product gives you the same result and should be easy to find in stores or online in the US and Canada. Here is the link to Krylon’s website http://www.krylon.com/products/make_it_stone_textured_paints/
Front Page Spayed with Stone Touch
End Result
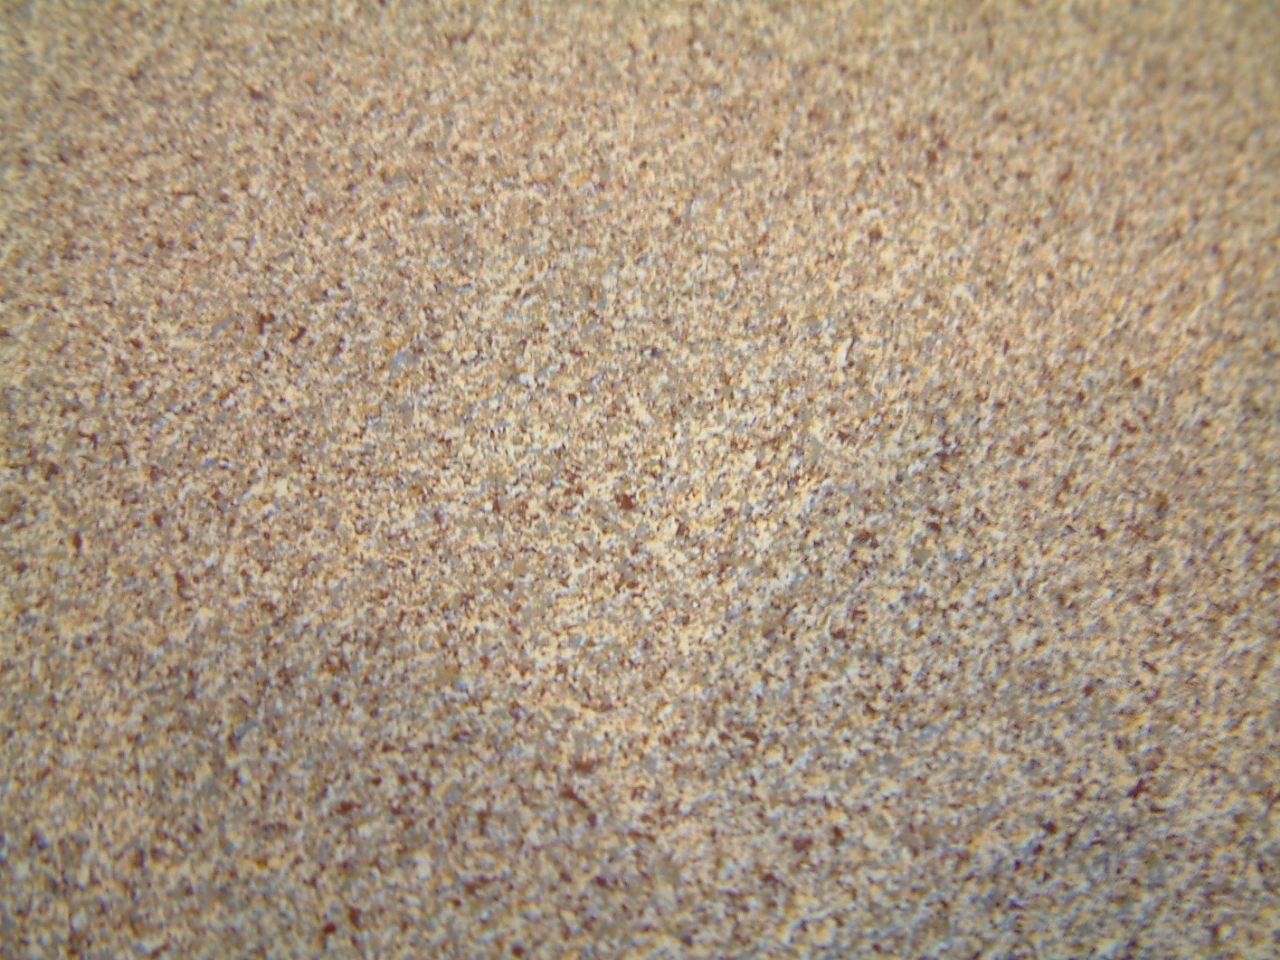
Close Up View of the Texture – It really feels like sand.
I used the sand treatment for the fronts of the pages and paper for the backs of the pages.
View from the Back of the Book
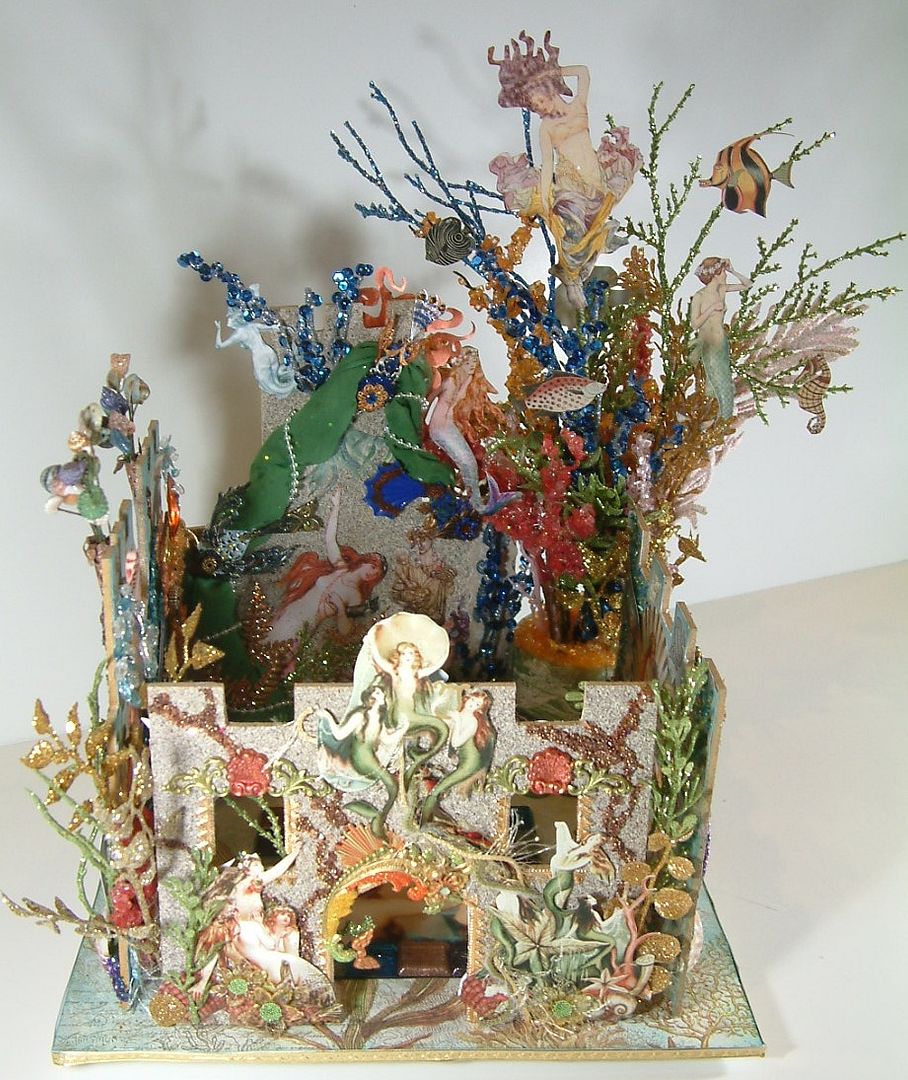
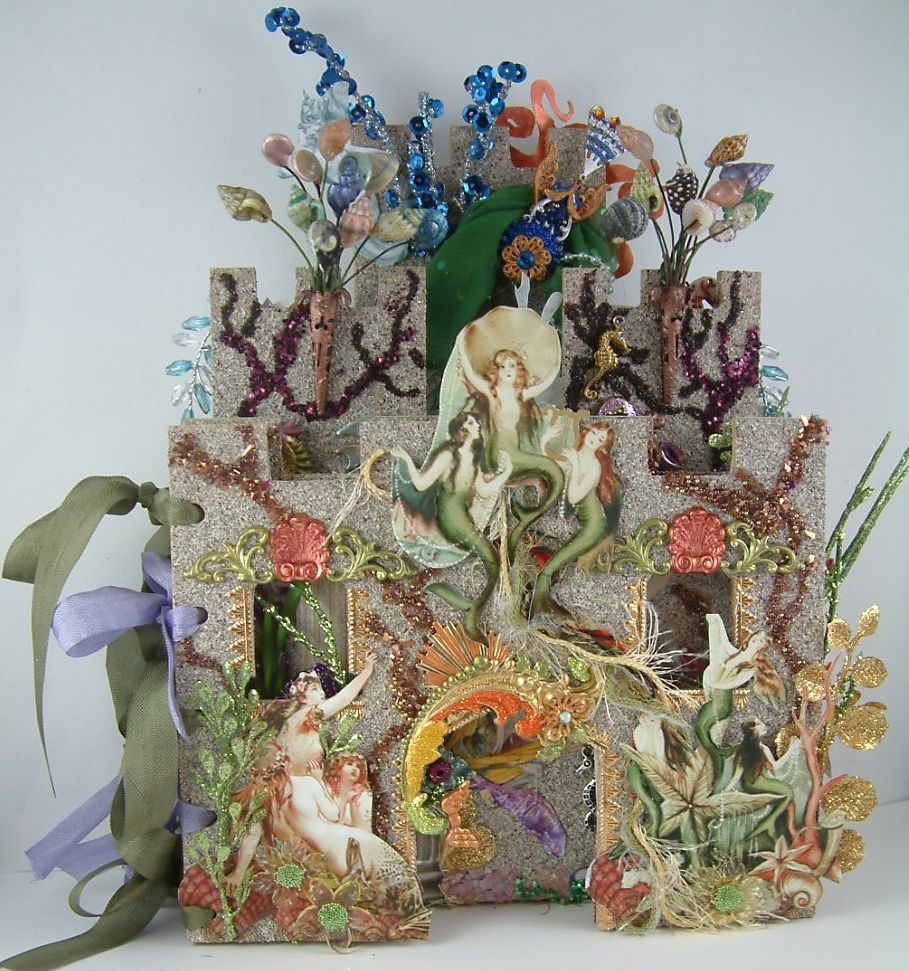
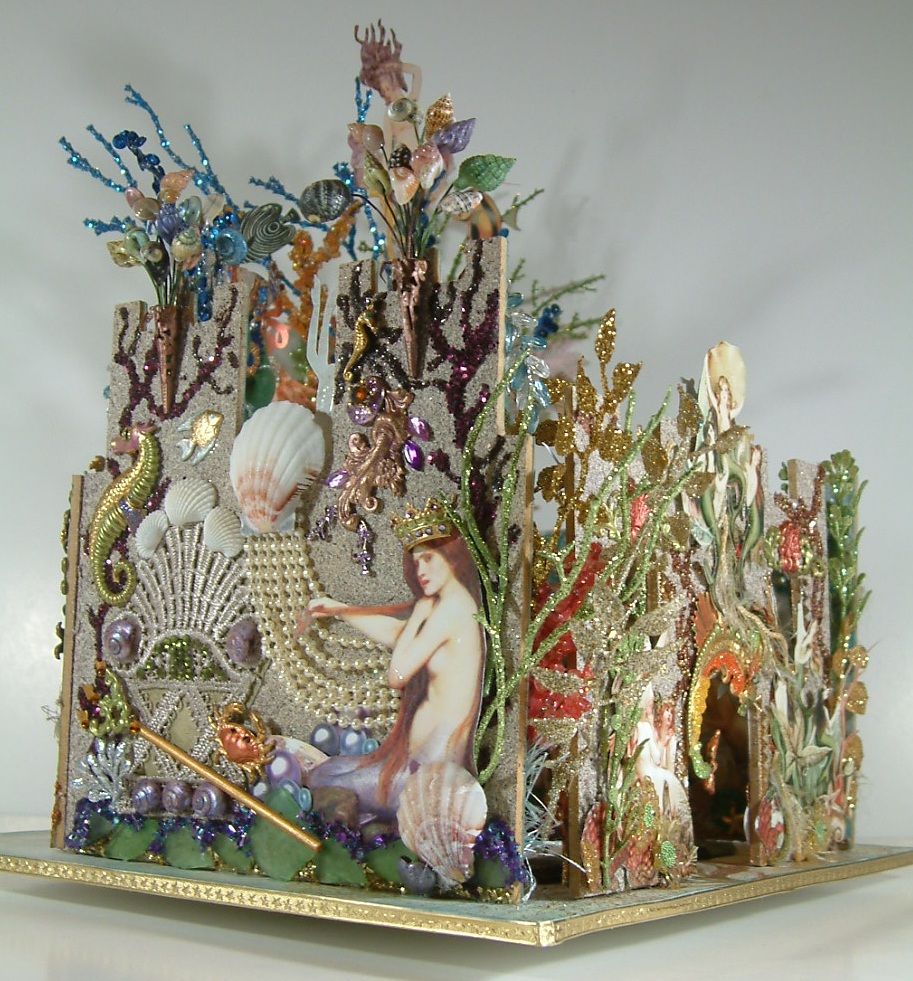
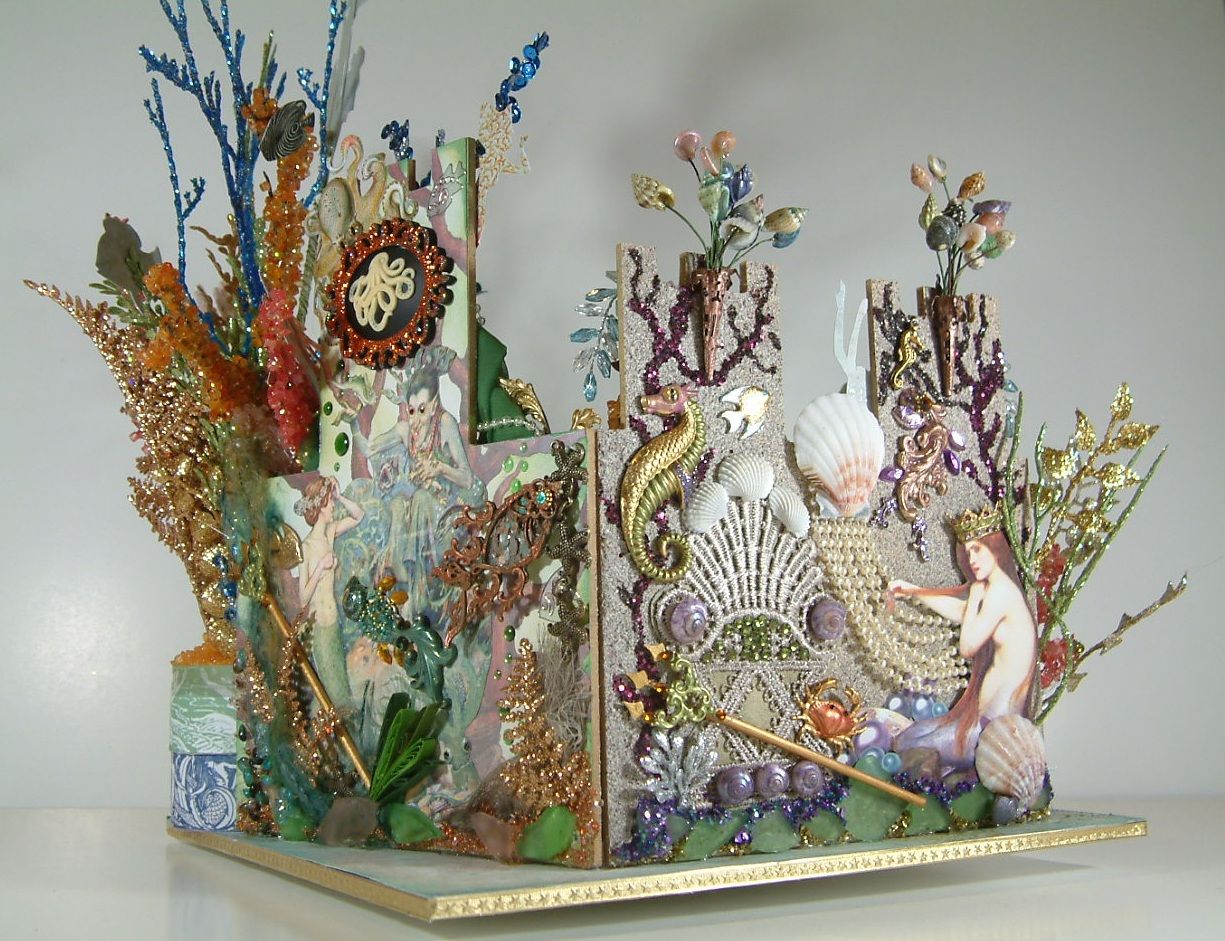
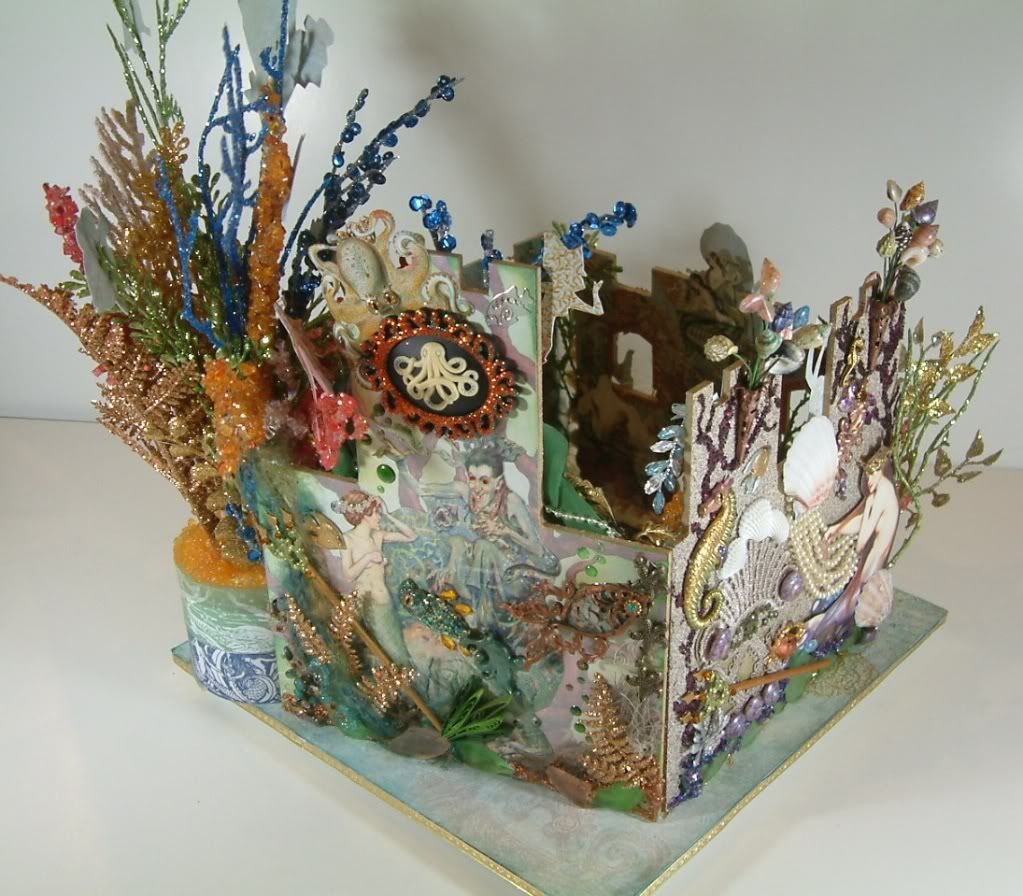
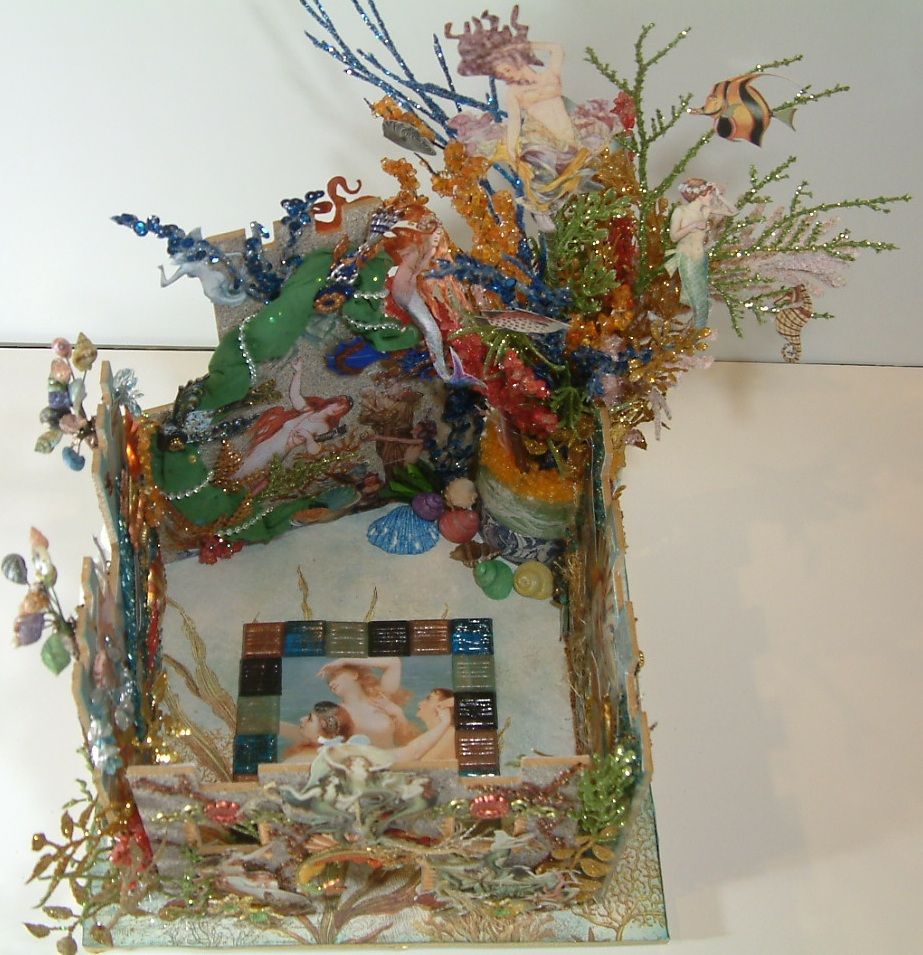
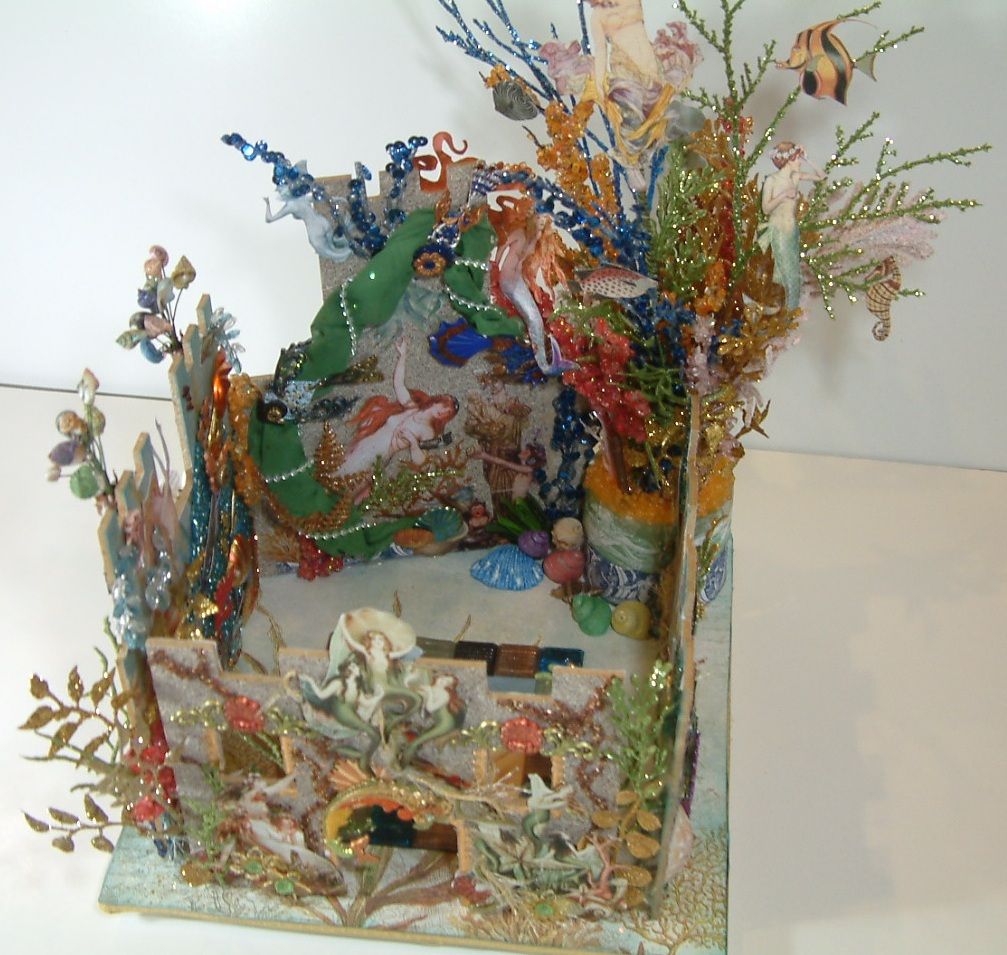
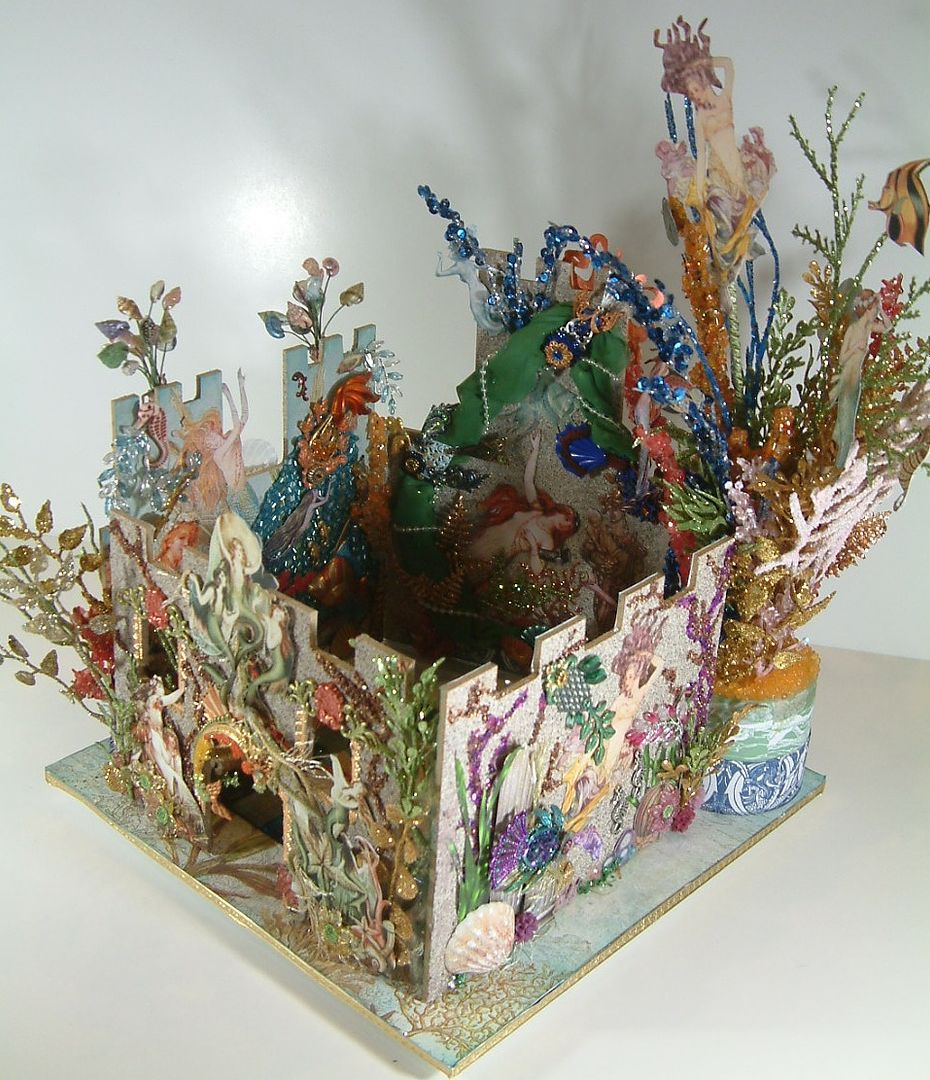
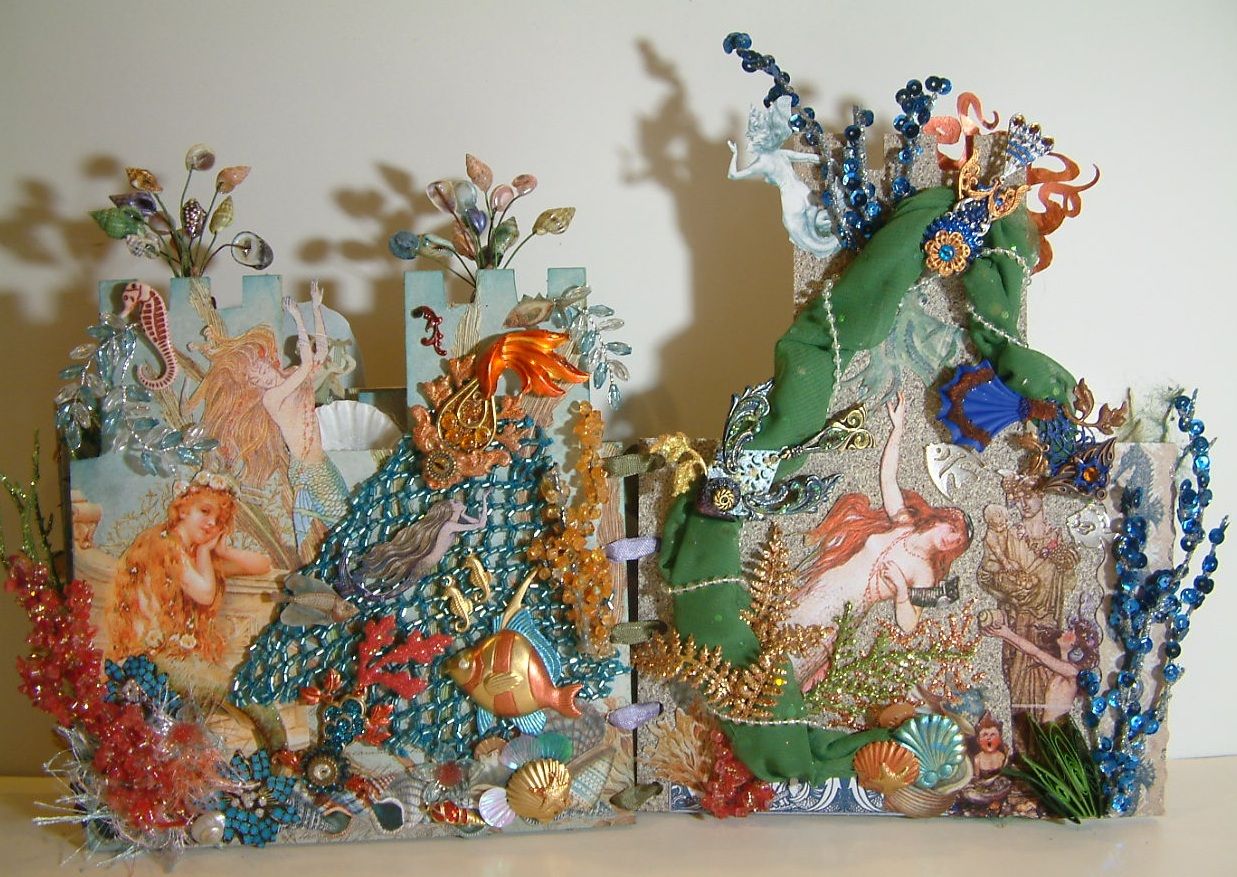
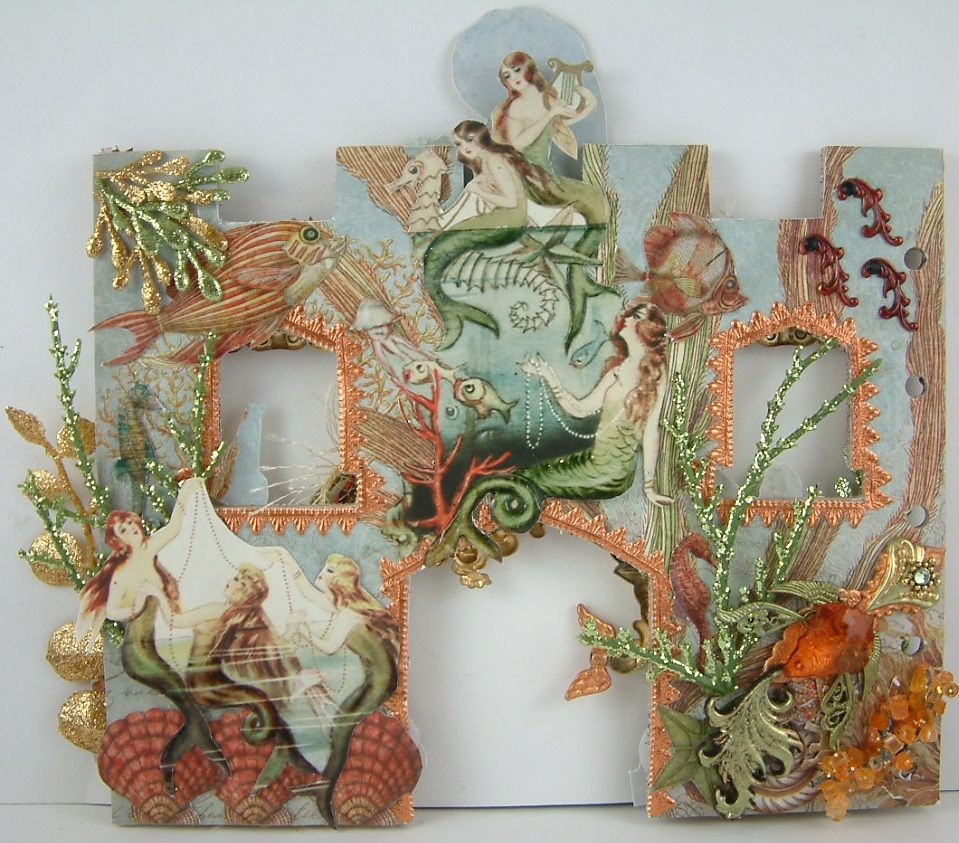
Pictures of the Book Open
GLUE: To attach all of the elements to the pages I used either Tombo Mono Multi glue or Glossy Accents.
Next, I’ll walk you through the design of each page with a list of the Alpha Stamps products that I used. Lastly, I’ll cover the design, construction and colorizing of the fish you see on all of the pages.
First Page Front – The Castle Gate
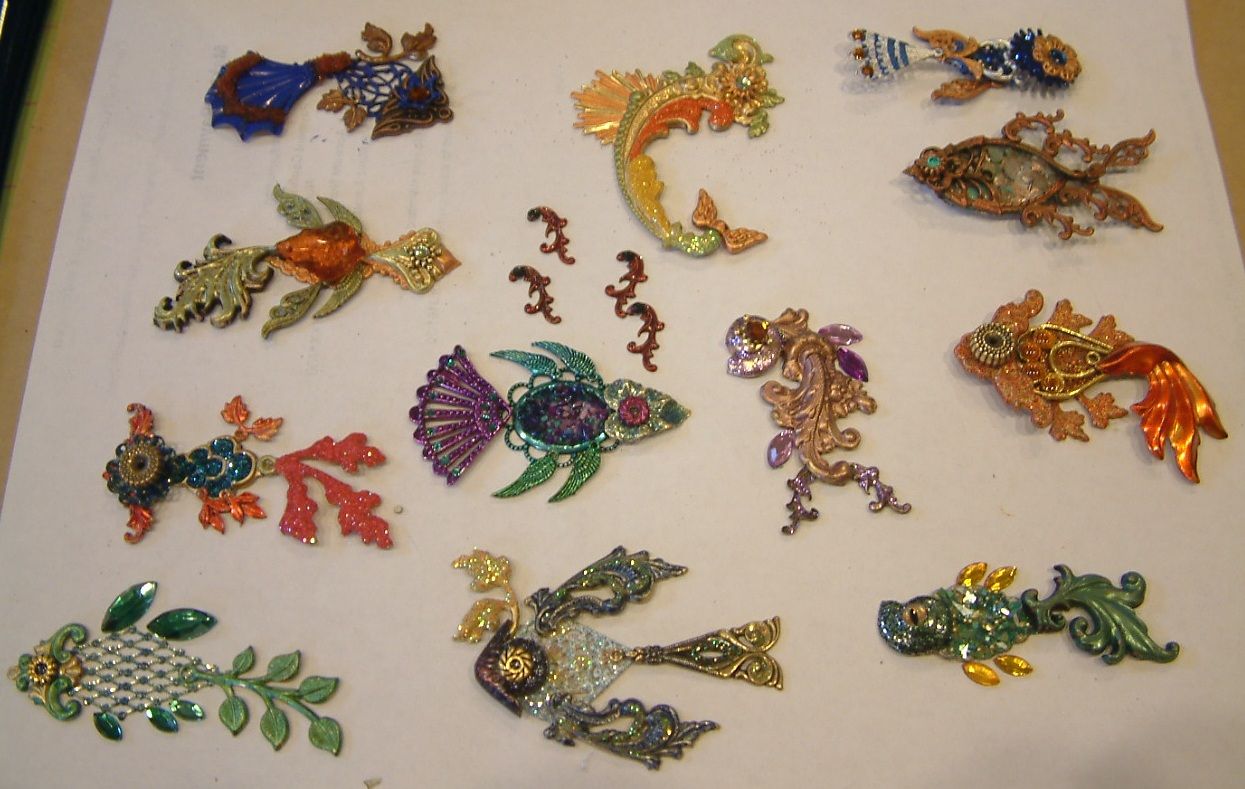
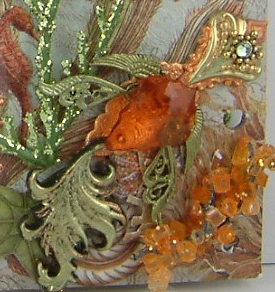
In the background you’ll notice brown vines. They are made of a mixture of glitter, microbeads and mica flakes. I’ve used this same treatment with different color mixtures on other pages. Note the fish over the entrance. The fish is assembled using various pieces of metal. On each page you’ll notice other fish I created using the same technique. I’ll be walking through in detail how I create the fish.
Alpha Stamp Supplies Used on the Page Pictured Above (except for the metal fish)
First Page Back – The Castle Gate
Alpha Stamp Supplies Used on the Page Pictured Above (except for the metal fish)
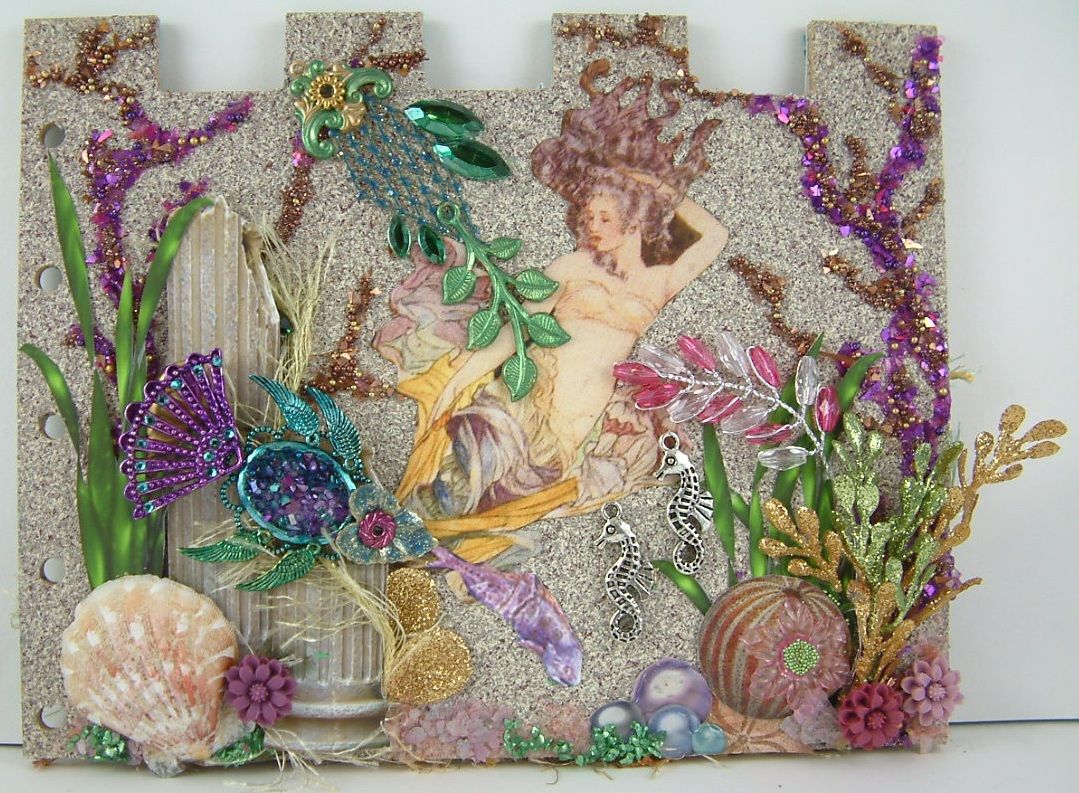
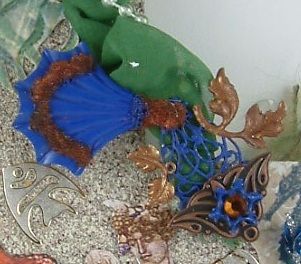
Second Page Front – Mermaid Garden
On many of the pages you’ll see sparkly and dimensional underwater plants, coral, etc. In the fall Michael’s Craft store carries glittered and beaded sprays for Christmas decorations. The sprays come various colors. Sizes and shapes and are very inexpensive. I always purchase several each year as I think they are perfect for coral and underwater plant life.
Alpha Stamp Supplies Used on the Page Pictured Above (except for the metal fish)
Second Page Back
Alpha Stamp Supplies Used on the Page Pictured Above (except for the metal fish)
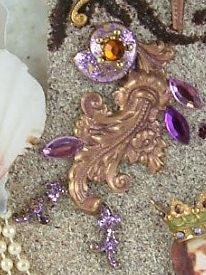
Third Page Front – The Queen’s Chamber
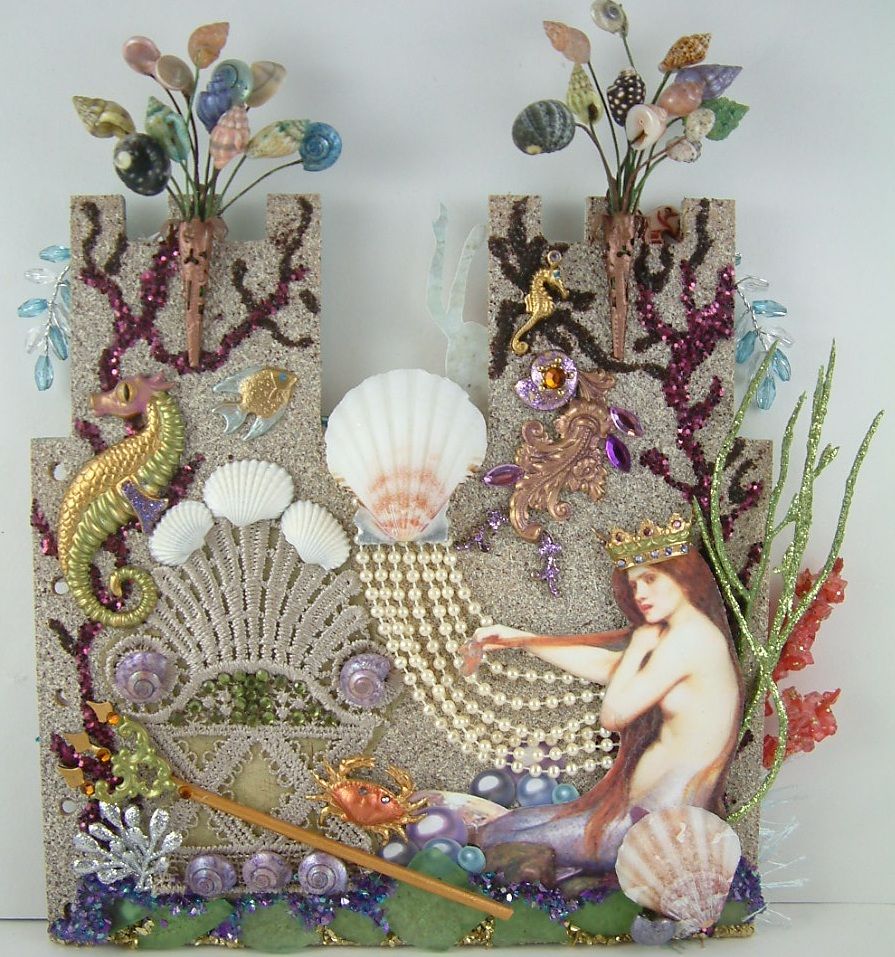
The throne is a piece of lace. I use a lot of flowers in my art. I typically cut off the wire stems (which I save). To create the seashell arrangements at the top I glued the wire stems in the seashells.
Alpha Stamp Supplies Used on the Page Pictured Above (except for the metal fish)
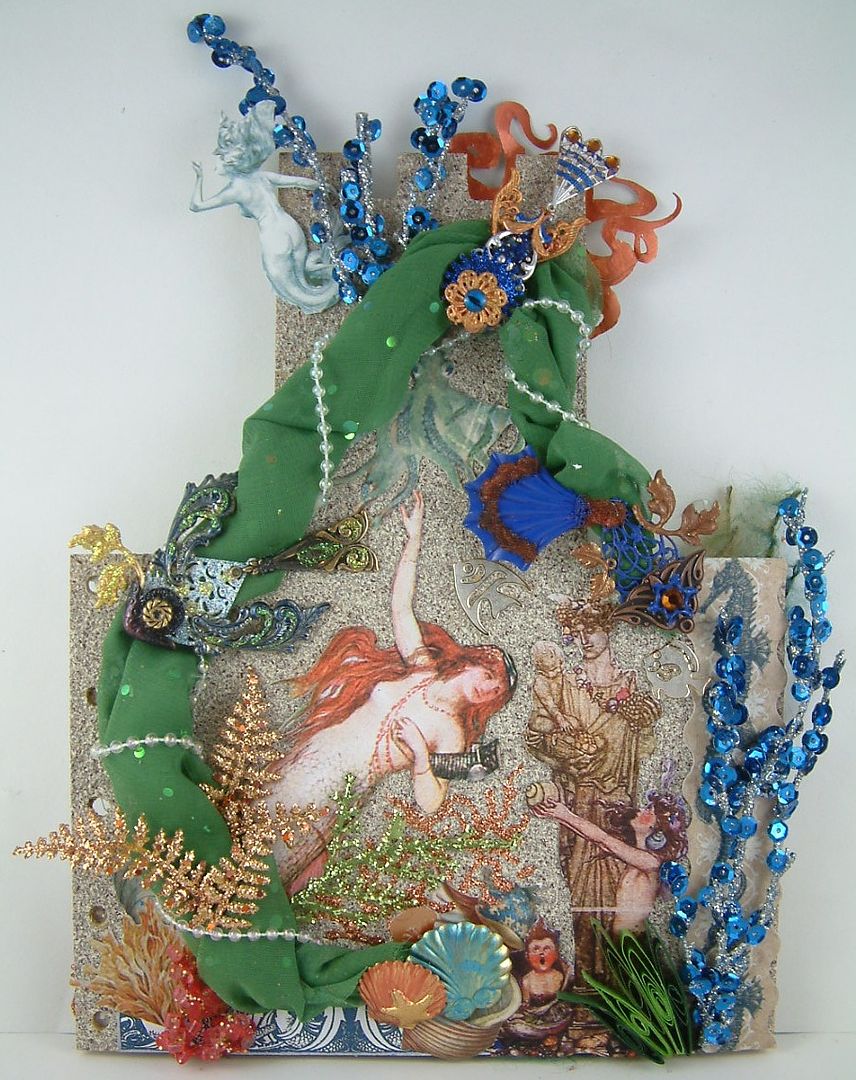
Third Page Back – Treasures of the Sea
The blue beaded net is a flapper hat that I catabolized. My friend Betty Drake gave it to me as she knows I will use just about anything in my art.
Alpha Stamp Supplies Used on the Page Pictured Above (except for the metal fish)
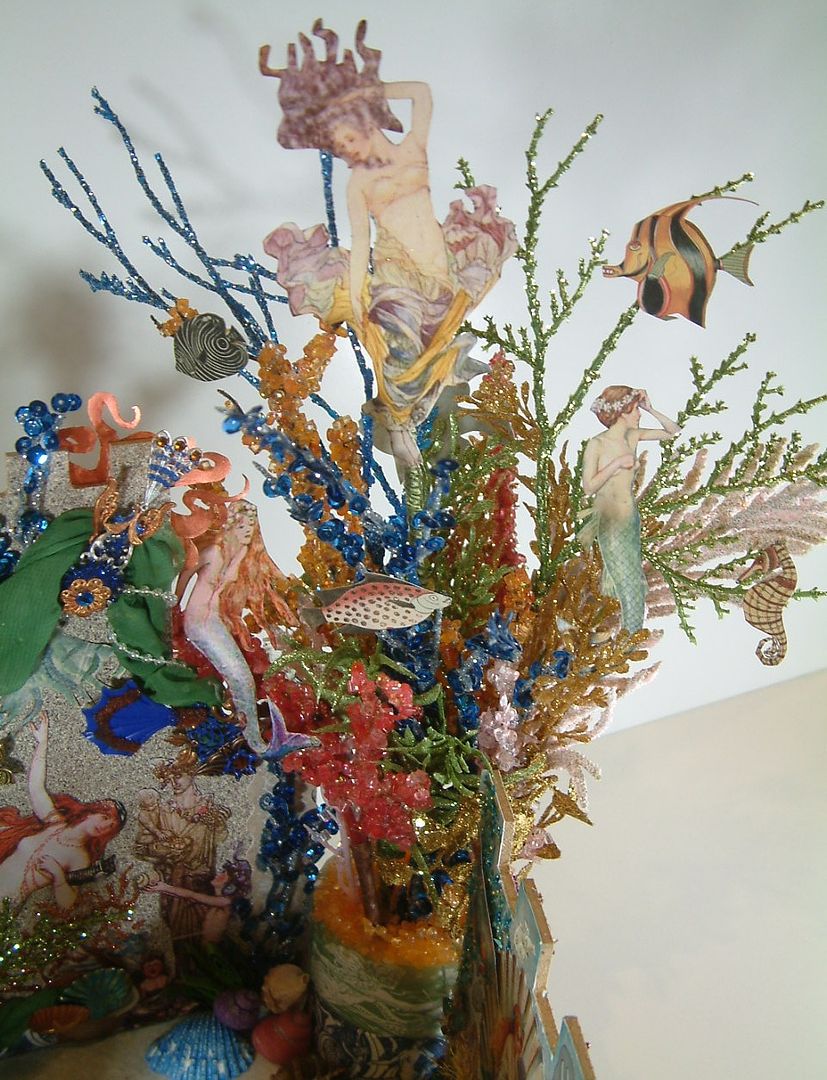
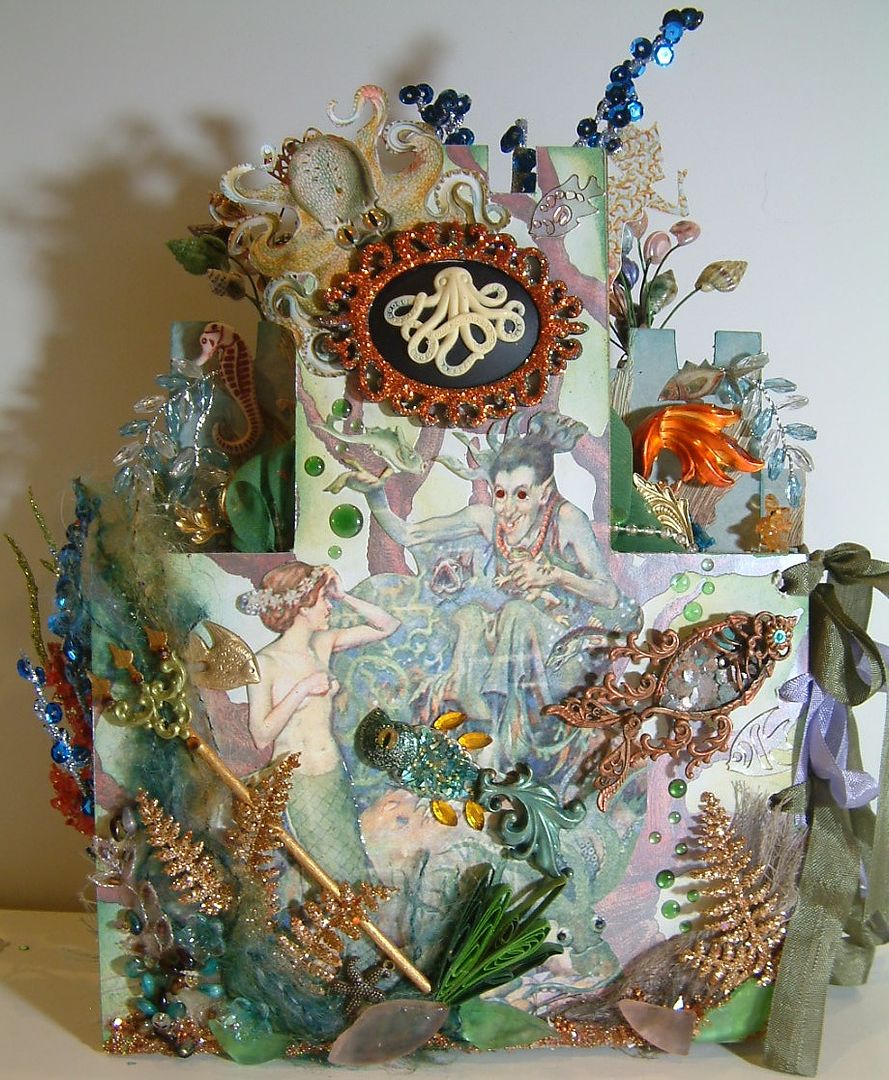
Forth Page Front – Temple of the Sea Goddess
The translucent fish trimmed in gold are stickers.
Alpha Stamp Supplies Used on the Page Pictured Above (except for the metal fish)
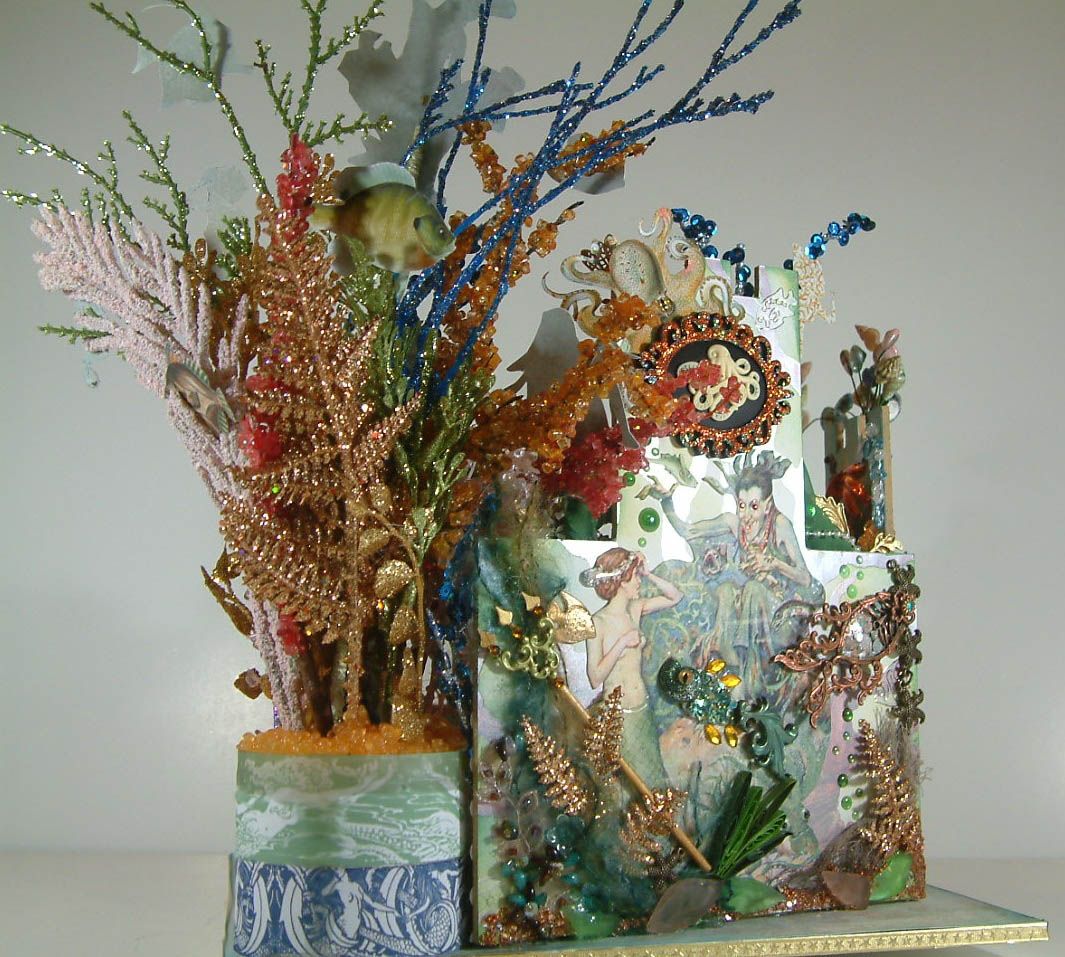
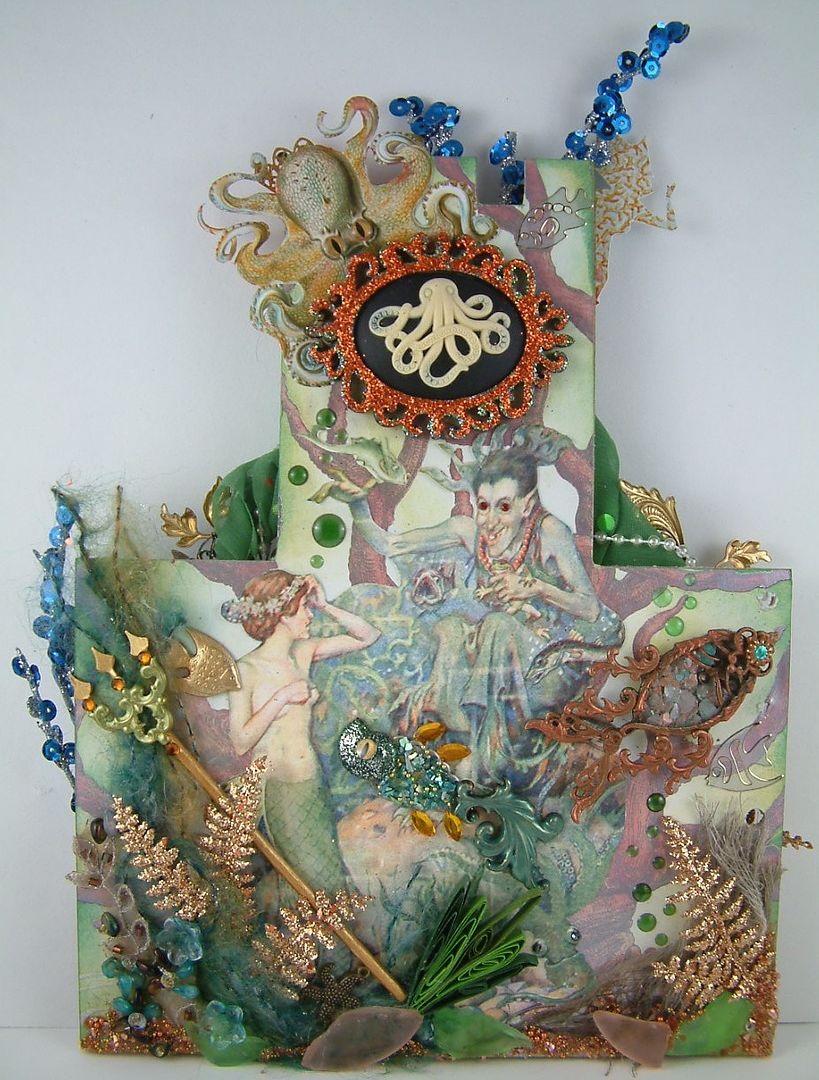
Forth Page Back – Lair of the Sea Witch
The brown and green large chunky looking pieces at the bottom are sea glass.
Alpha Stamp Supplies Used on the Page Pictured Above (except for the metal fish)
How the Book is Bound
Tutorial - Creating Fish from Metal Bits and Bobs and How to Emboss Metal and Plastic
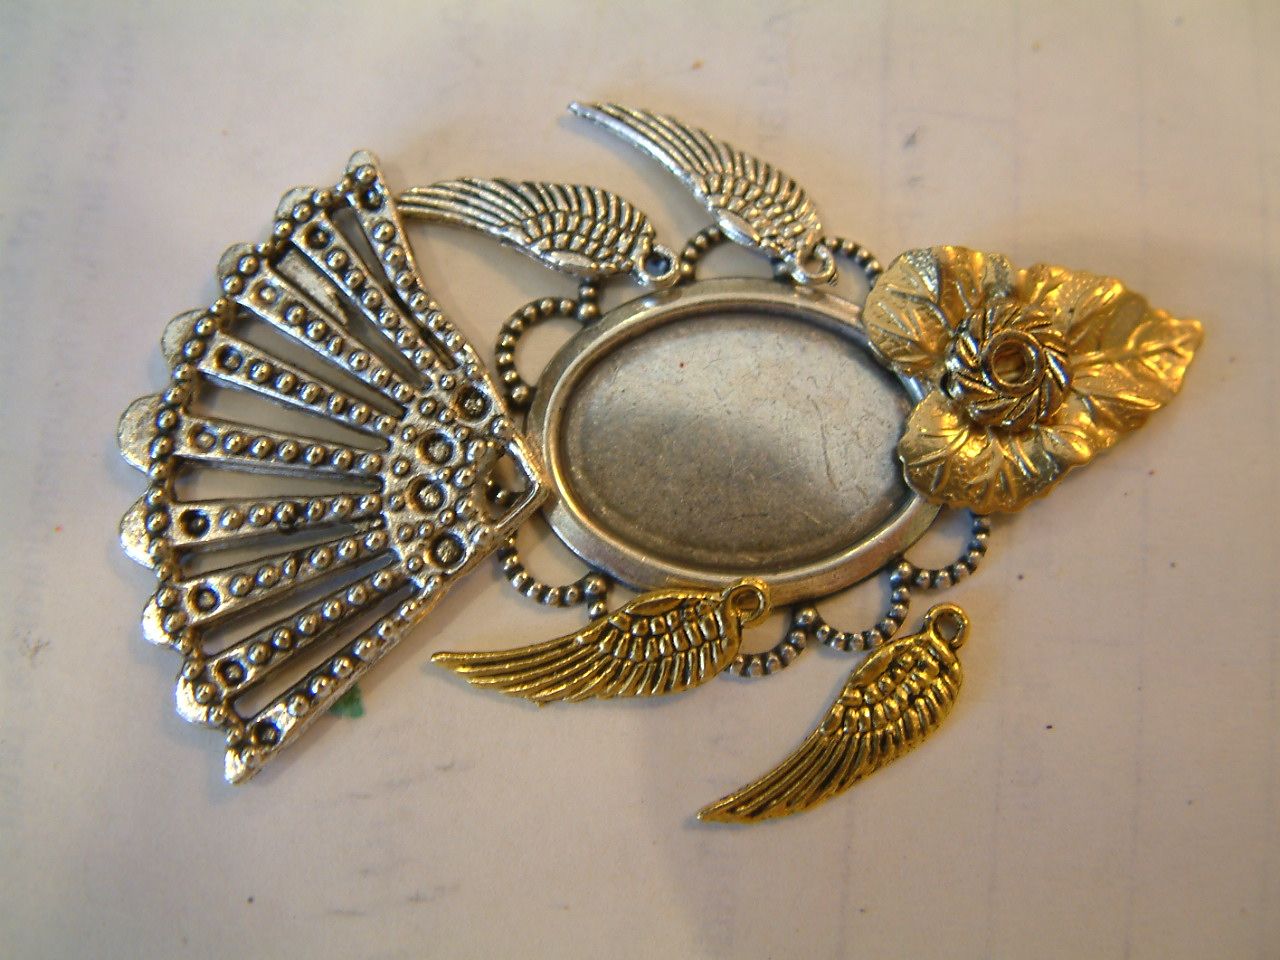
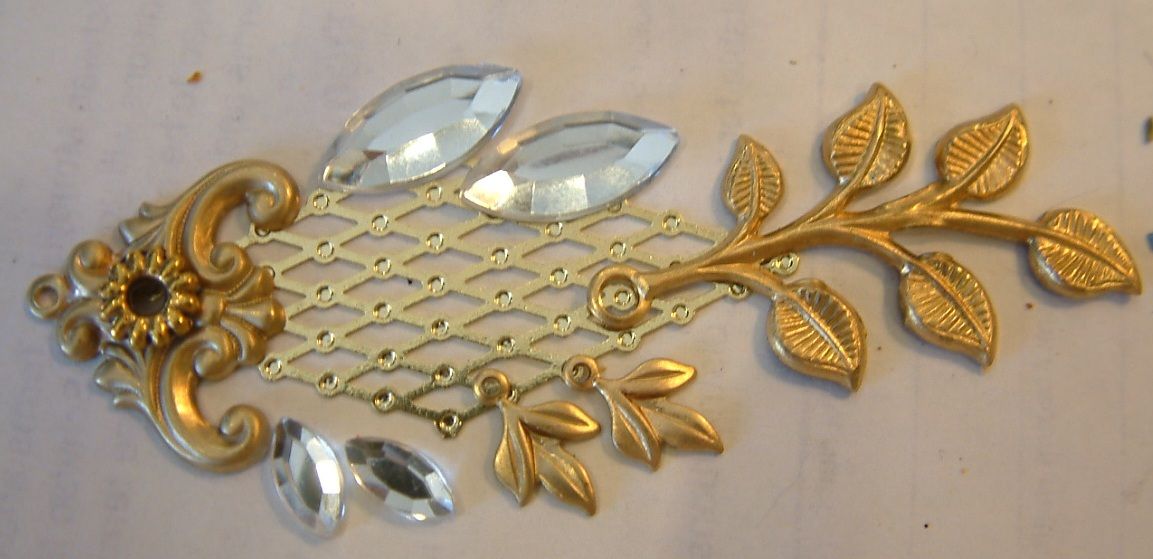
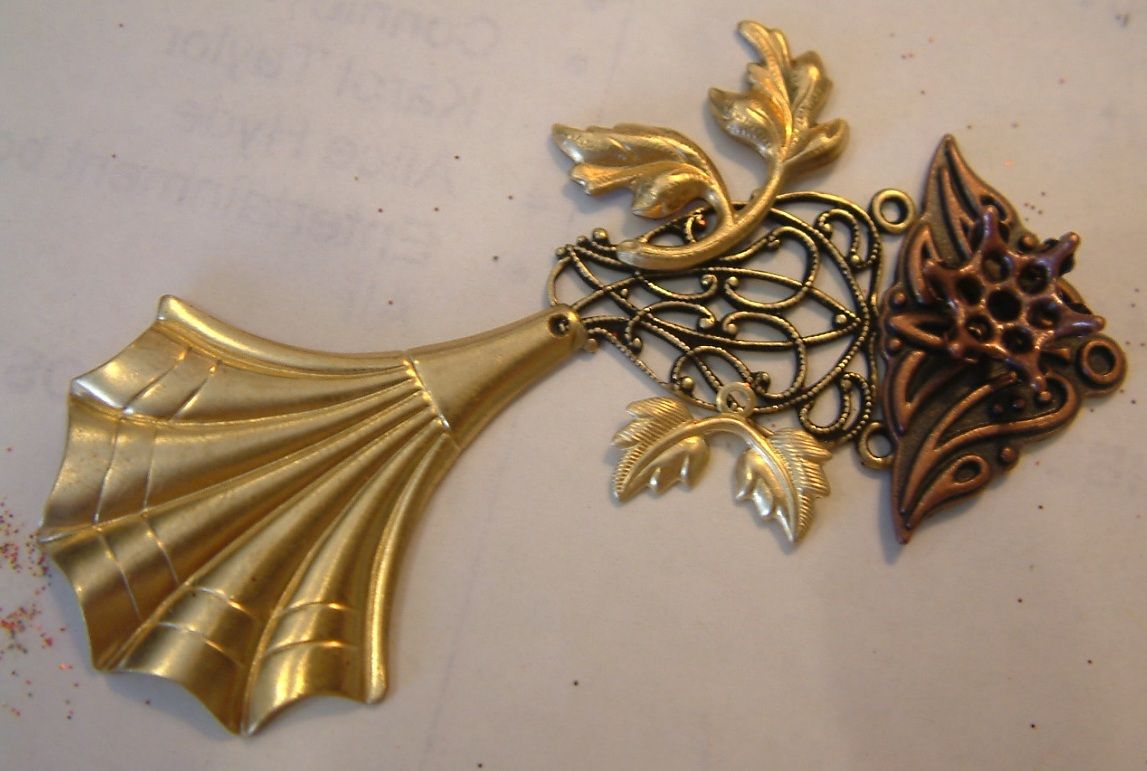
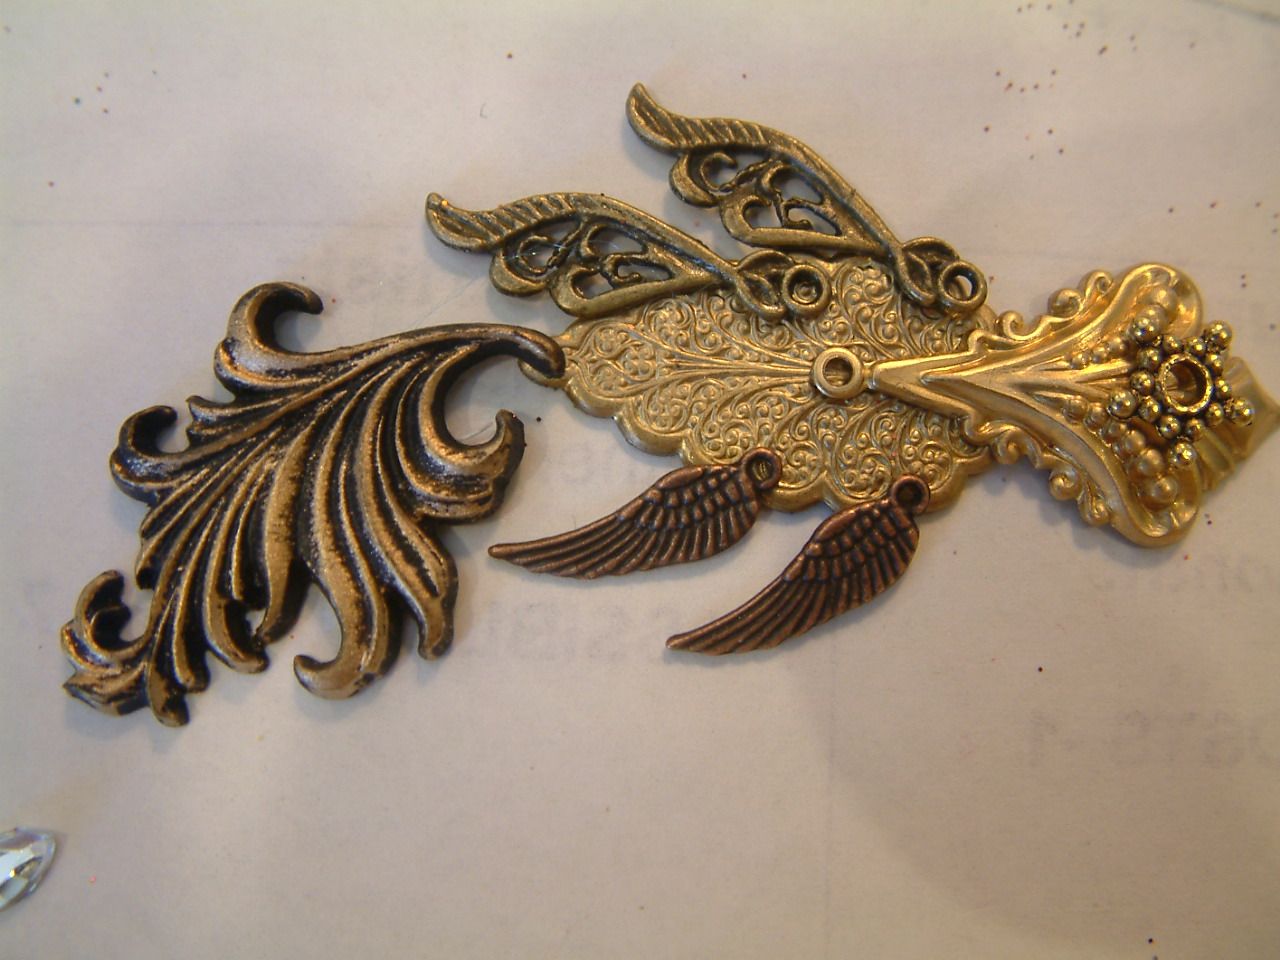
I love making these fish out of bits of metal and plastic findings and charms. To me they look like a piece of jewelry. I started making these fish last summer after I came up with the Steampunk Owl. It worked so well for the owl I thought it would also work for fish. There are all sorts of unusual looking fish in the sea so let your imagination run wild. The way I approach designing the fish is to deconstruct the body and to look for metal bits for each of the parts of the body. The parts you need are something for the:
- Head
- Other bits that might stick out of the head or some other part of the body.
- Core of the body
- Tail
- Fins
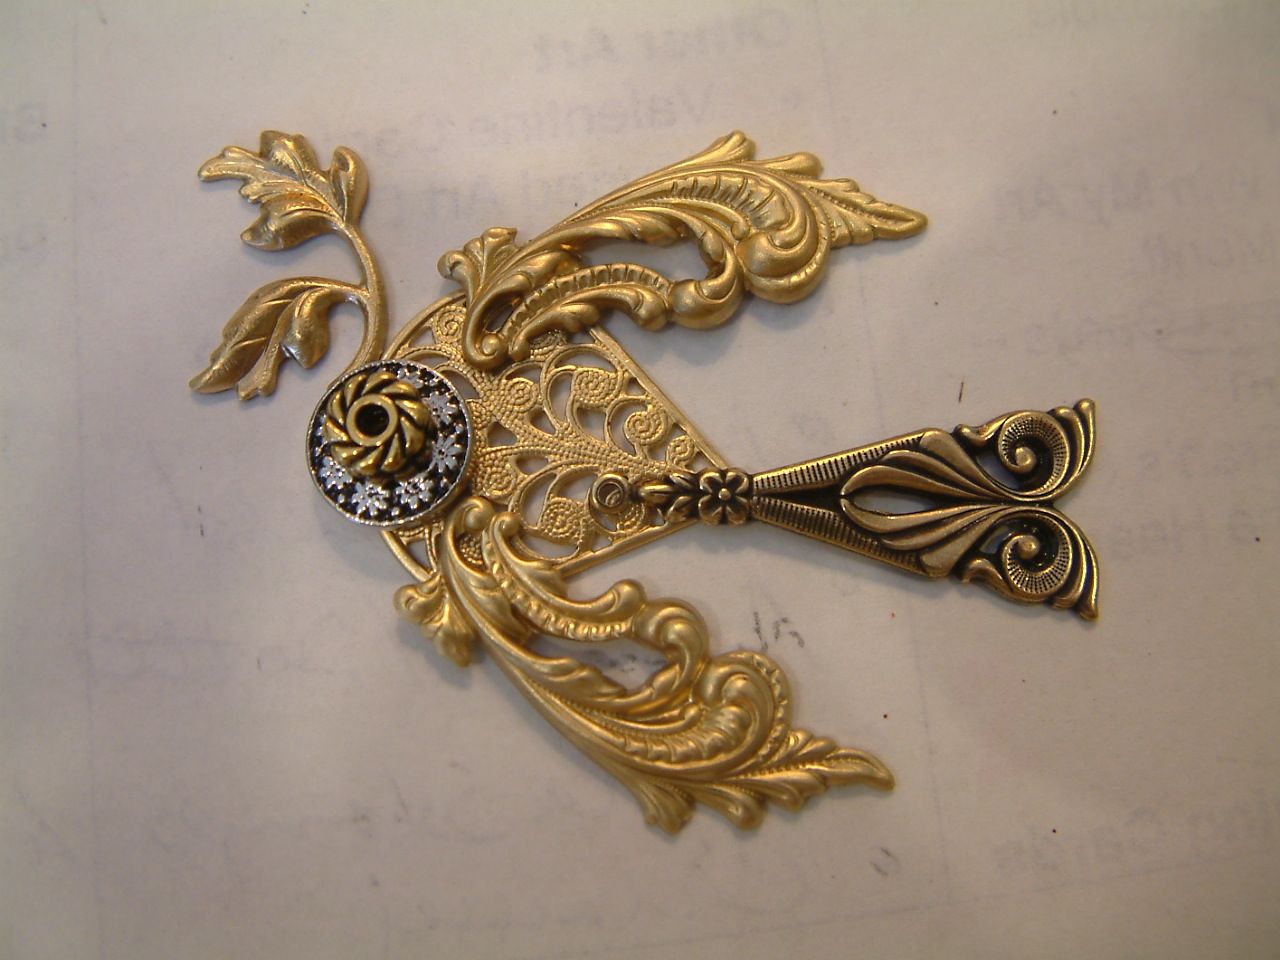
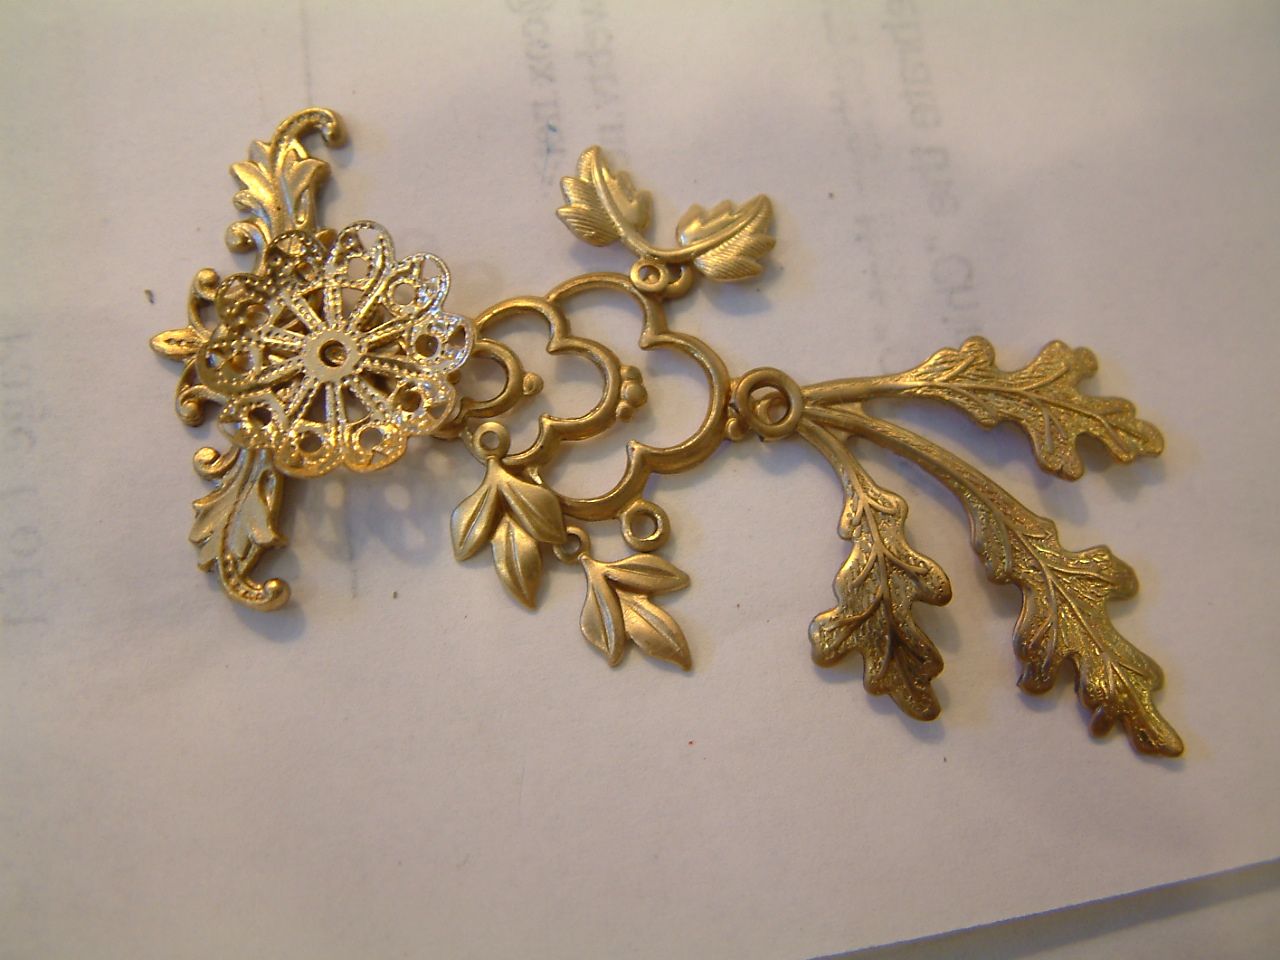
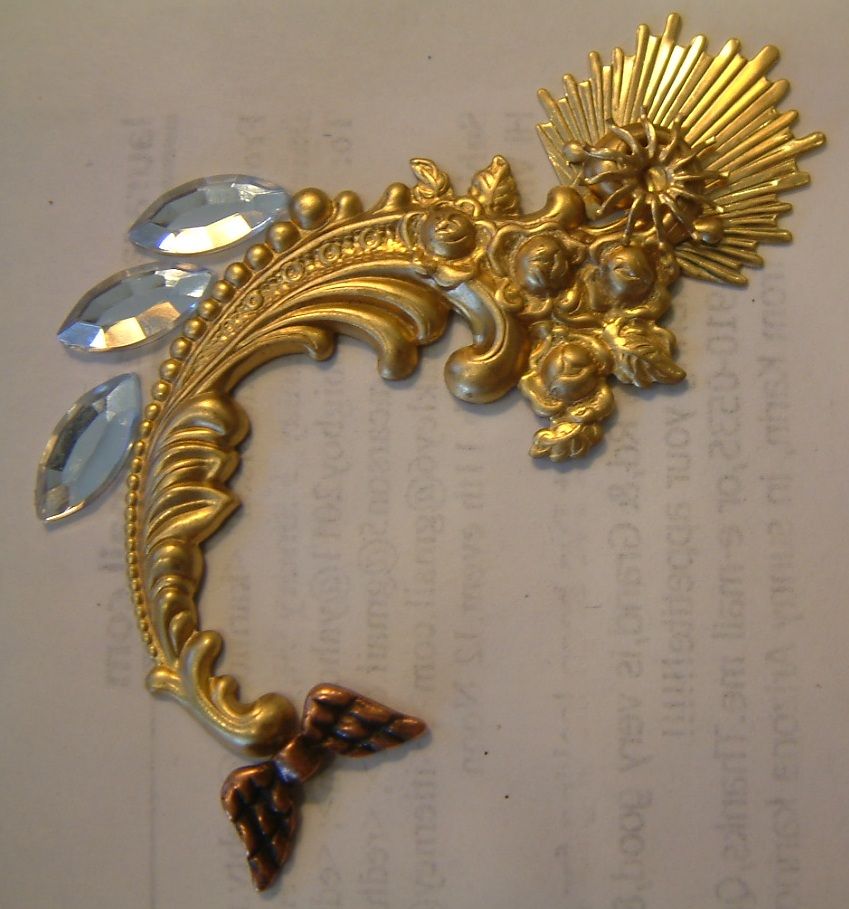
In the picture below you can see the metal bits I chose to use in the design of the fish. I start by laying the fish out and then I take a photograph. Since I will be texturizing and colorizing the fish with a variety of products, having a photo helps me remember how to glue the fish together.
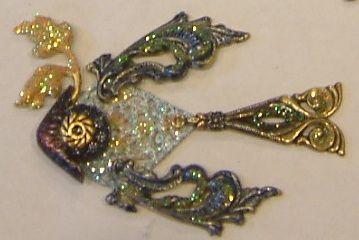
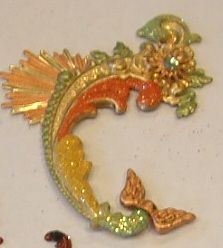
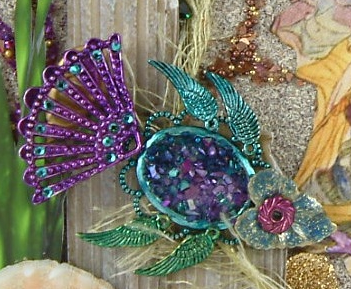
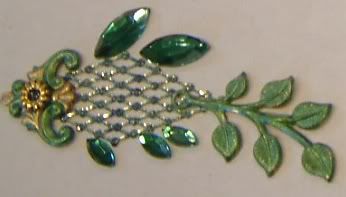
BEFORE AND AFTER
Alpha Stamps Products Used In the Fish Pictured Above:
Alpha Stamps Products Used In the Fish Pictured Above:
You can see in the case below I decided to change the design slightly when I assembled the fish.
Alpha Stamps Products Used In the Fish Pictured Above:
Coloring and Decorating the Fish
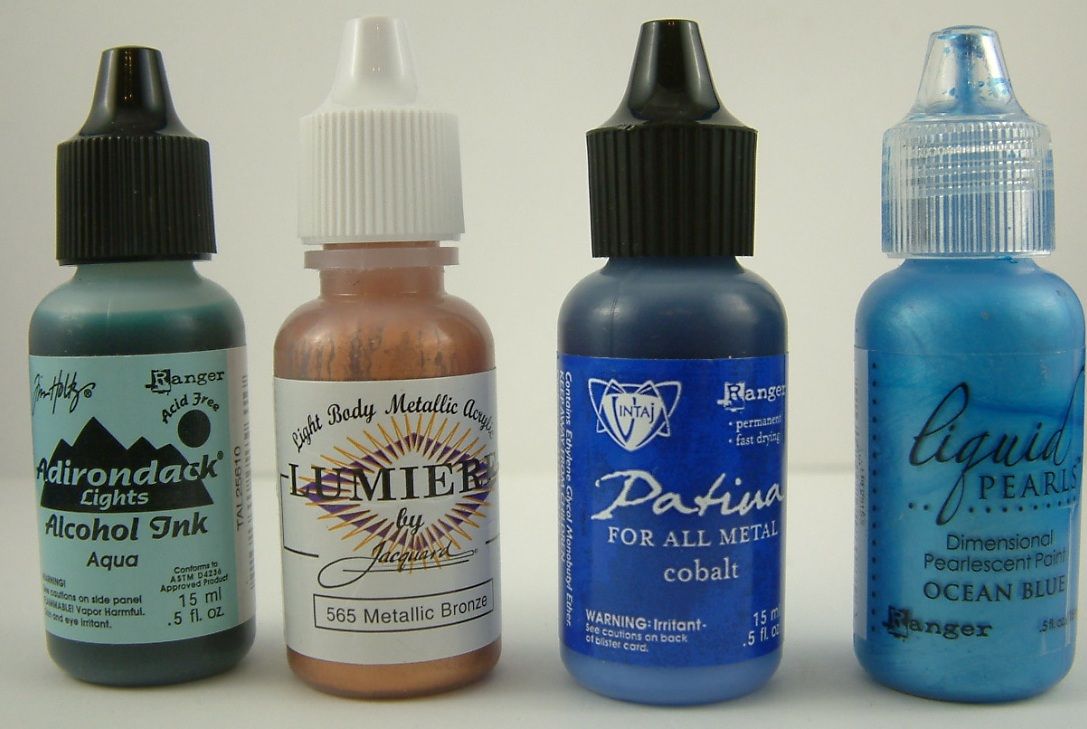
I used a variety of products to change the color of the metal and plastic; Ranger Alcohol Inks, Liquid Pearls Pearlescent, Lumiere Metallic Acrylic paints, Ranger Vintaj Patina for Metal, glass glitter, and embossing powder.
Ranger Alcohol Inks
If you just want to change the color of the metal but have the metal look still come through the color then use the Ranger Alcohol Ink. One thing to remember is that the color of the metal will influence the color the painted metal takes on. In other words the after applying the ink to the surface, the metal will not be the exact color it is in the bottle.
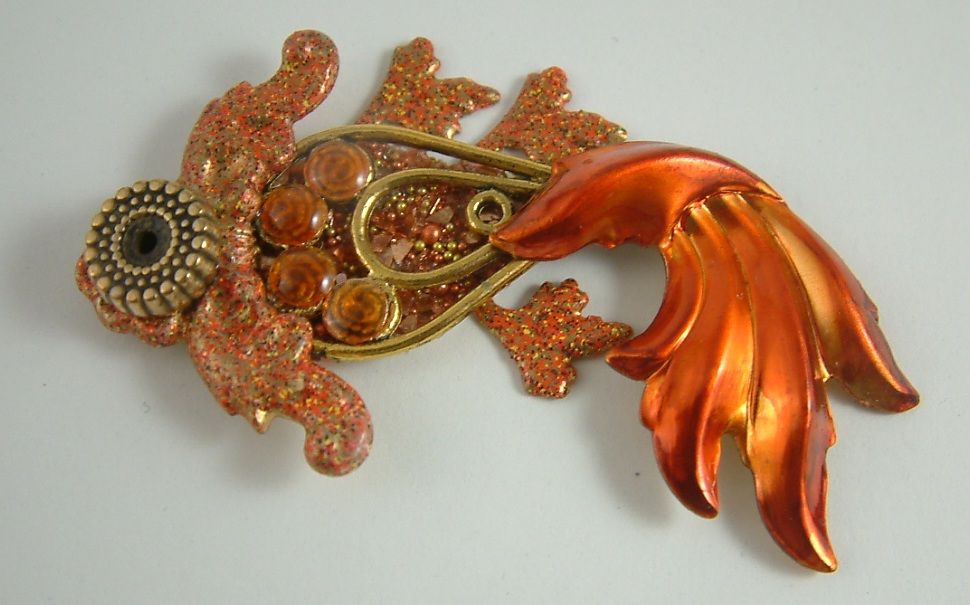
On the fish picture above, the tail, body, fins and eye, are painted with Ranger Alcohol Inks.
Alpha Stamps Products Used In the Fish Pictured Above:
If you want to cover up the some or all of the piece but still have a metallic or a pearlescent look then use Liquid Pearls or Lumiere Metallic Acrylic paints. How much of the metal you see will depend on the number of coats you apply. Alpha Stamps carries several of the most popular colors of Liquid Pearls.
I used Ranger Alcohol ink to color the rhinestones.
Alpha Stamps Products Used In the Fish Pictured Above:
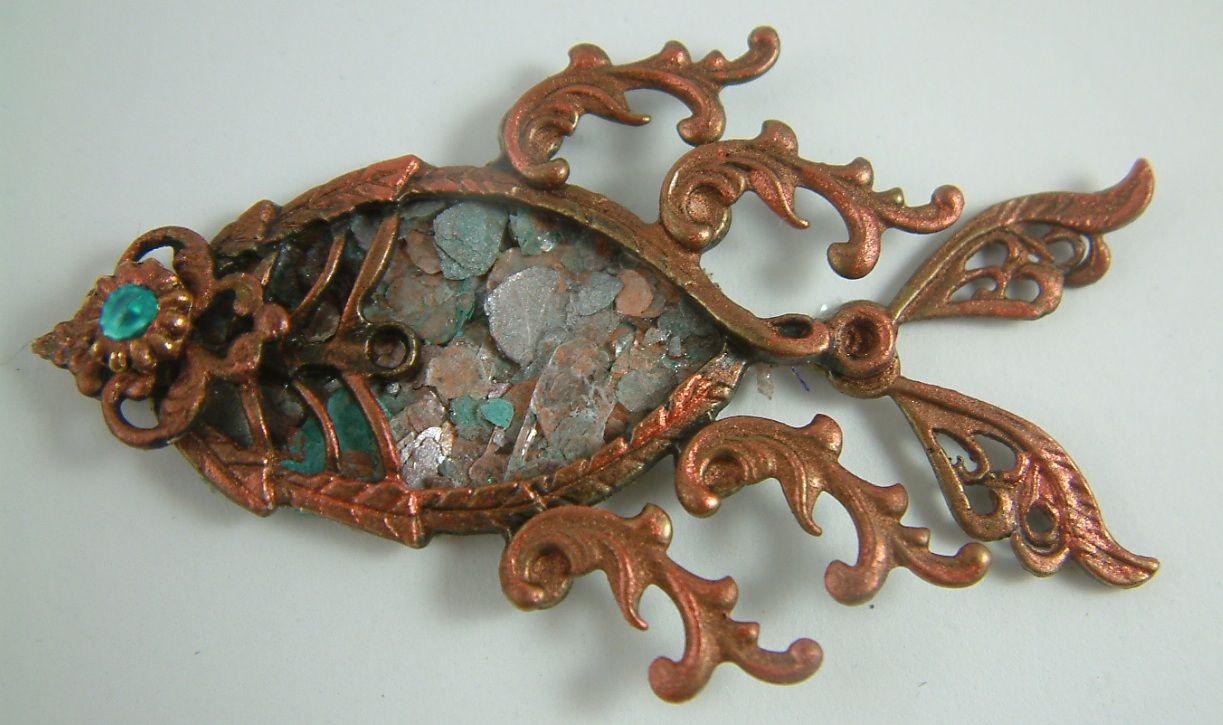
Ranger Vintaj Patina for Metal
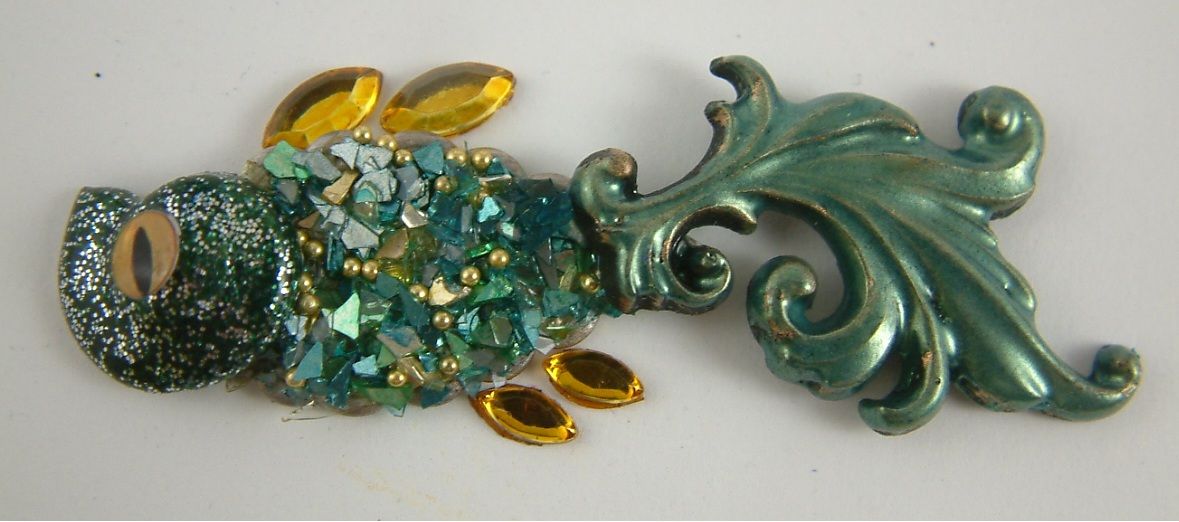
If you want to cover up the color of the metal and achieve an enamel look then use the Ranger Vintaj Patina for Metal. In the picture below, the tail, the body and the eye of the fish are painted with Cobolt blue Vintaj Patina. The paint goes on very smooth and dries quickly. There are some really cool things you can do with this product that I will cover in a future post.
Alpha Stamps Products Used In the Fish Pictured Above:
Filigree works great for the body of the fish. Some of the filigree that Alpha Stamps carries that would work well for the body are:
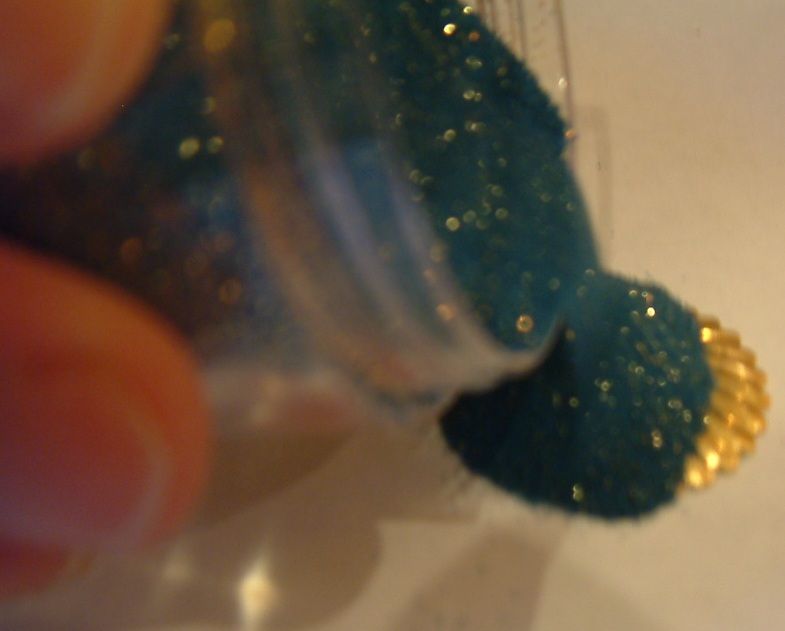
Glass Glitter
For the fish below, I used glass glitter on the shell head and the bottom fins. I purchase my glitter from the Art Glitter Institute. They also carry their own line of glues to apply glitter to just about any surface. One of the things that I love about their glue is that the bottle comes with a tiny steal tip which allows you to apply the glue precisely in very small areas.
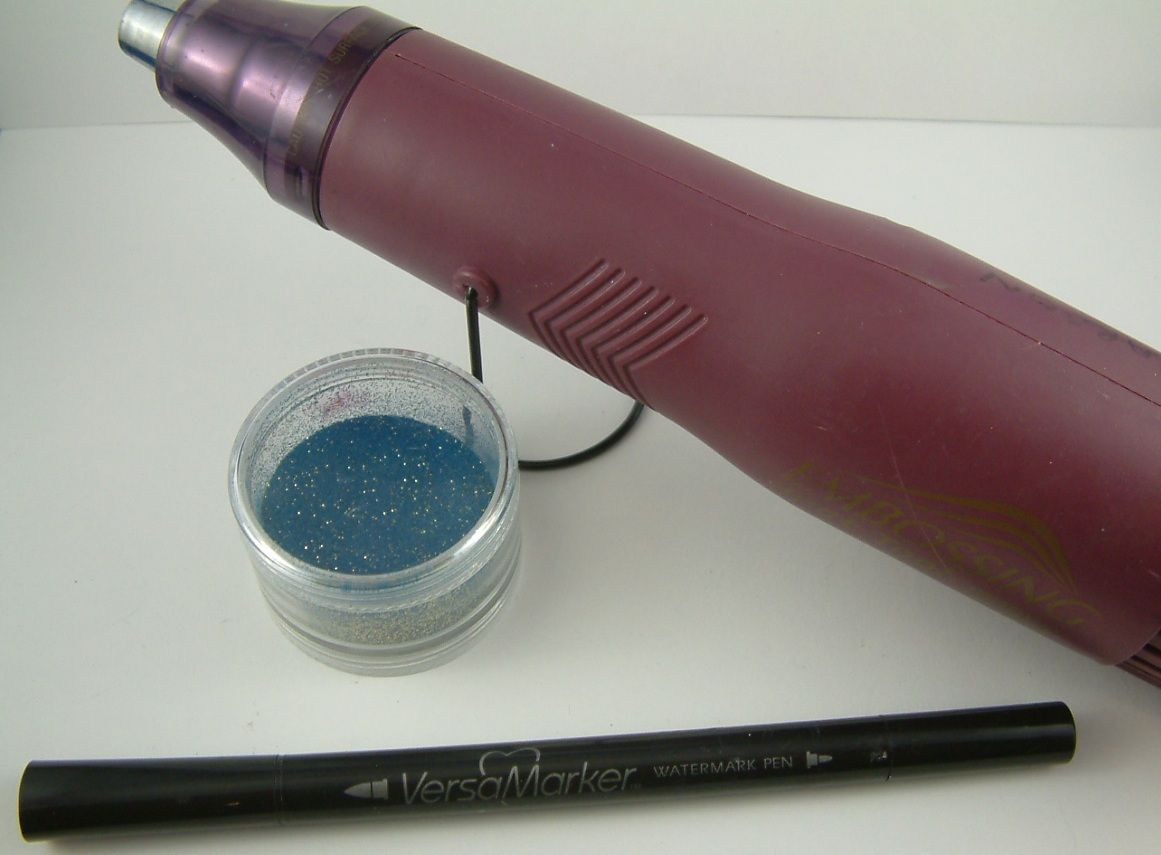
Embossing Powder
One of the ways I decorated the fish was to emboss the metal. It’s really easy to do.
What You’ll Need
Versamarker
Embossing Powder
Heat Gun
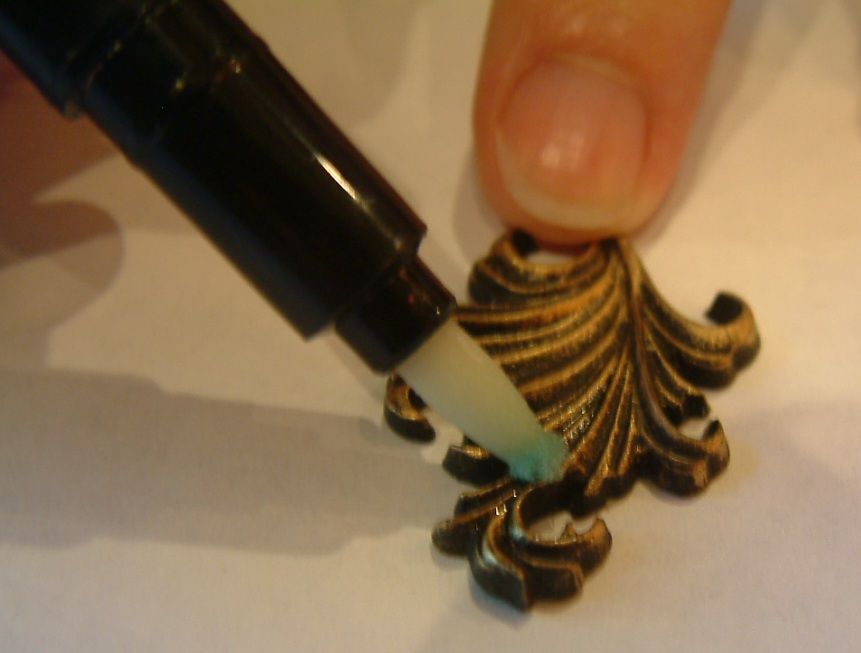
The folks who make VersaMark embossing pads also make a marker version which works great for embossing small embellishments like metal and plastic pieces. The marker has two different sized tips.
Using the VersaMark Marker apply the embossing solution to the areas that you want to emboss. You can coat the entire surface or just parts of the surface.
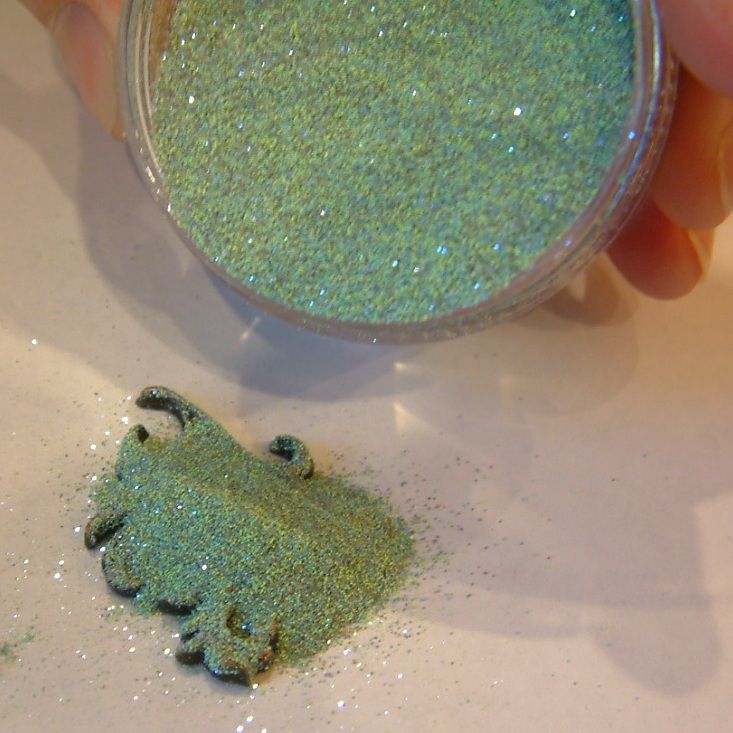
Sprinkle embossing powder on the piece.
Shake off the excess embossing powder.
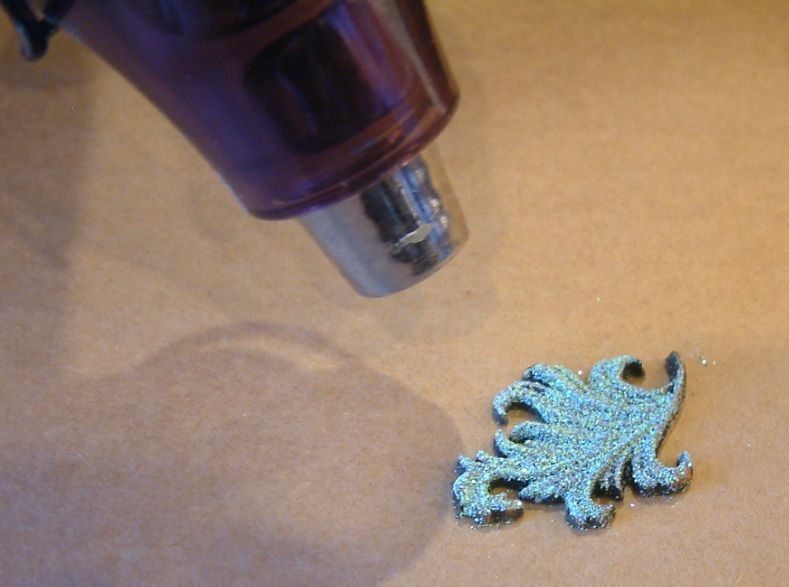
Melt the embossing powder using a heat gun.
WARNING: The plastic and metal gets very hot. You need to give it time to cool off before you touch the piece.
If you missed a spot, want thicker or more area’s embossed repeat the steps above. If you only want certain areas to have embossing powder, DO NOT pour more powder over the piece when it is hot as the powder will stick to the entire surface.
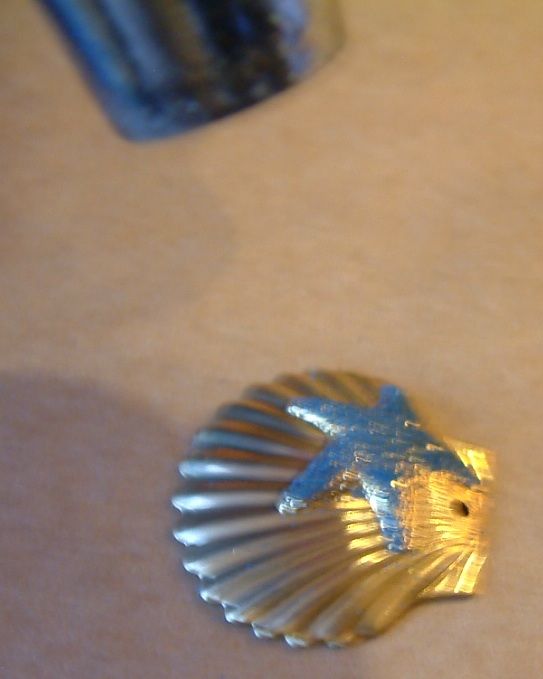
In the examples below I only embossed the starfish on the shell. I used the smaller of the two tips on the marker to apply the solution.
TIP: Sometimes static electricity will cause the powder to stick to areas to which you have not applied the VersaMark solution. There are various anti-static powders on the market that you can apply first. This works great if you are using a rubber stamp to apply the embossing solution but doesn’t work in this situation. If you apply an anti-stick powder first the powder will end up gumming up the tip of the marker. I recommend using a paintbrush to knock off the excess powder.
In the picture below the fish’s tail, fins and head has been embossed.
Alpha Stamps Products Used In the Fish Pictured Above:
Alpha Stamps Products Used In the Fish Pictured Above:
Alpha Stamps Products Used In the Fish Above:
Pieces that are square or triangular shaped work well for faces. In addition to the pieces I used Alpha Stamps also carries these items that would work well for faces:
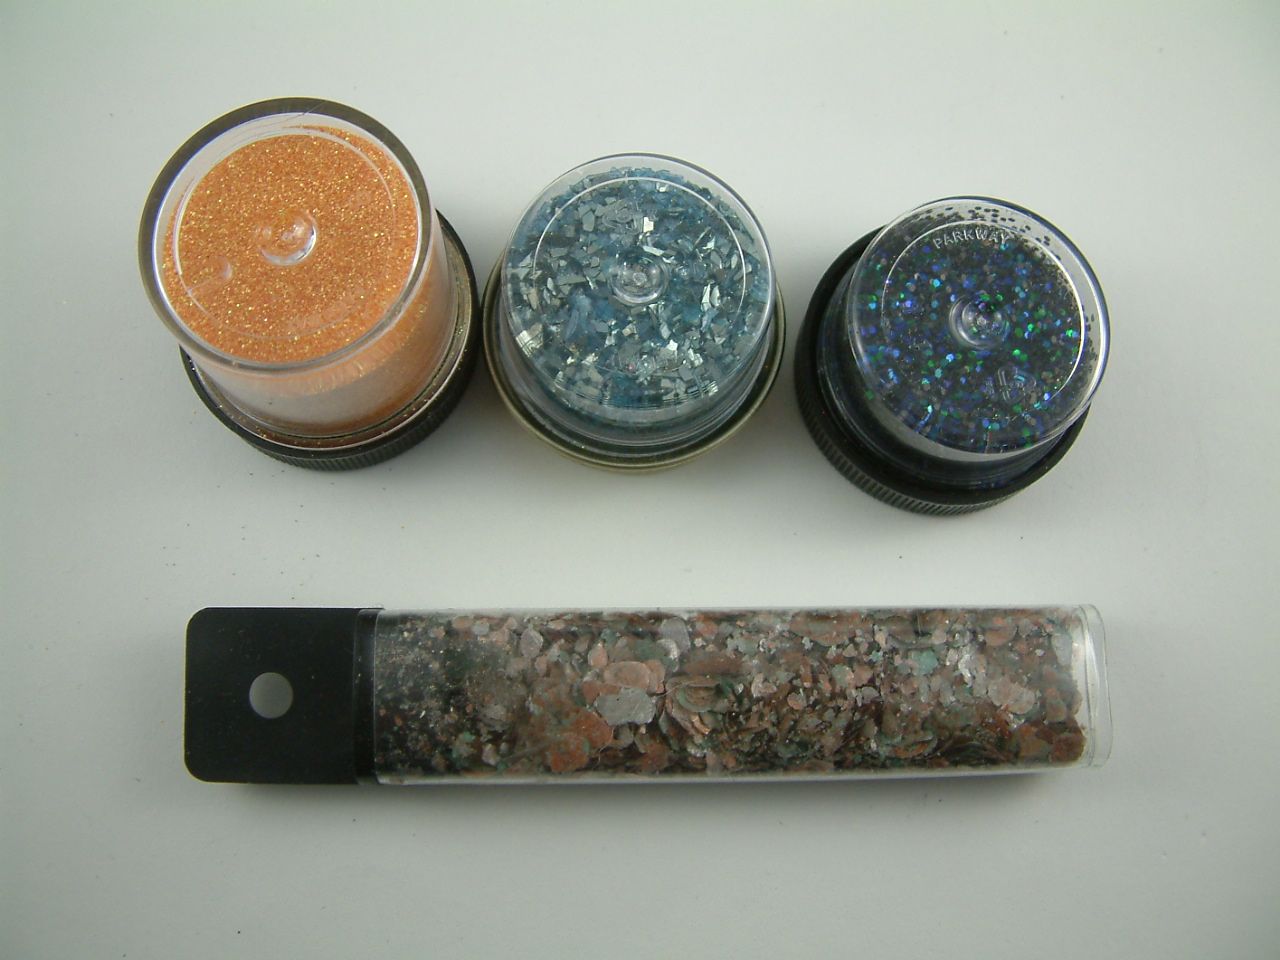
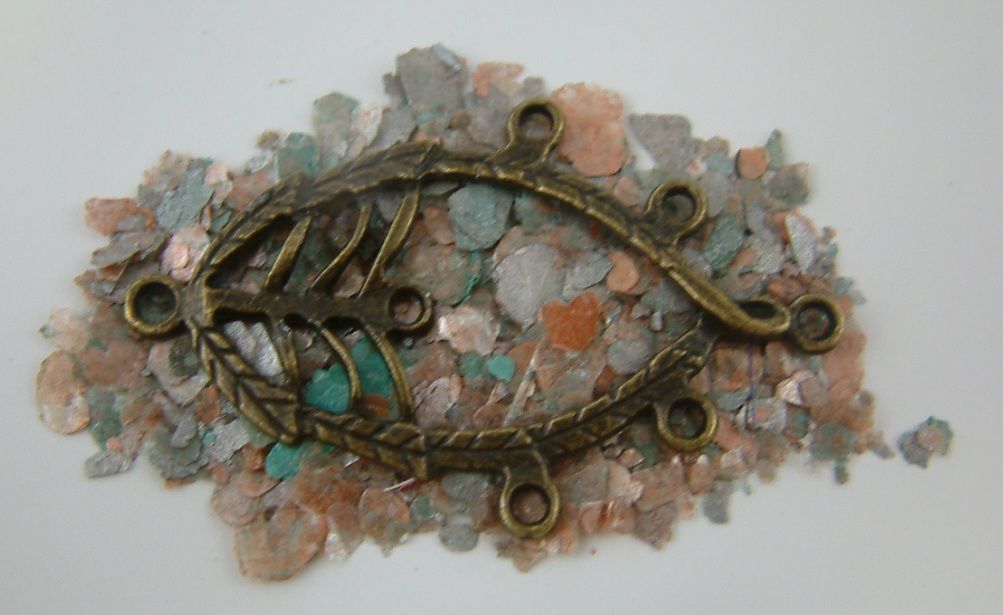
Mica Flakes and Other Mixes
To fill in the body of some of the fishes I used mica flakes or mixes of microbeads, mica flakes and glitter.
Alpha Stamps Products Used In the Fish Pictured Above:
For this fish, I first glued mica flakes to a piece of cardstock in an area slightly larger than the pieces. Next, I glued to piece to the mica flakes. Lastly, I carefully cut away the excess paper/mica flakes.
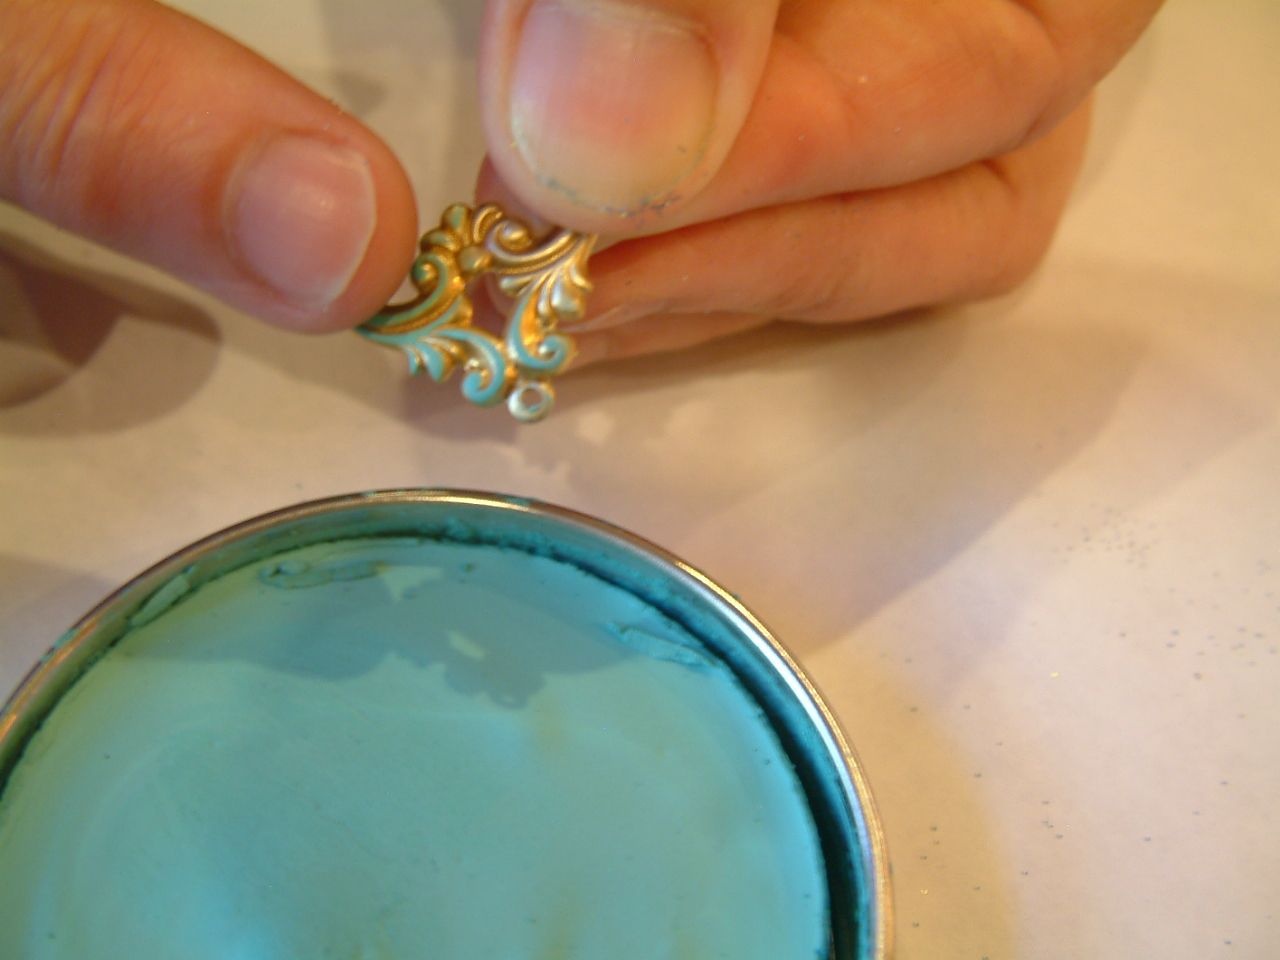
Gilders Paste –Patina
Another option to color metal and plastic is Gilder’s Paste (Alpha Stamps also carries black and copper). This stuff has the feel of shoe polish (but is a little stinky). I typically use my finger to apply it to the piece if I want just the raised areas to have color. You could also use a paintbrush for full coverage.
Assembling the Fish (Glue)
Once all the bits and bobs are decorated I glued all the pieces in place using E6000 glue. This glue is super strong and works really well with non-porous surfaces like metal and plastic. This is very important for a project like this as some of the glue points are very small (i.e. gluing the fins to the body).
Stay tuned as after I completed this book I took it apart and made something completely different. I want to assure you that in the process no art was removed or damaged and new things were added. I hope you will be excited to see what I created. I wanted to give you another idea of what to do with a book like this. I’ll be posting what I did in a couple of days. This post is long enough!