What can I say, a girl has gotta have her shoes! And for those of you who also love shoes, I
have some shoe themed projects to share with you.
In this post I’ll cover how to make mini shoe picture stands out of images of shoes, shoe picture stands from chipboard shoes and a Paris inspired paper shoe. In addition to the
tutorials, I have two new collage sheets and a new digital image set.
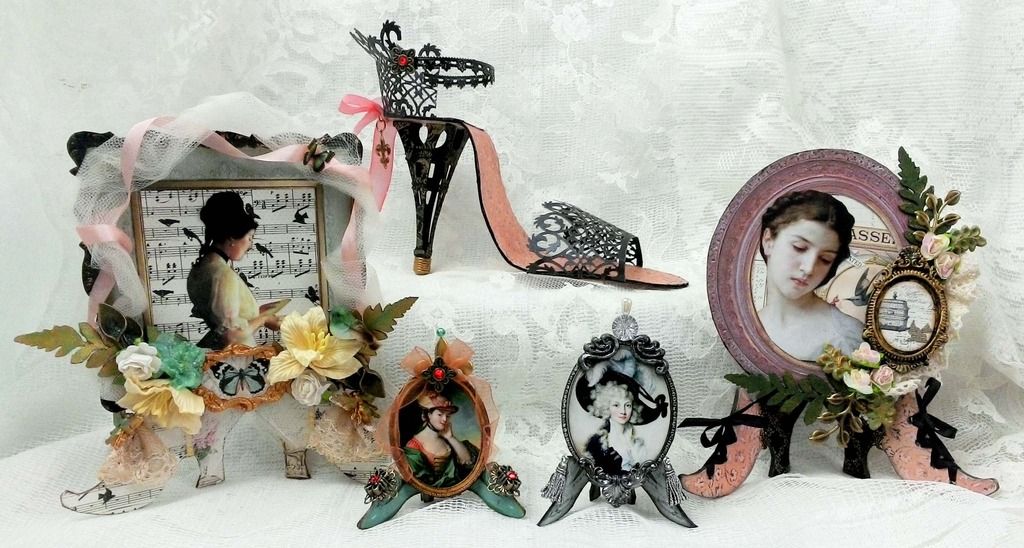
Picture stands made from shoes are great for
displaying pieces of art or photographs.
In the samples below, I am using the stands made from chipboard shoes and die-cut labels to
display collaged pieces. They would also
work great for displaying something smaller like an ATC.
These stands are simple to make with endless style and theme possibilities.
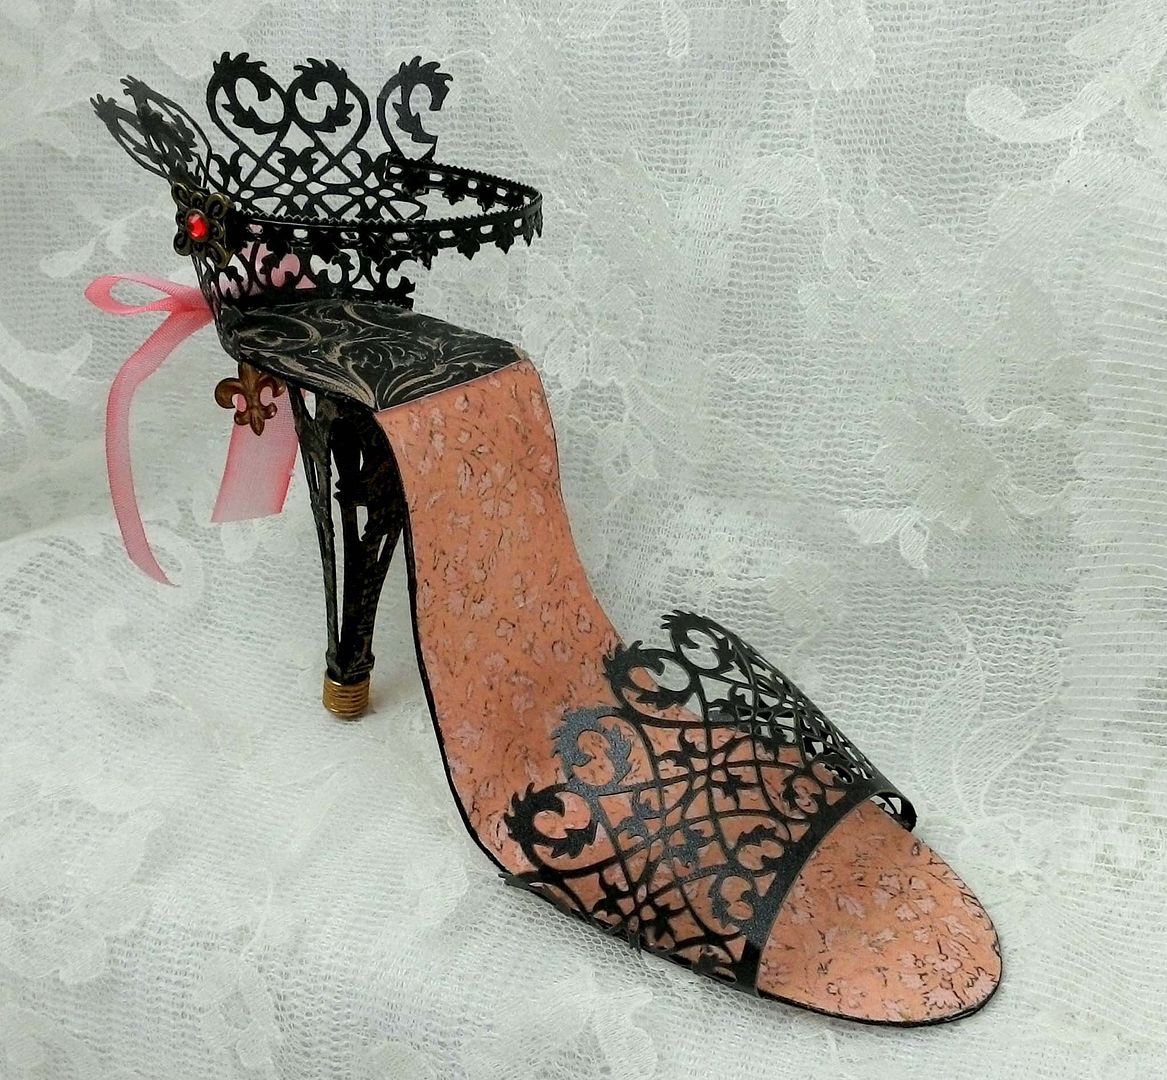
This Paris inspired paper shoe is super
simple to make and is sporting a heal made from three chipboard Eiffel towers.
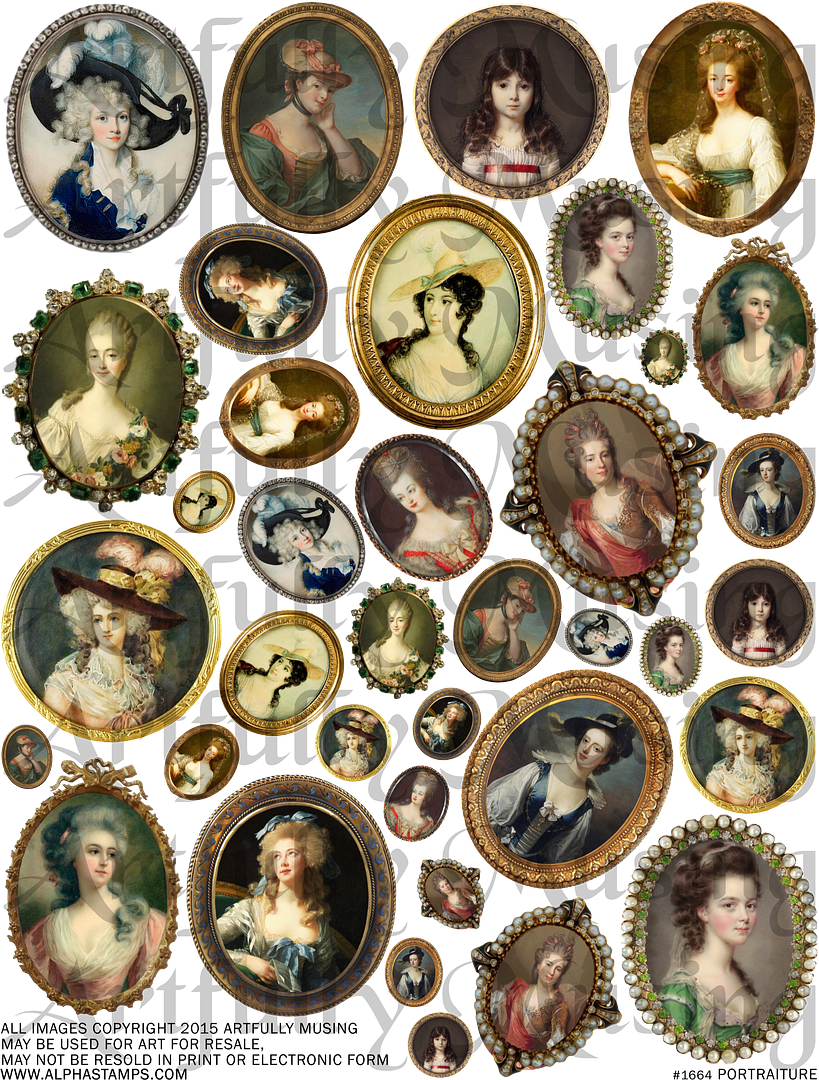
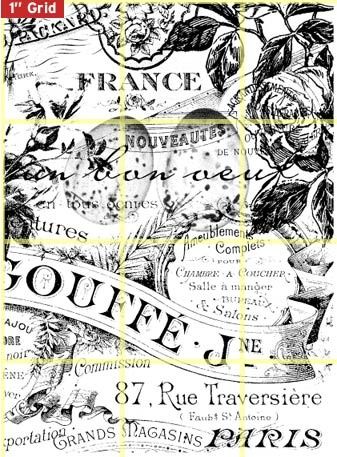
This
sheet is packed with vintage framed lovelies.
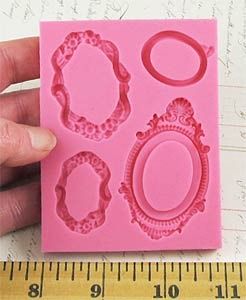
Some of the smaller images are sized to fit in the Oval Frames Silicone
Mold. For the sample projects, I printed
the sheet on glossy presentation paper.
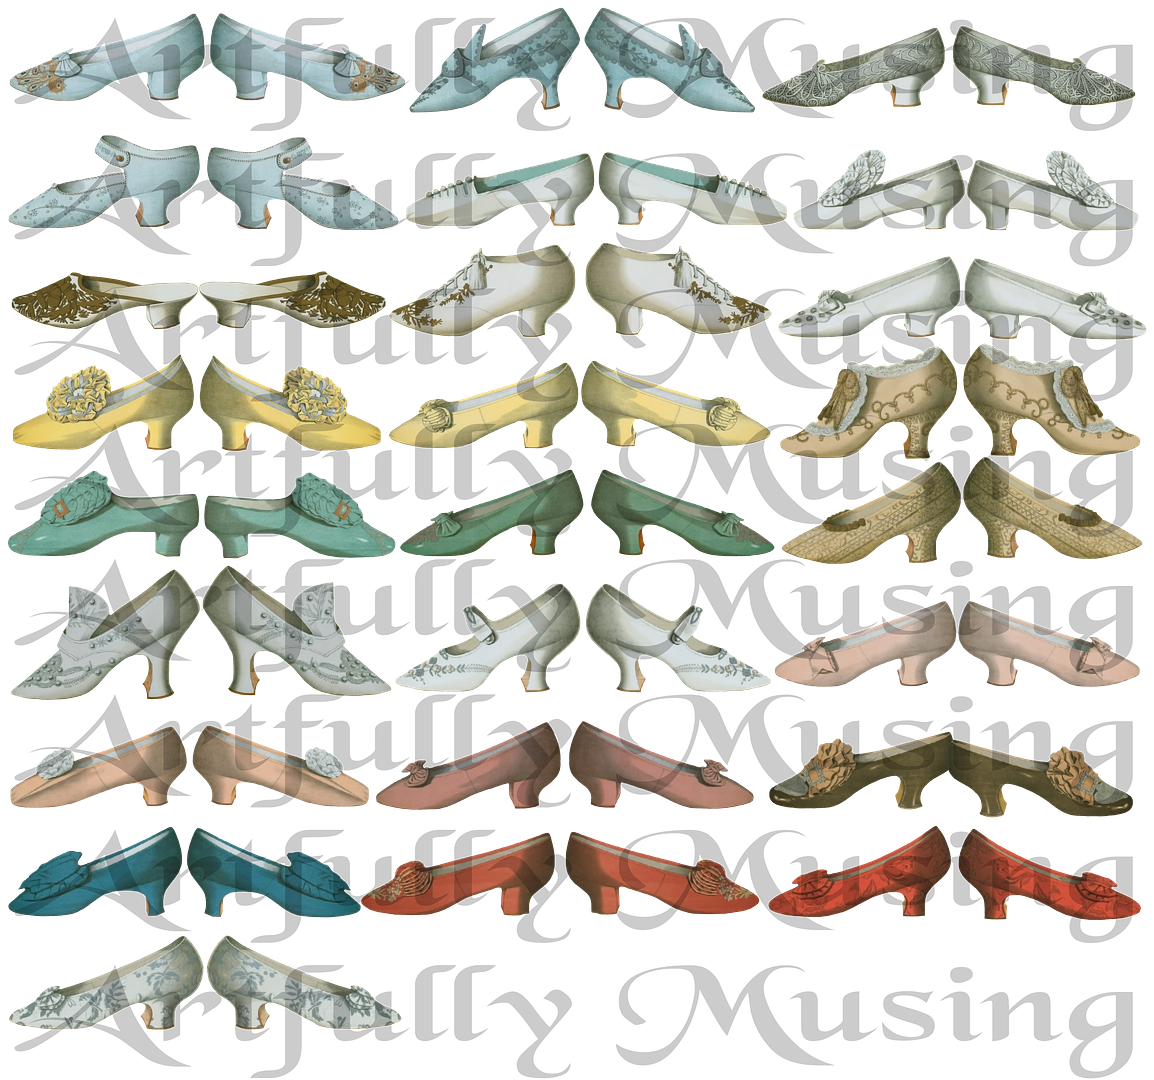
The
collage sheet contains 17 unique pairs of shoes in two sizes. I used the larger version of the shoes for
the mini shoe stands.
The digital set contains 25 unique pairs of shoes for a total of
50 images. All of the shoes on the
collage sheet plus and additional 8 pairs of shoes are included. The shoes are approximately 2 ½” to 3” wide. I made them larger than the collage sheet as
it gives you the ability to resize them with better resolution.
Digital
files can be resized, rotated or flipped as needed. The files are in a .png format. PNG formatted
files have a transparent background
making it easy to layer an image over other digital images. You can open .png files using graphic
programs like Photoshop Elements.
Digital collage sheets and digital images can be saved to your computer
and printed as many times as you wish.
CHIPBOARD SHOE STANDS
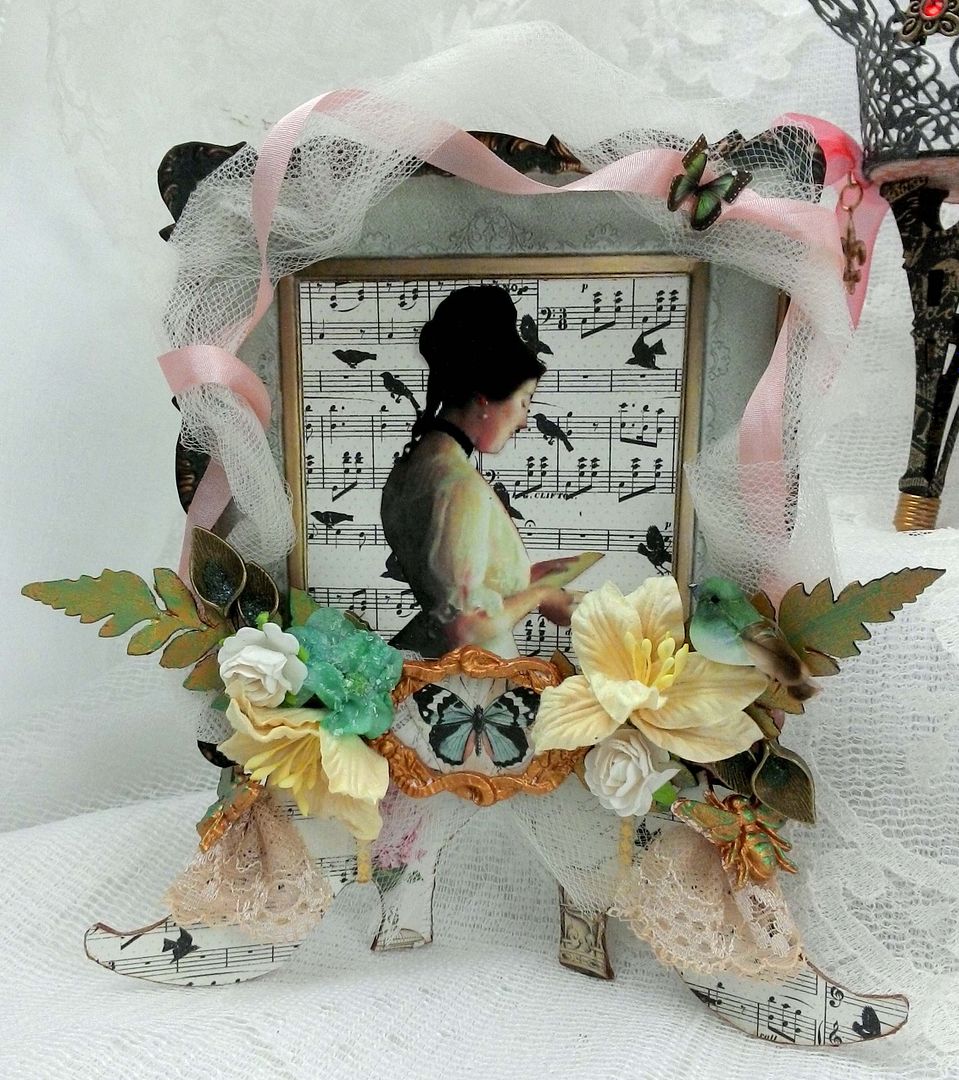
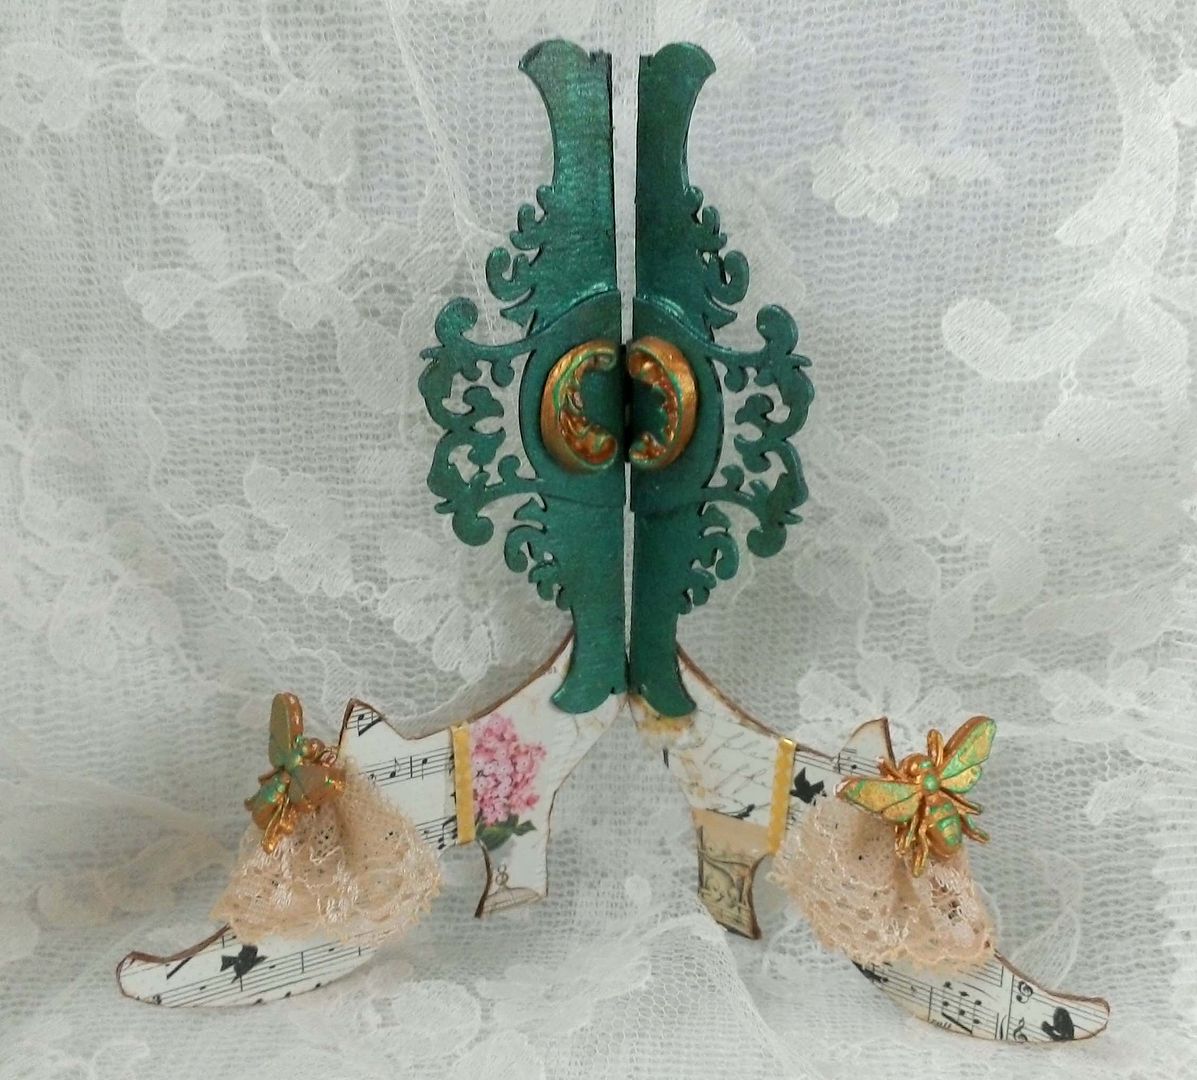
TEAL CHIPBOARD SHOE STAND & COLLAGE PIECE
For
those of you who have followed me for a few years you might recognize this
project as I have posted some samples of shoe stands in the past.
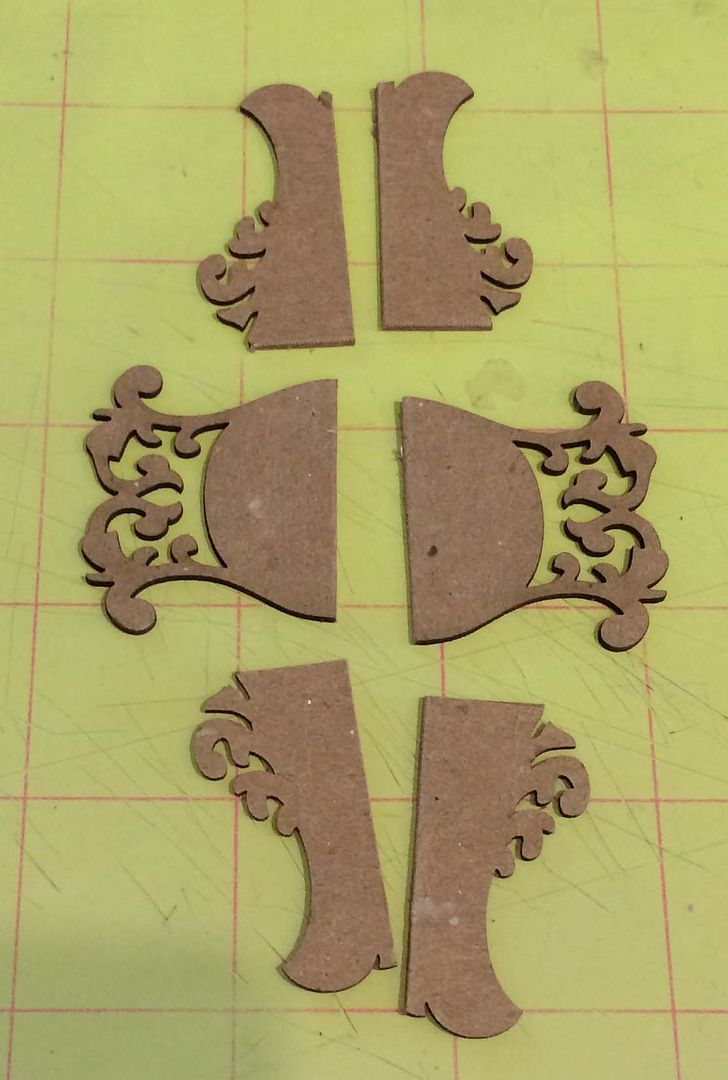
I
started by selecting two labels from the Die-Cut Stackable Labels set (there are six to choose from). I choose two so that the back of the stand would
be high enough to support the art piece.
Using a ruler and an X-Acto knife I cut the long piece in half horizontally
and vertically which resulted in 4 pieces.
I cut the wide piece in half.
Next, I glued the chipboard pieces together.
I
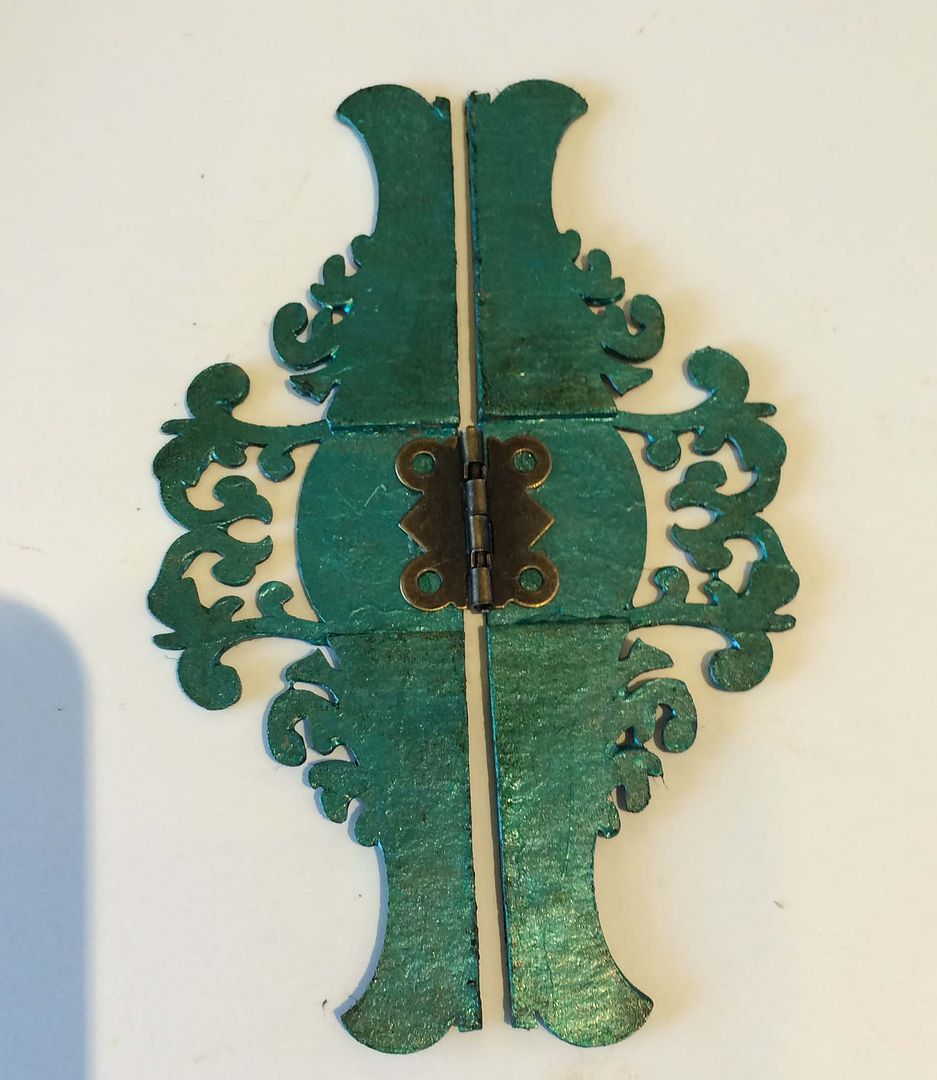
painted the chipboard with Peacock Liquid Pearls.
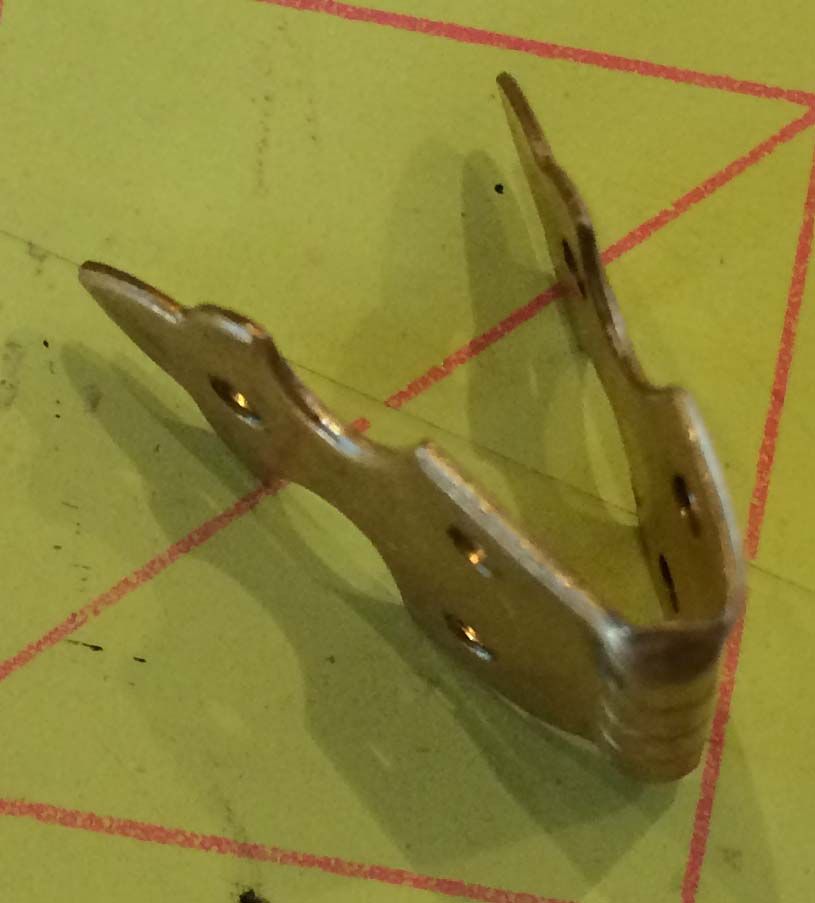
I glued
the hinge to the back of the chipboard using E6000 glue. In the picture below you can see how I was
able to make the back longer by cutting it in half and gluing the half to the
edges of the center section.
NOTE: When you attach the hinge, be sure to leave a
gap of at least 1/8” or more. If you don’t
leave a gap you won’t be able to position the sides to make a picture stand.
You
could also add brads to the hinges if you wish.
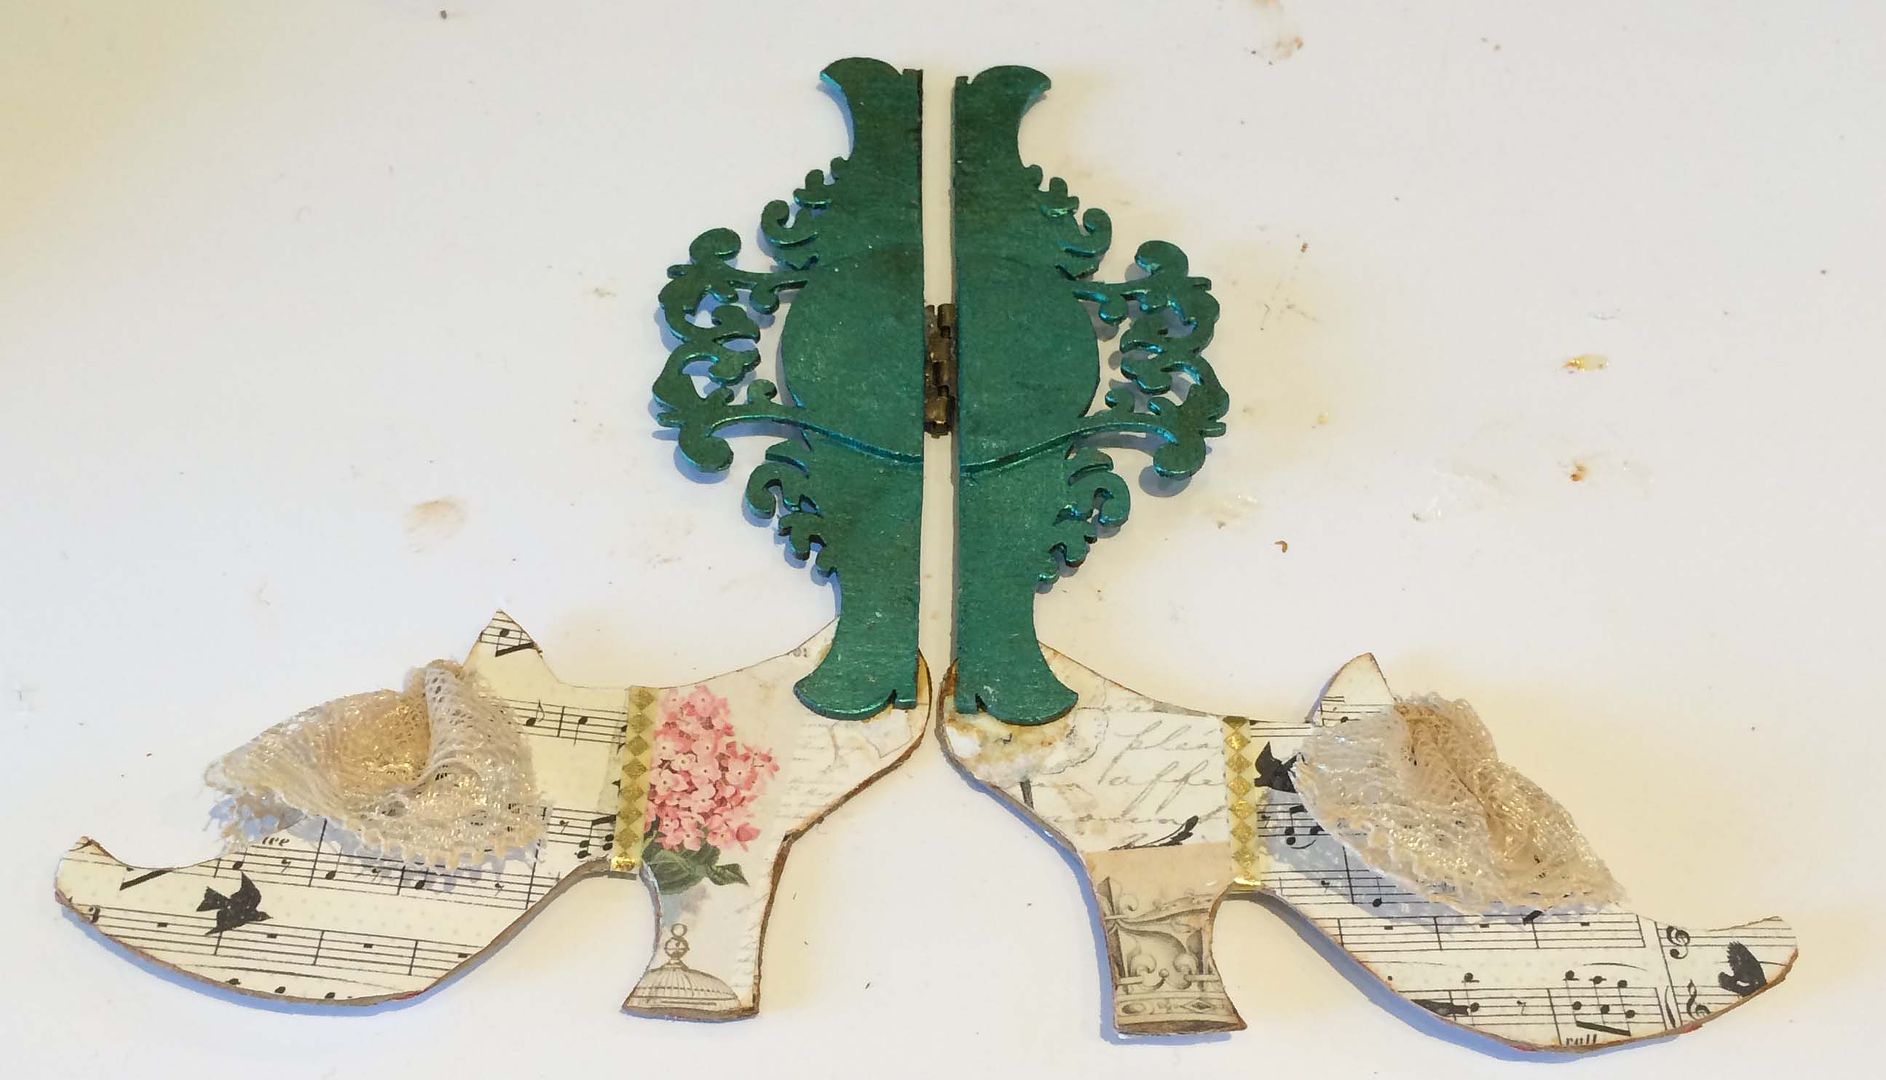
Next,
glue the chipboard back to the chipboard shoes.
Notice the placement of the chipboard on the shoes in the picture
below. Also notice how the bottoms of
the shoes are lined up. Before gluing
the back to the shoes, I like to use clips to clip the back in place to make
sure that the picture stand will “stand” and that everything is lined up.
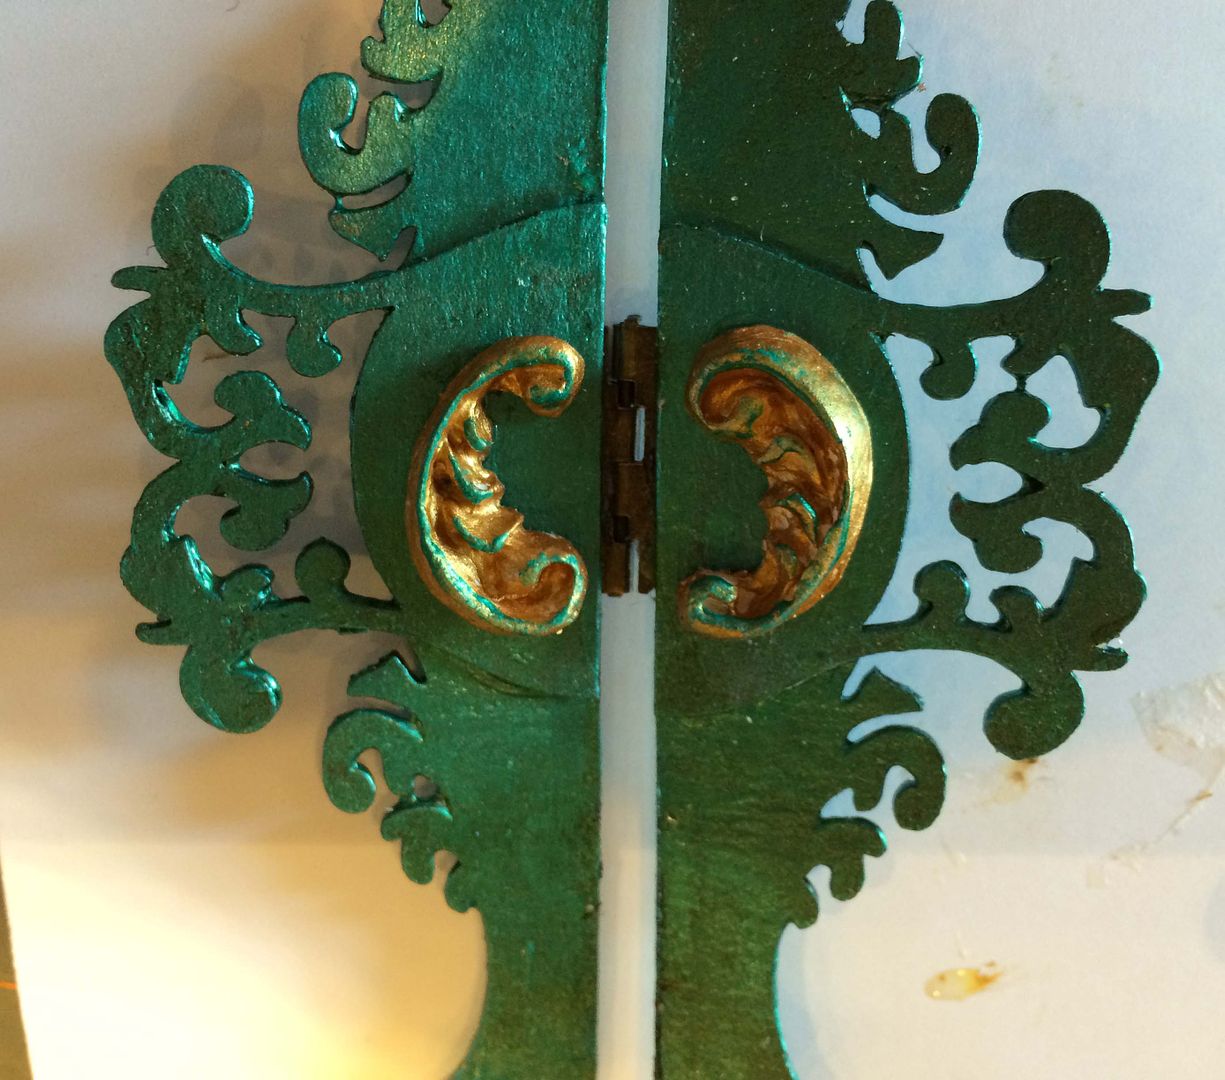
To the
chipboard back, I added clay swirls made from the Small Flourishes silicone mold. I painted the swirls gold, then using my
finger I lightly brushed on some of the Peacock Liquid Pearls paint.
I
decorated the chipboard shoes with paper from the Harmony Paper Pad and Gold
Harlequin Tape. On the top of the shoes
is gathered lace.
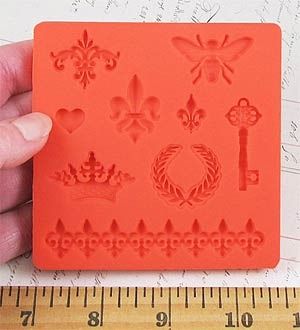
The
final decorative touch on the shoes is clay bees made from the Royal Icons
Silicone Mold.
I painted the bees using
the same technique as I used to paint the swirls.
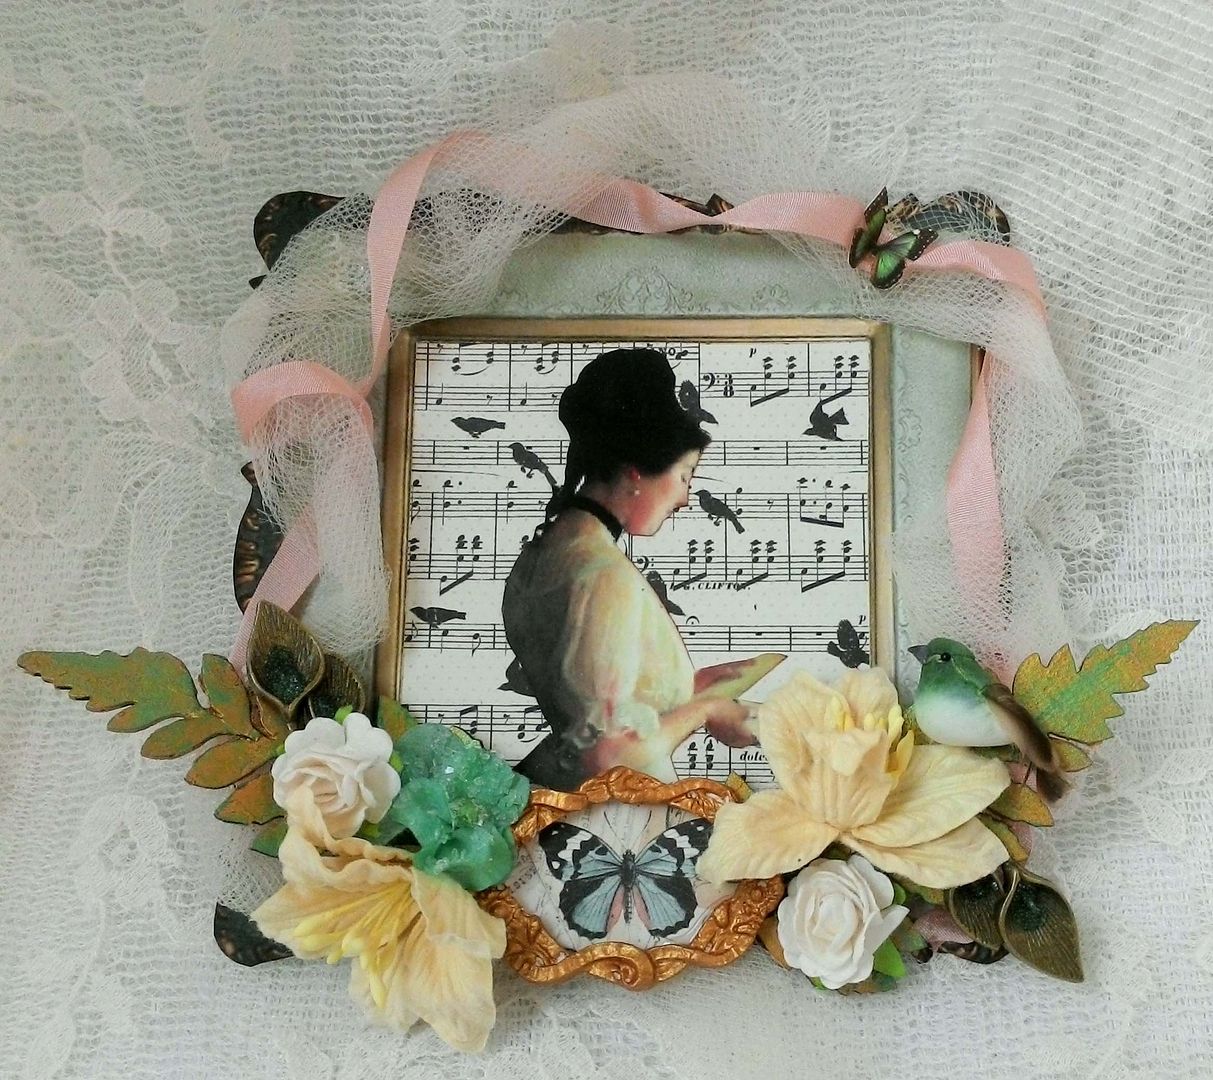
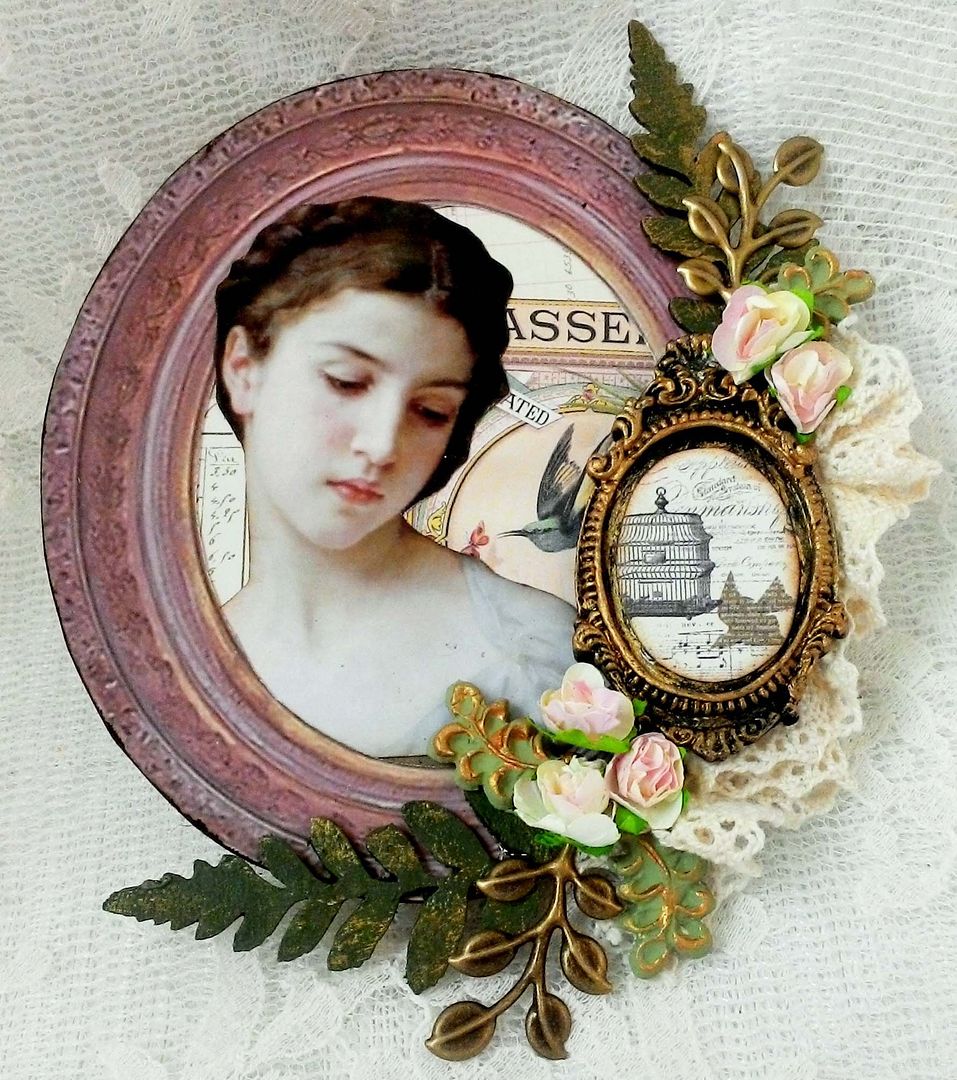
The
frame of the piece is from the Elegant Frames Digital Image Set. I accented the frame with ribbon and
tulle. I used the Harmony paper in the
background and the image is from the Go Away, I’m Reading collage sheet. The frame at the base of the piece is paper
clay that was made using the Oval Mirror Frames Silicone Mold.
The large leaves are die-cut chipboard. Brass leaf charms, paper flowers and a bird
complete the piece.
Alpha Stamps Products Used for the Teal Chipboard Shoe Stand & Collage Piece
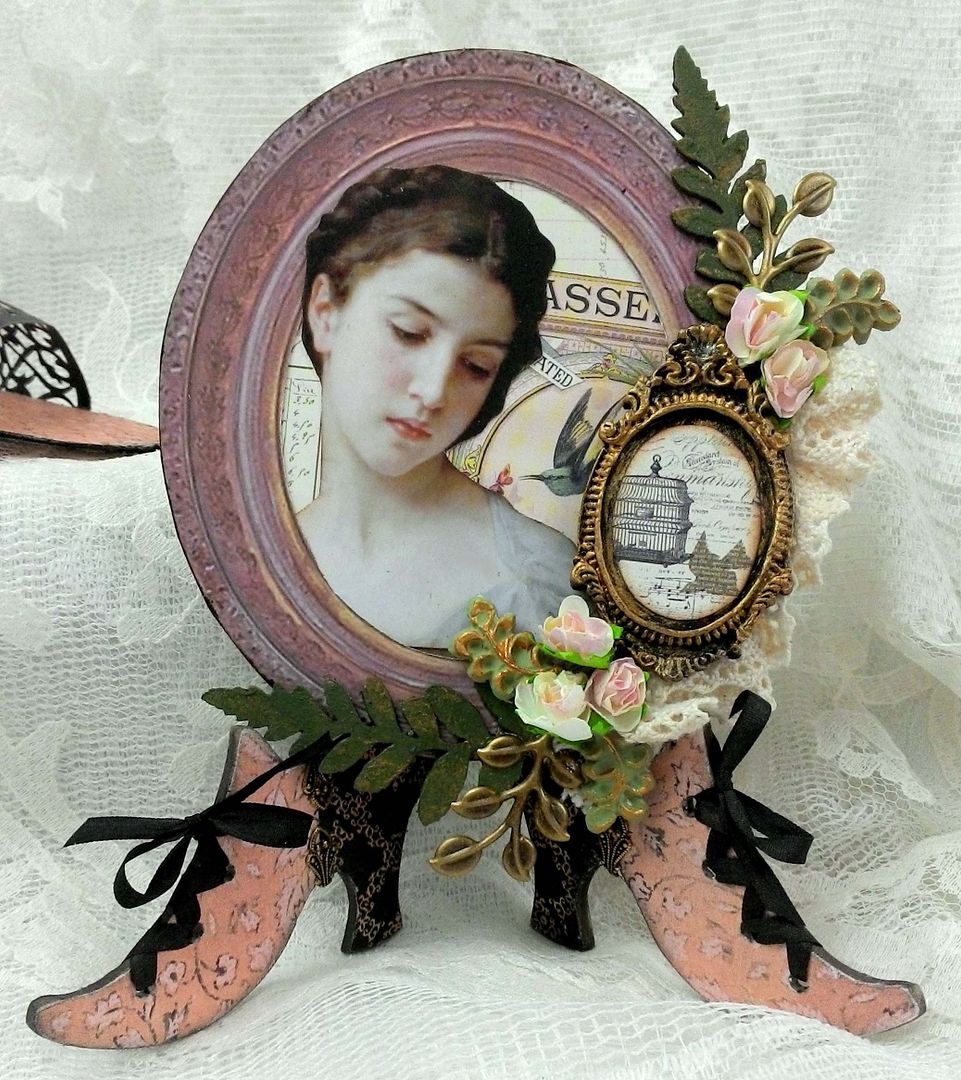
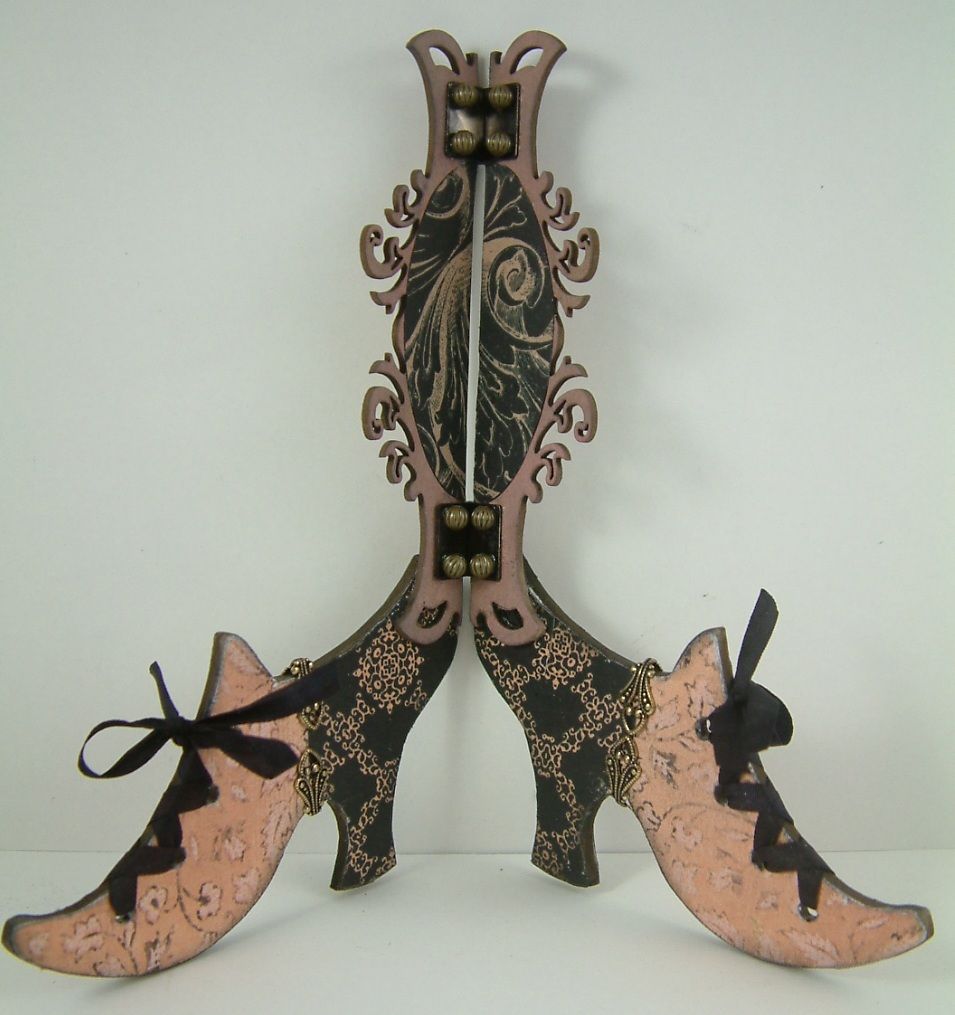
PINK CHIPBOARD SHOE
STAND & COLLAGE PIECE
The
shoe stand in this example is actually one I made a few years ago using the
Alamanc paper pad. Alpha Stamps was able
to get their hands on some more of the paper so I thought I would include this
stand as an example too. I also created a
new collage piece to go with the stand.
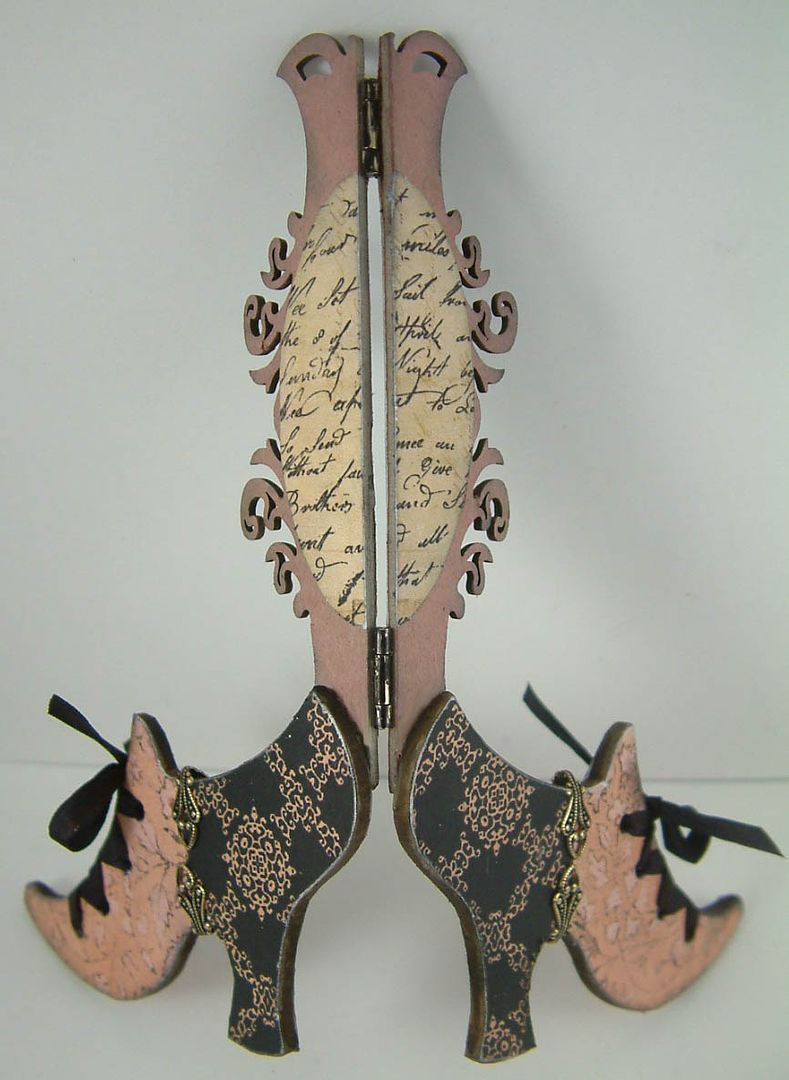
This shoe has a long label for the back which unfortunately is no
longer available, but you can achieve the same result by combining two labels, as
I demonstrated with the teal shoe stand above.
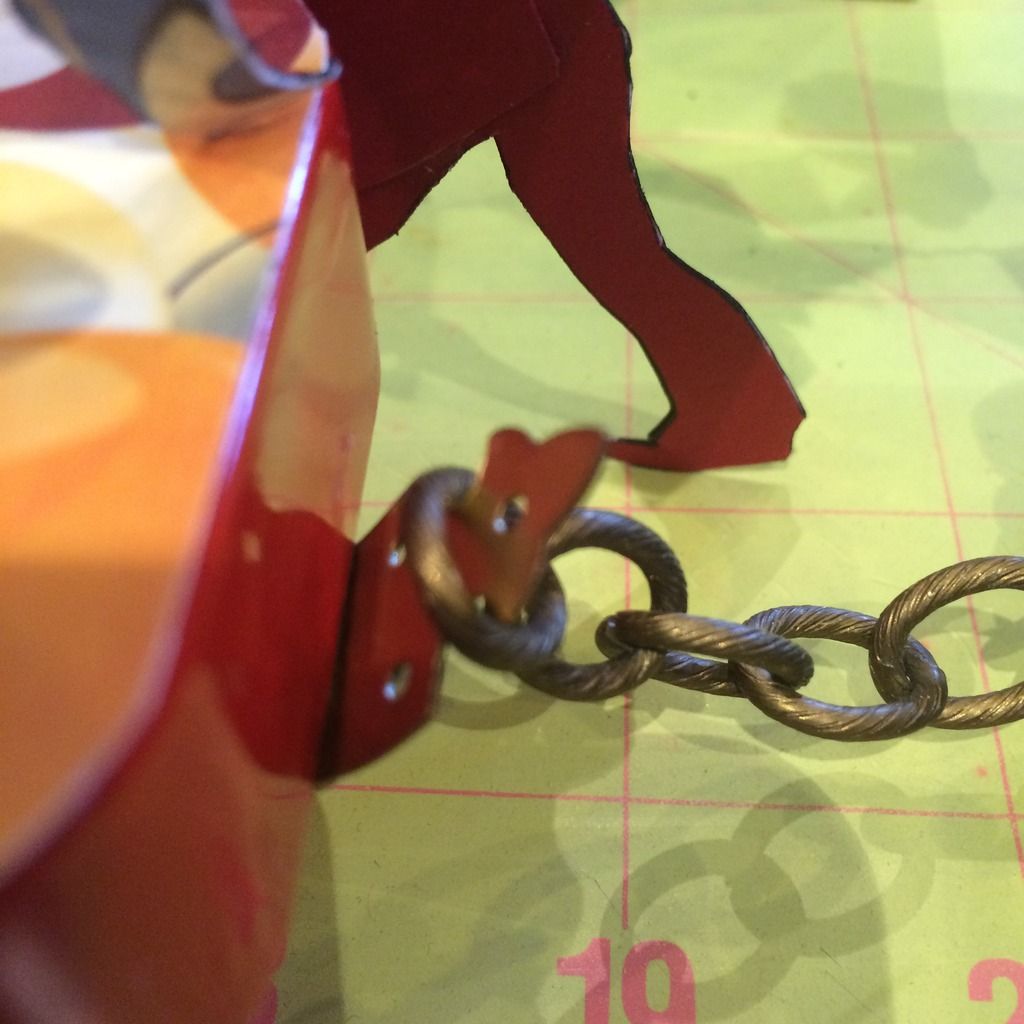
In this
example, I used two small hinges that are on the front instead of the
back. The holes of the hinges are
covered with a bead. If you are going to
use beads just make sure that they are not too large that they prevent the stand from
bending together.
A cute
decorative touch for the shoes is to punch holes and lace them with
ribbon. I also added fold over bails to
the center of the shoes where the different papers meet.
The
frame piece is from the Elegant Frames Digital Image Set and the paper is from
the Harmony paper pad. The large leaves
are die-cut chipboard and the small light green leaves are made from paper clay
using the Small Flourishes Silicone mold.
In the background is gathered lace.
The small black and gold frame is made from paper clay using the Oval
Mirror Frames Silicone mold.
Alpha Stamps Products Used for the Pink
Chipboard Shoe Stand & Collage Piece
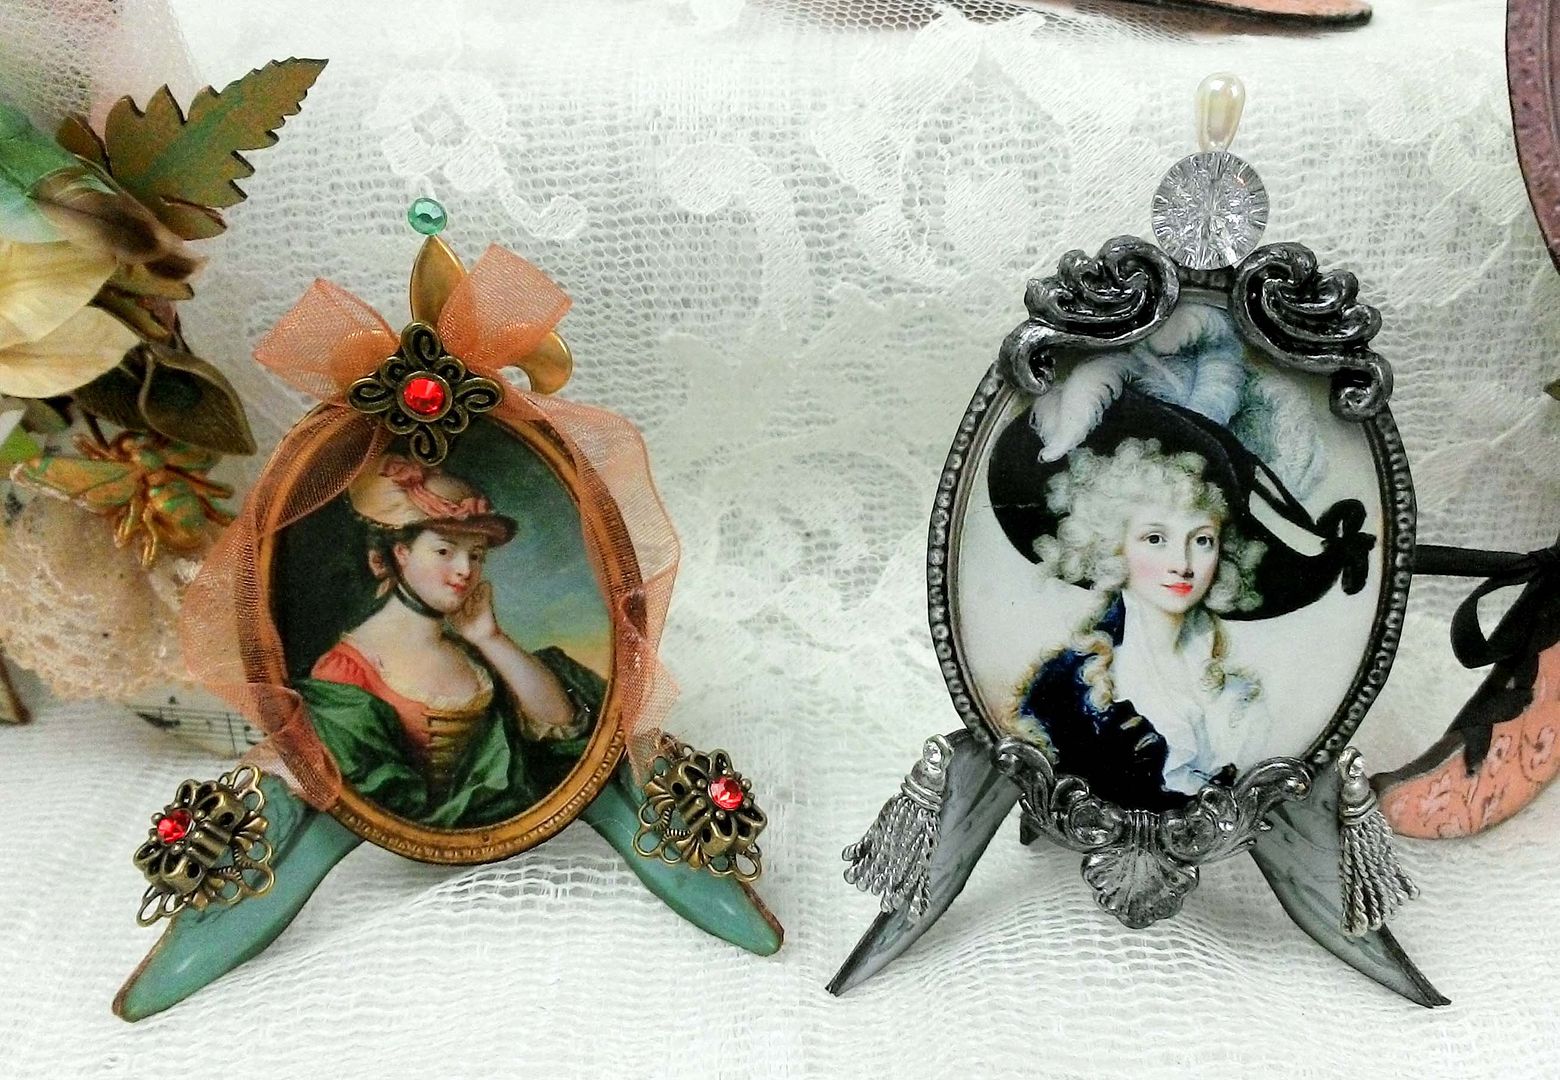
MINI SHOE STANDS
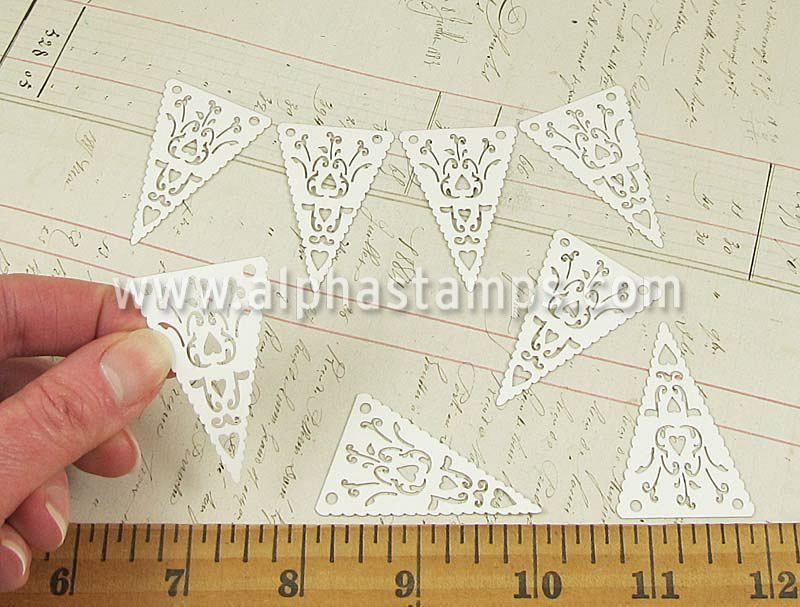
These
mini shoe stands are quick and easy to make.
All you need are images of shoes and a piece of filigree.
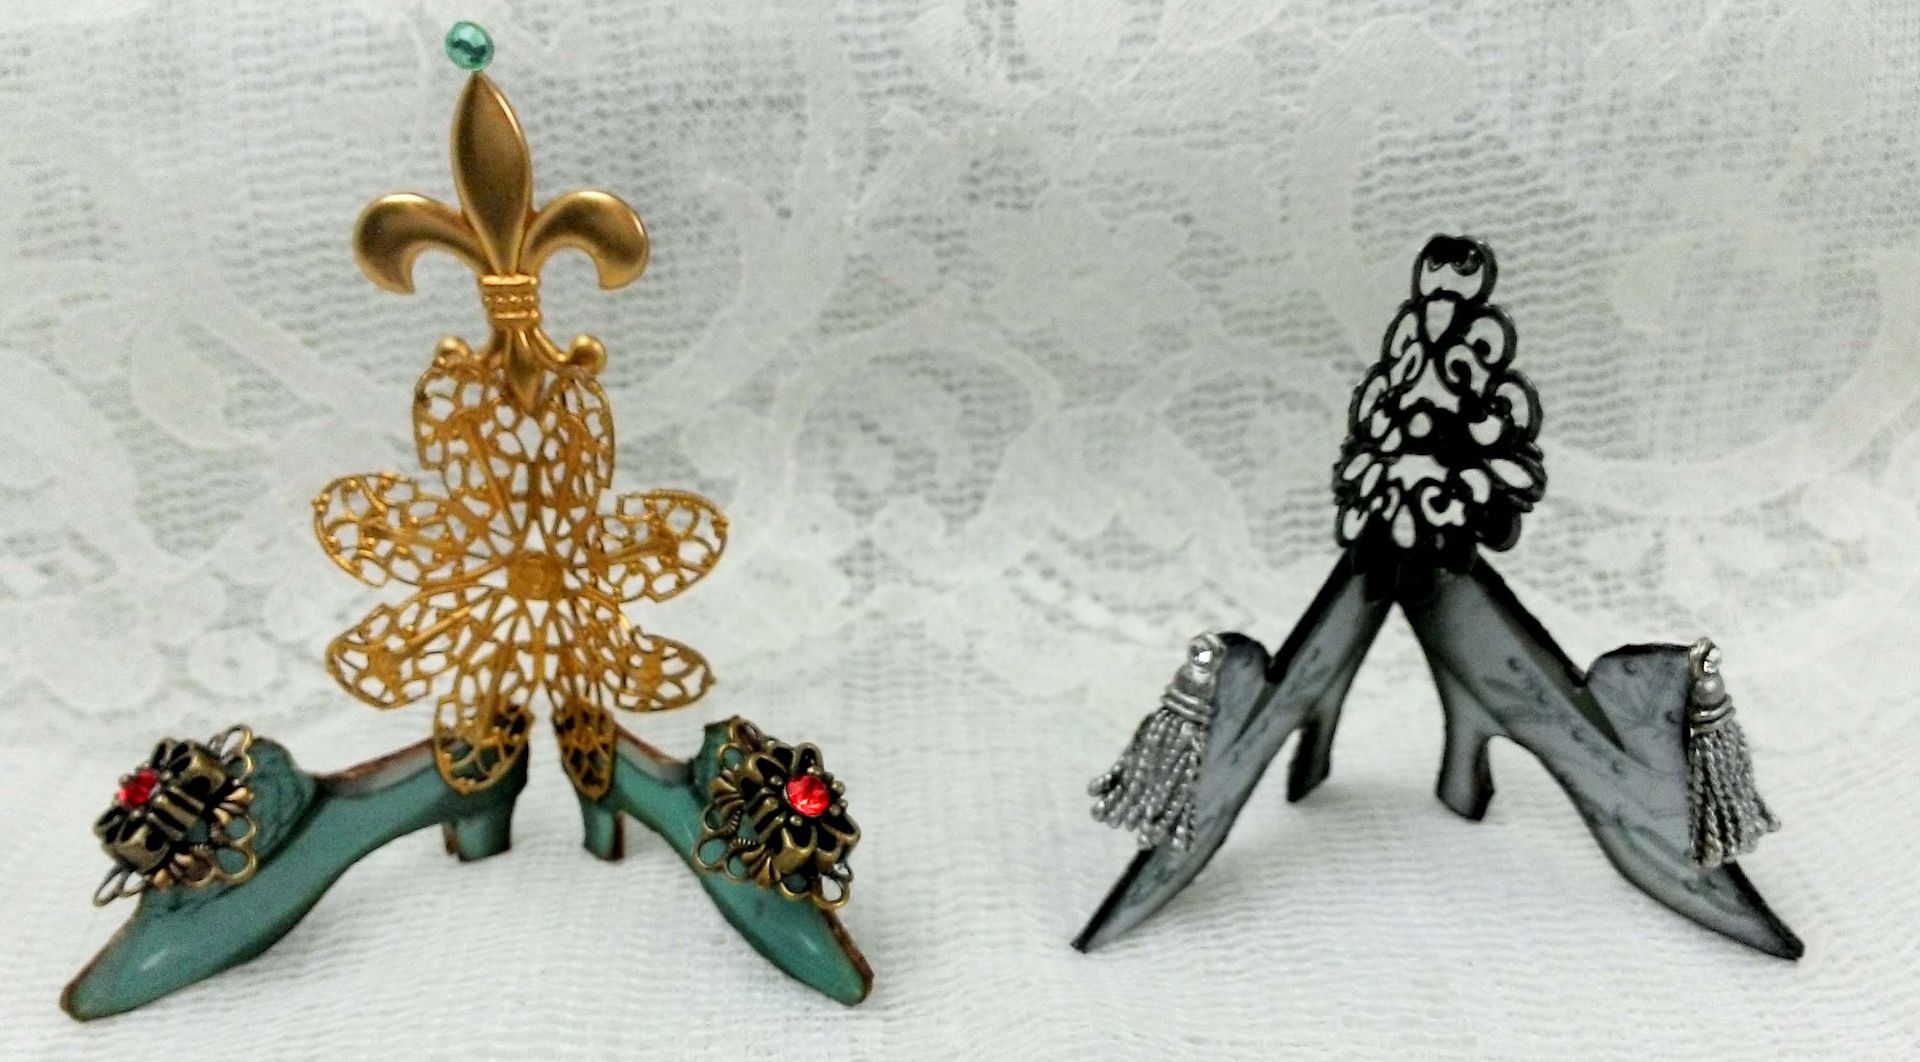
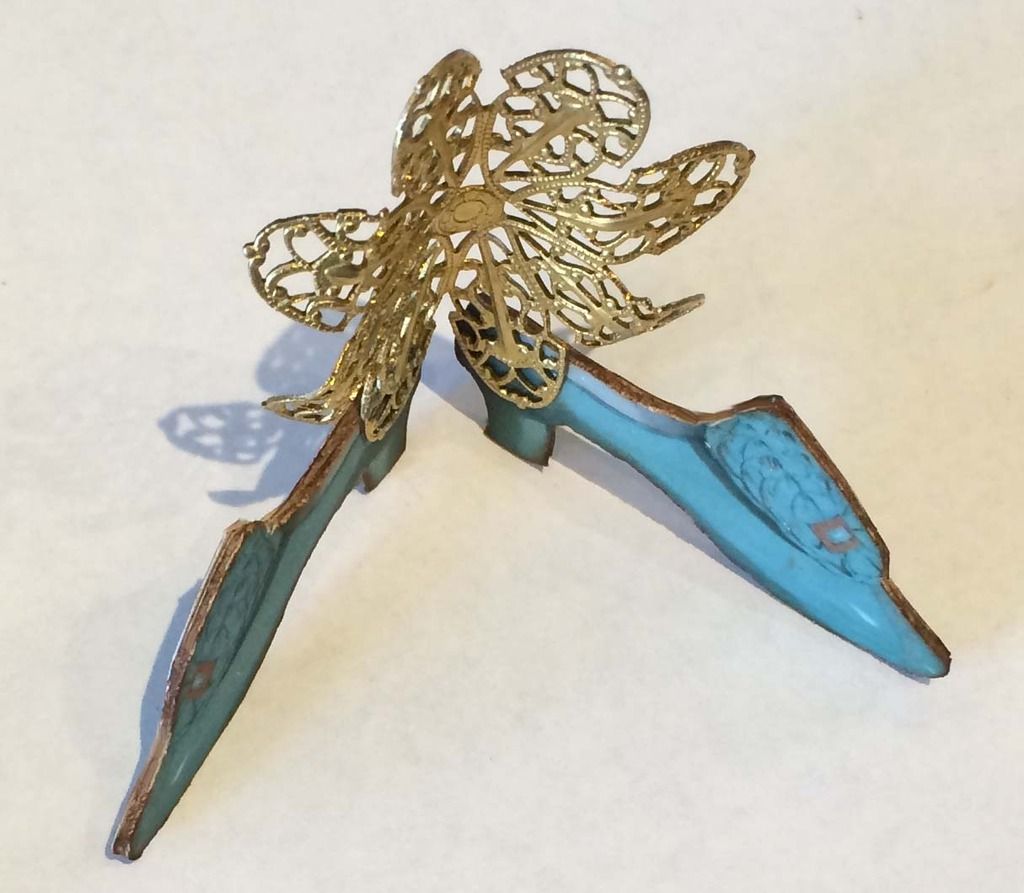
MINI TEAL SHOE STAND
WITH PORTRAIT
The
overall size of the stand is 3” x 3”.
I used 2
sets of the larger shoes from the Elegant Shoes collage sheet. I glued one set to a piece of card stock and
cut them out. Next, I cutout the other
set and glued them to the card stock side of the first set. What you should end up with is three layers
consisting of the shoe image on the front and back and a piece of card stock in
the middle. Instead of card stock you
could use very thin chipboard. You want
the shoes to have some stiffness but not so thick that you can’t cut them out. Next, I
inked the edges.
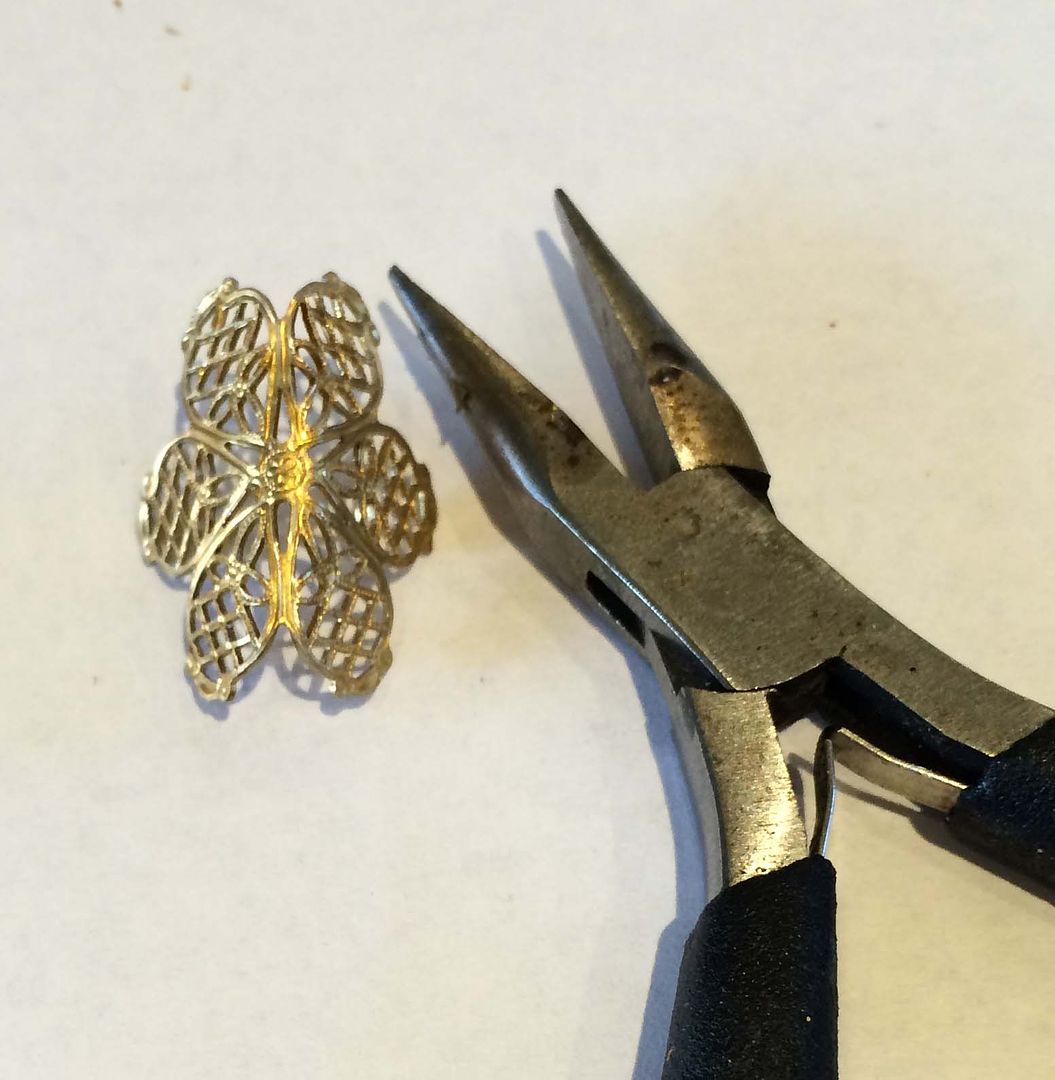
To
connect the shoes I used a piece of filigree which I bent. I suggest that you make the piece that you
are going to put the stand first, that way you can use it to decide how much to
bend the filigree. The more you bend it
the closer the shoes will be together.
You want to make sure that the shoes are close enough to hold your
piece.
For the
filigree in this example, I first bent it in half and then bent out the
edges. First, I like the way it looks
(edges bent out) and if I didn’t do this the filigree would pushed the picture
too far forward.
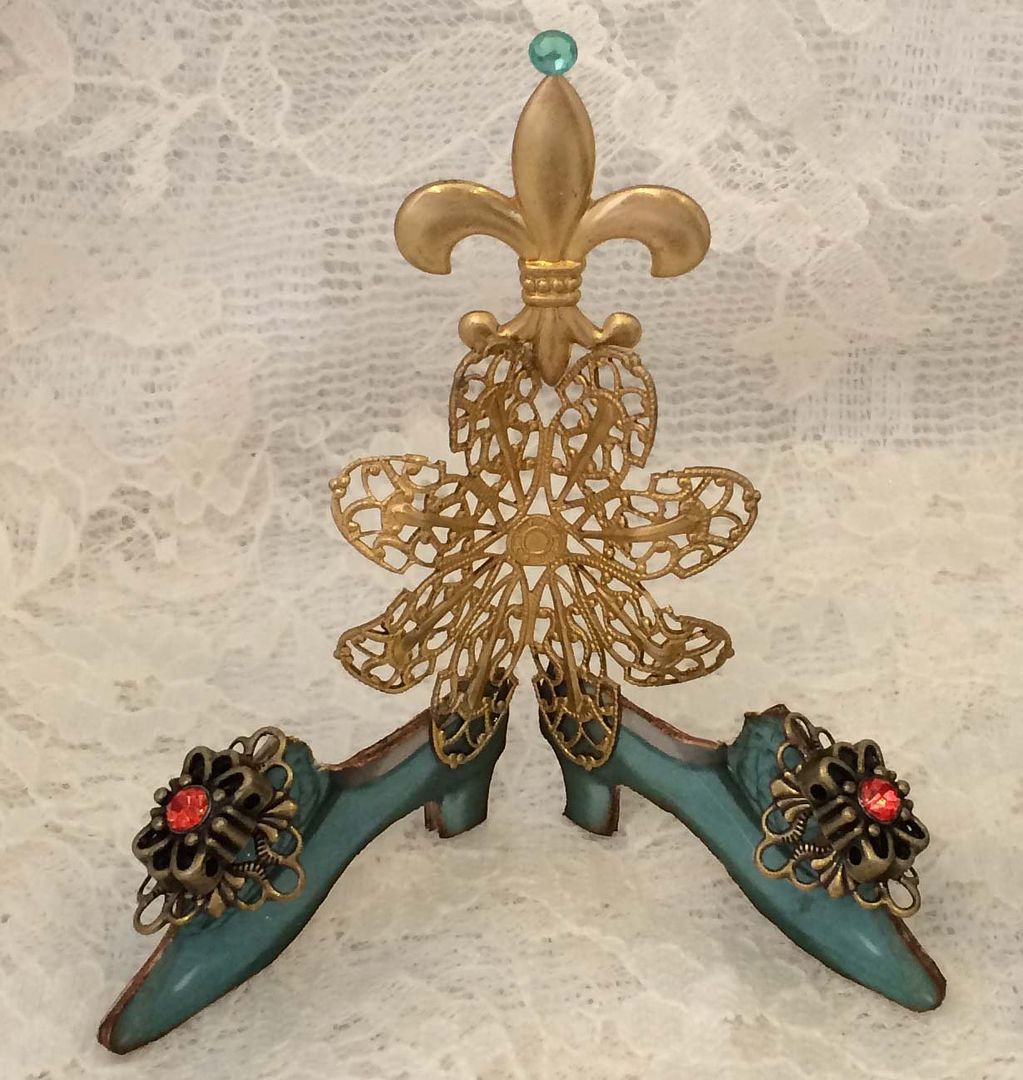
For
decoration on the top of the shoe, I bent a piece of filigree and topped it with
a slider bead.
To the
filigree I added a fleur de lys and a rhinestone.
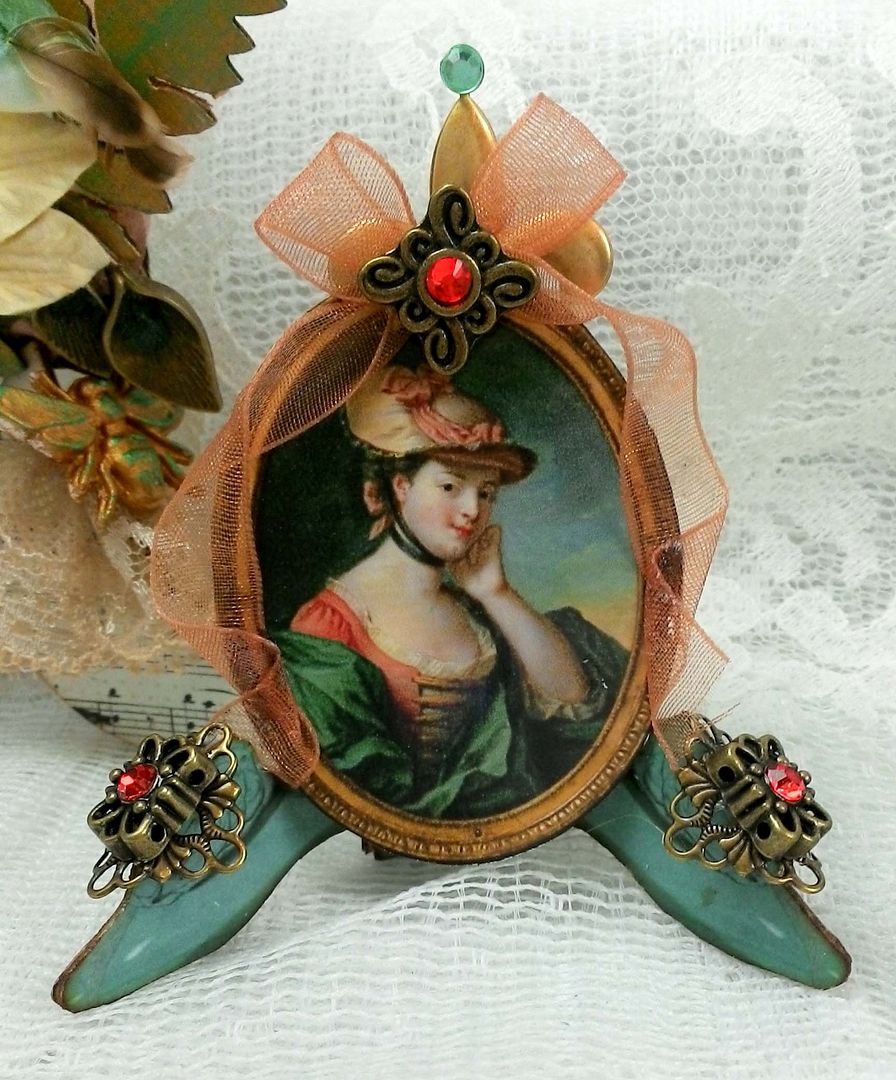
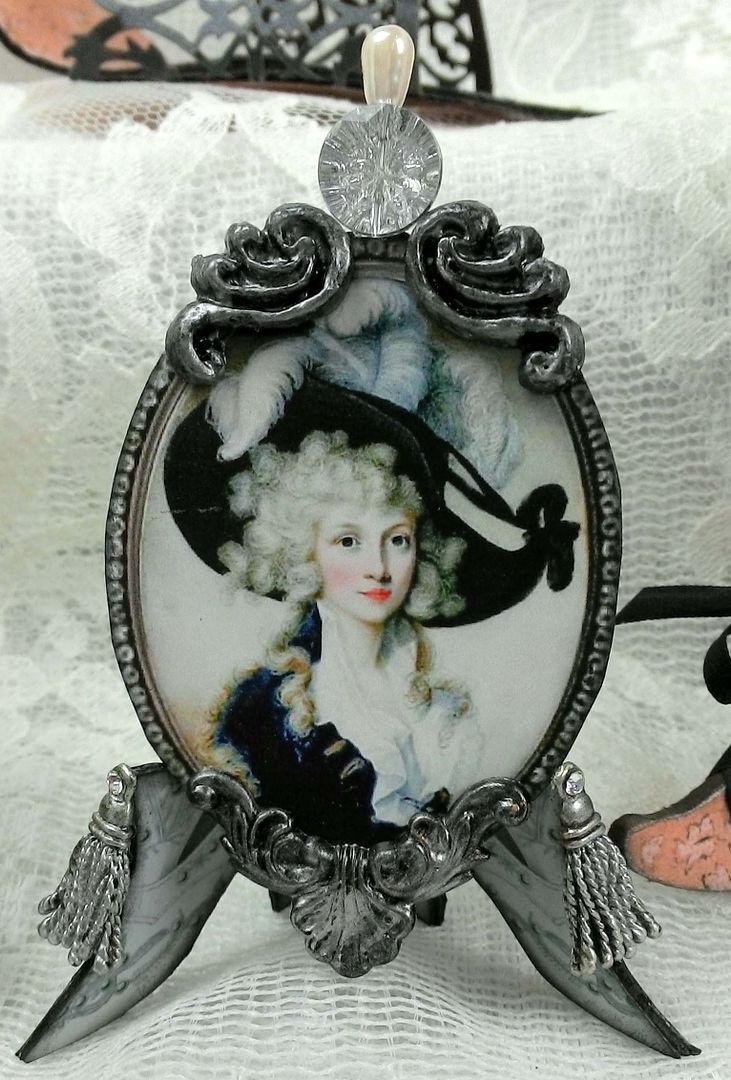
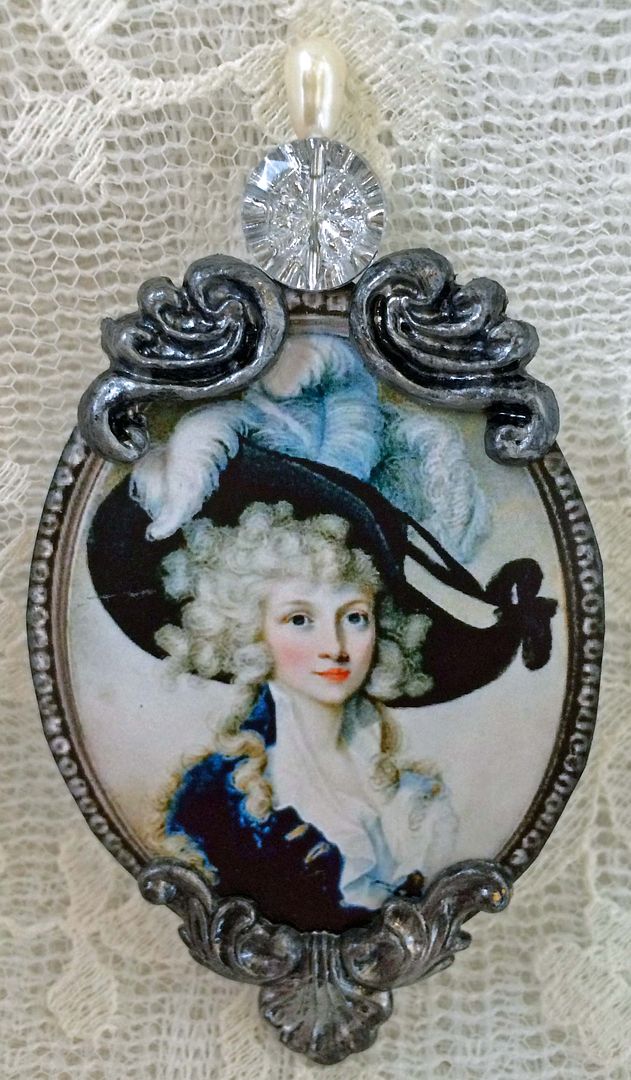
For the
art piece, I used one of the portraits from the Portraiture collage sheet, some
sheer ribbon and another slider bead.
Alpha Stamps Product Used For the Teal Shoe
Stand and Portrait
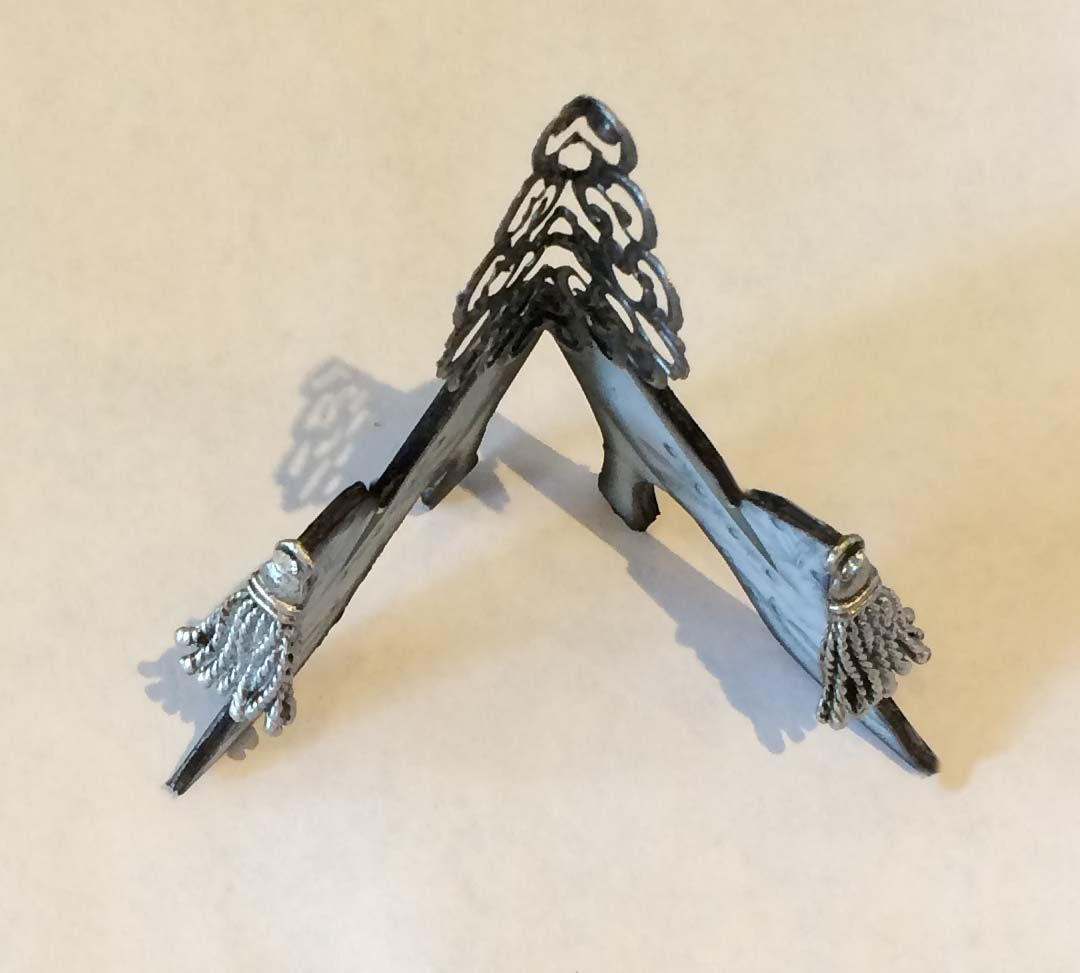
MINI BLUE SHOE STAND
WITH PORTRAIT
This
shoe stand was constructed the same way as the teal stand. The only difference being the piece of
filigree. You can see from the picture
below that I bent the filigree in half.
The tops of the shoes are decorated with tassel charms which I painted
with Pewter Liquid Pearls.
For the
art piece I used one of the portraits from the Portraiture collage sheet, a
pear shaped stickpin which is inserted into the shaft of a button from my stash,
paper clay swirls made from the Small Flourishes silicone mold painted with the
pewter paint and a brass corner also painted with the pewter paint.
Alpha Stamps Products Used for the Blue Shoe
Stand and Portrait
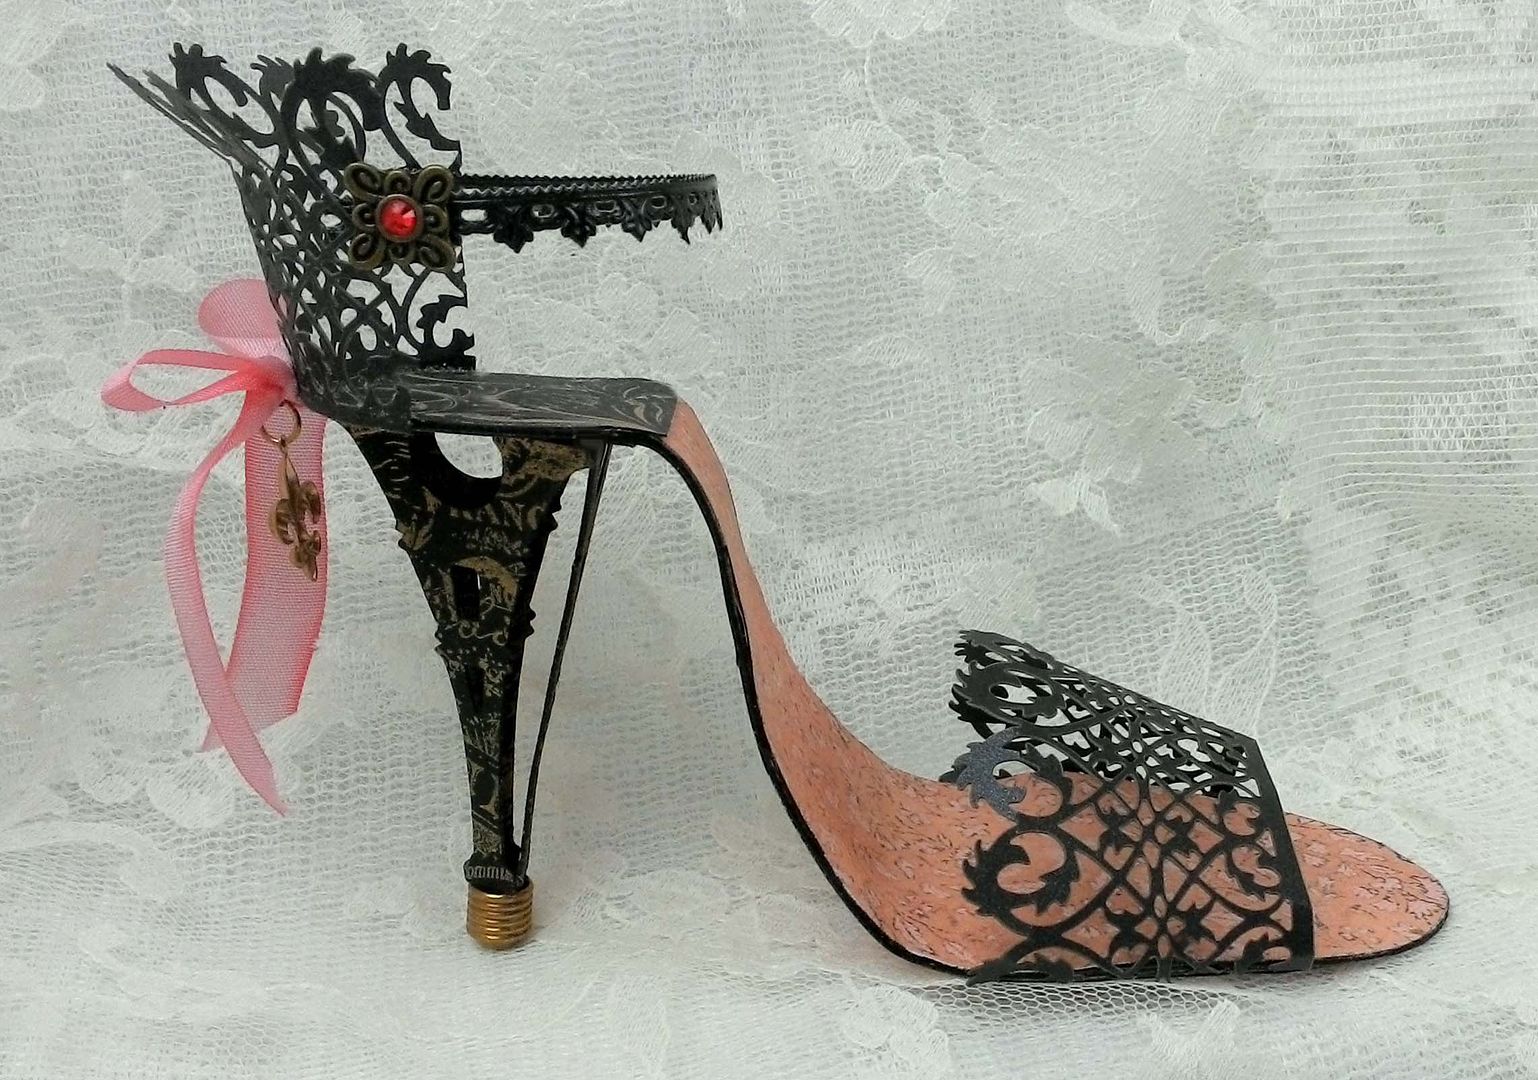
PARIS PAPER SHOE
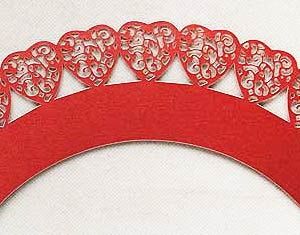
The
inspiration for this shoe is the Die-cut Black Wrought Iron Fence Wrap. It’s been sitting on my work desk for a
couple of months waiting for inspiration to hit. At the same time I’ve been thinking about
making some paper shoe patterns (I know some of you have been asking for me to
do paper shoes). As I was working on a
pattern I started thinking “why not make this really simple so that more people
will want to give it a try”. By using
the wrap it takes away some of the complexity of cutting and fitting together a
pattern.
The
only pattern for this shoe is for the sole .
One fence wrap gives you enough material for the toe of the shoe and the
back of the heal.
Start
by printing out the shoe pattern below.
Notice that there is a direction to the pattern. Both of the feet are slightly curved in the
same direction.
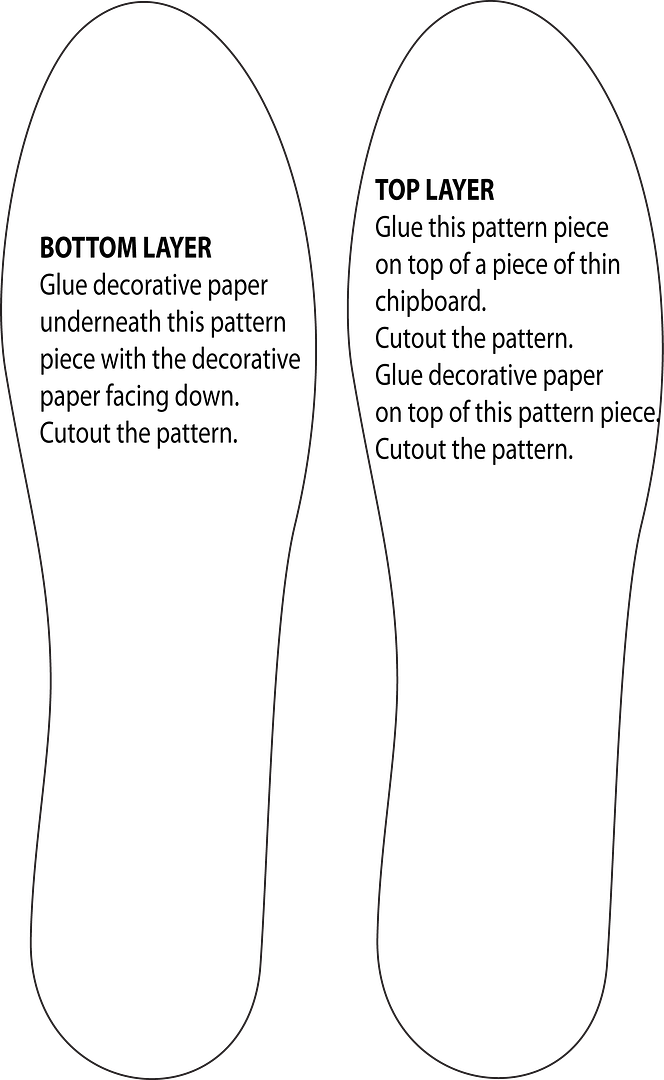
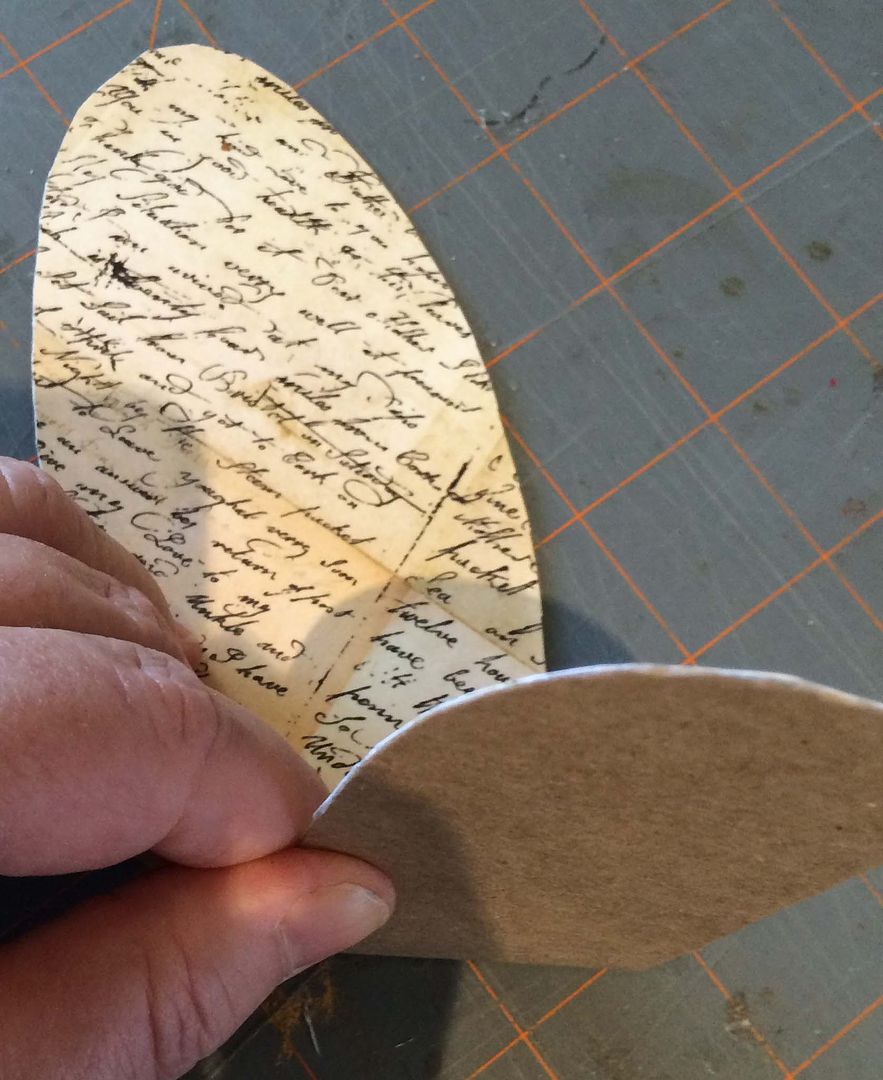
The bottom layer of the sole will be made
up of decorative paper and a pattern piece.
The top
layer of the sole is made up of a pattern piece, a piece of thin chipboard
or cardstock and decorative paper.
The two
layers will be glued together to make the sole of the shoe. The layers must be glued together in the
right order.
Bottom Layer
Glue
decorative paper underneath the pattern piece with the decorative paper facing
down. Cut out the pattern.
Top Layer
Glue
the pattern piece on top of a thin piece of chipboard and cut out
the pattern. If you
don’t have thin chipboard, use cardstock instead. You don’t want the shoe to get so thick you
can’t bend it.
Glue
decorative paper on top of the pattern and cut out.
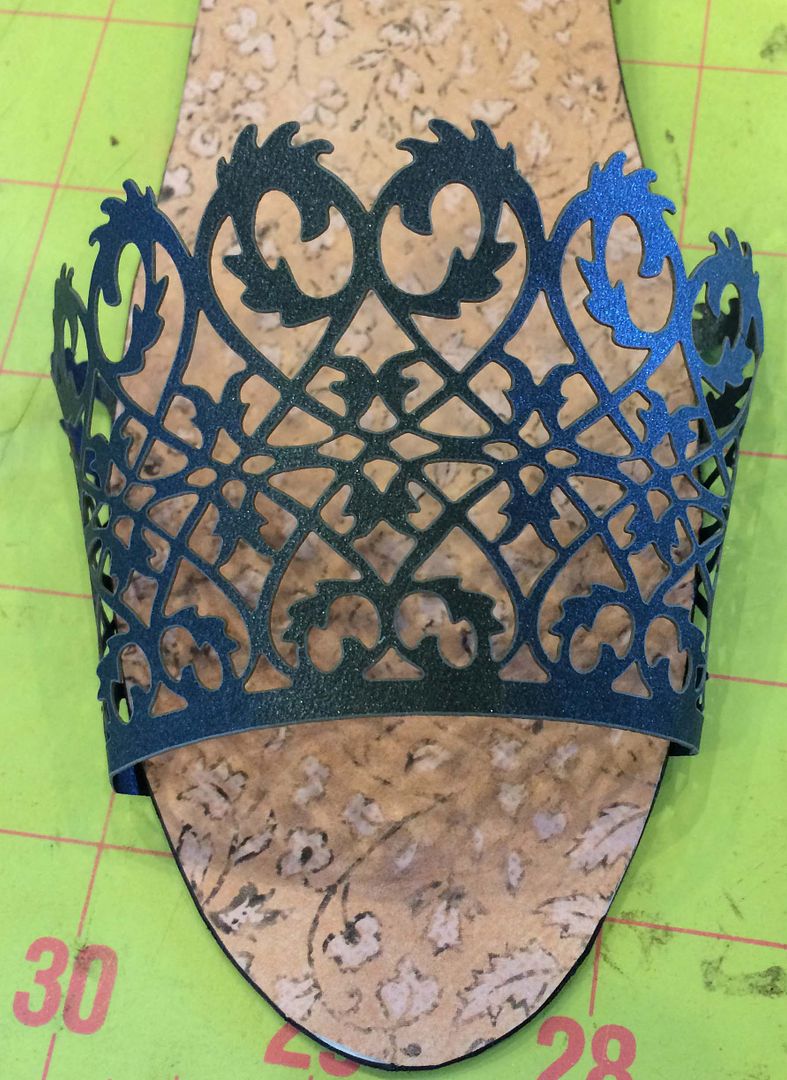
Cut the
piece of fence wrap to make the toe and heal.
Notice that one of the heart shaped pieces on the wrap is centered on
the shoe.
To decide where to cut – I used from the
tab end (which I used to attach the wrap to one side of the sole) plus 3 heart
shapes (so that one would be centered on the shoe) and a little more past the 3rd
heart shape to wrap on the other side of the sole.
Glue
the cut piece onto the top layer of the sole.
I used E6000 glue. Don’t worry if
you can see the glue under the shoe as it will be covered up with the bottom
layer of the sole.
Glue
the bottom layer of the sole to the bottom of the top layer of the sole. You should now have complete sole with decorative
paper underneath and on top.
NOTE: When you are gluing the pattern, paper,
chipboard and then the layers together make sure you apply an even coat of glue
to all of the pieces. If you don’t, when
you bend the sole to make the shoe shape the layers might separate and or the
paper might lift.
Next, I
inked the edges of the sole.
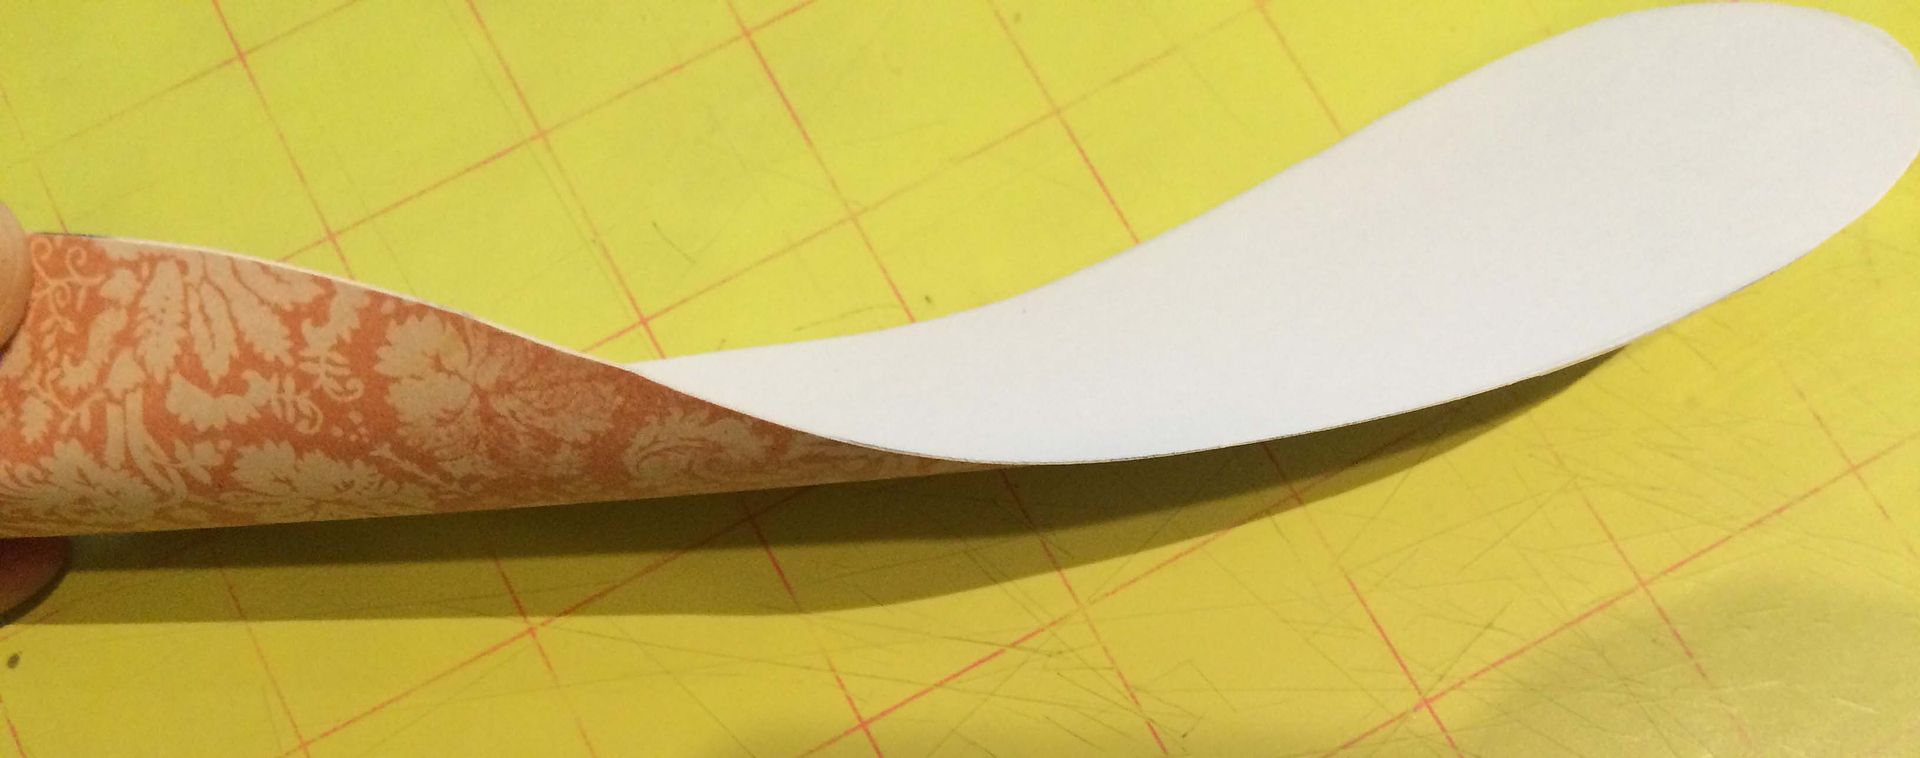
Bending the Sole
To give
the shoe it’s shape I bent the sole.
The first bend I made was at the top.
Notice how I used two different papers to cover the sole. I liked the look of the two papers but it
also helped with knowing where to bend.
The black paper extends 2” from the back of the shoe and this is the
point where I put the bend. Don’t make
the bend at the bottom until you add the heel to the shoe.
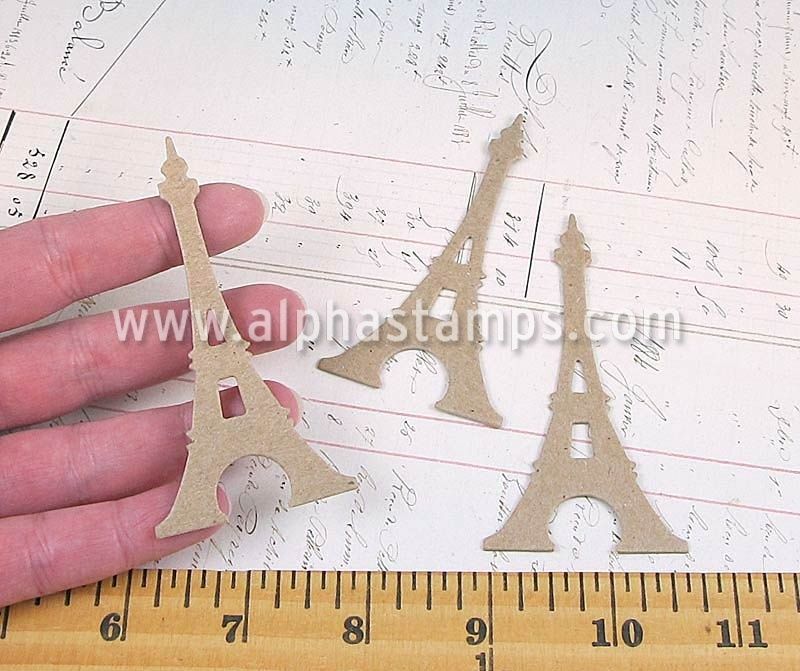
Eiffel Tower Heel
I
thought a French themed shoe would be so cute with an Eiffel tower as the
heel.
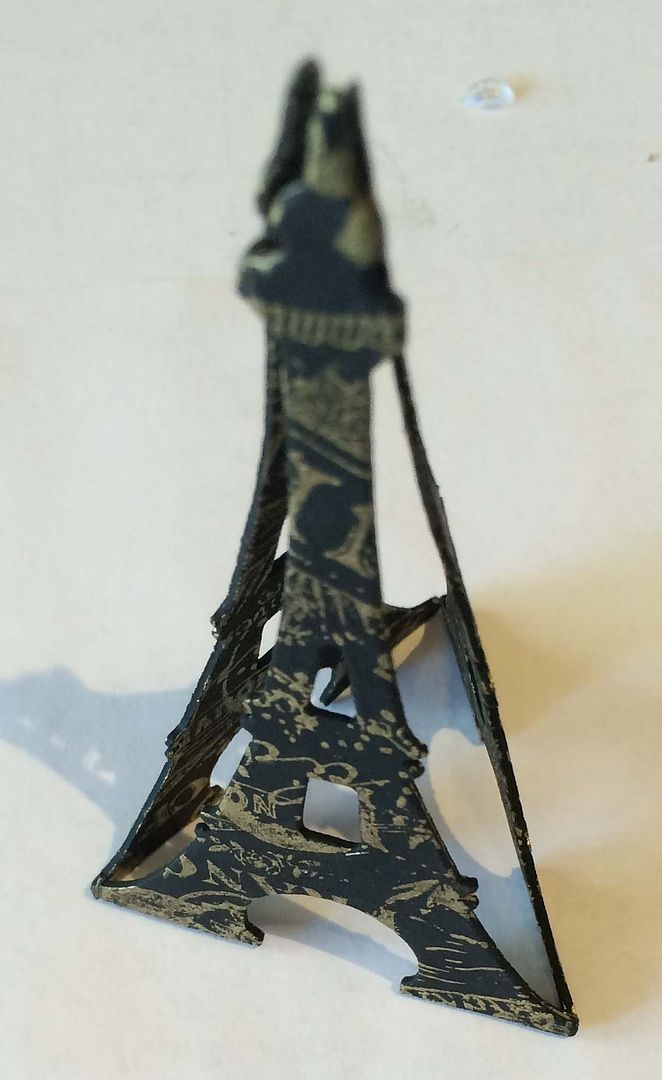
I
started by painting three chipboard Eiffel towers black.
Next, using gold ink and the French Floral
Collage rubber stamp I stamped the towers on both sides. If your stamp has a direction, keep that in
mind while stamping. Since the towers
are going to be upside down, I stamped them upside down.
I glued
the towers together using E6000 glue.
For an
extra decorative touch I glued brass foot to the top of the tower. Using E6000 I glued the towers to the bottom
of the shoe.
Bending the Sole - Second Bend
Now
that you have the heel in place you need to make the second bend. The reason you need to wait is that the
height the heel will determine the amount and location of the bend. You need to bend the sole so that the front
of the shoe sits flat on the surface.
The bend in the example piece is approximately 3 ¼” from the front of
the shoe.
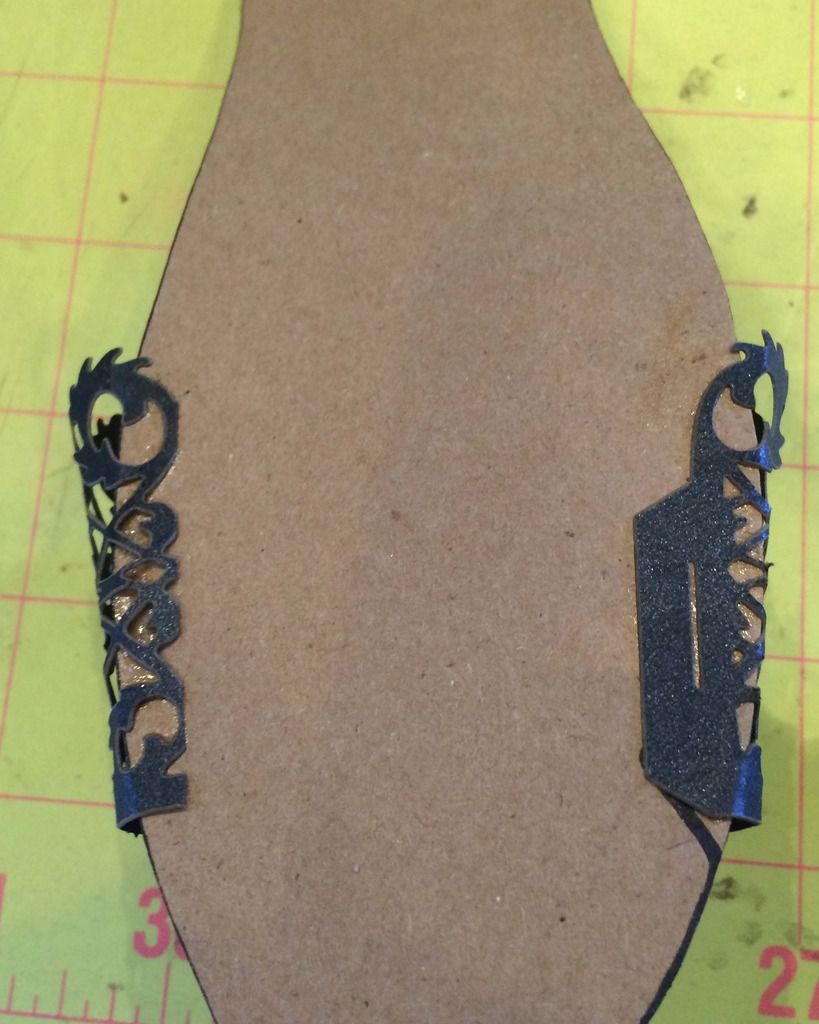
The
last step is to attach the back piece.
Using the remaining fence wrap, trim the edges so that the decorative
scrolls match on each side. I also bent
back the heart shapes. Attach the fence
wrap to the back edge of the sole using E6000 glue.
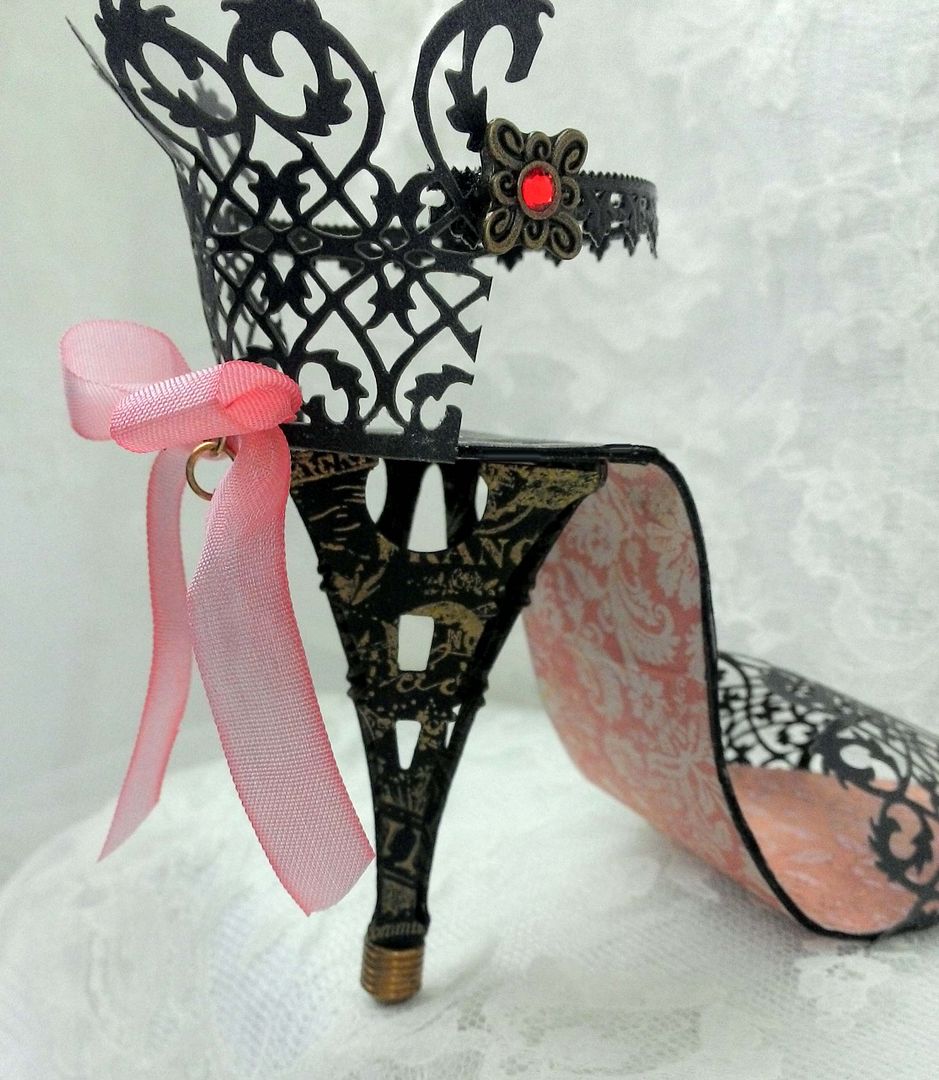
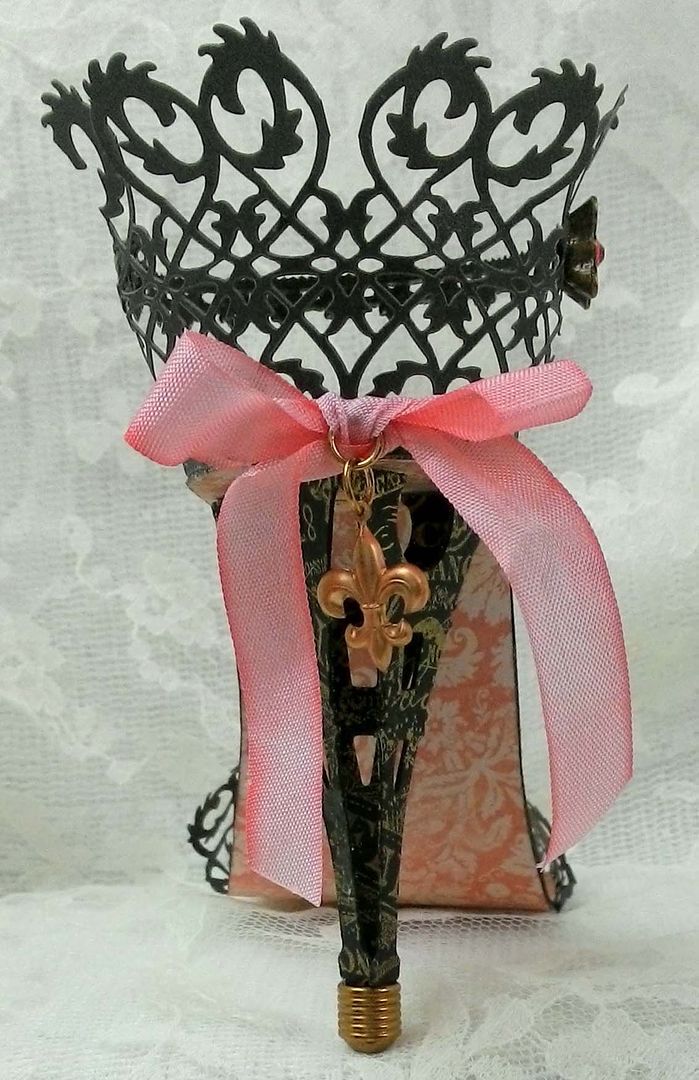
Final Touches
I added a piece of Dresden as a strap decorated with slider beads (the
Dresden is glued to the inside of heel piece).
NOTE: If you add something with any
weight to one side you must add it to the other or the shoe will fall
over. This is because of the height of
the heel. If you use something else that
is shorter for a heel you may not have this problem.
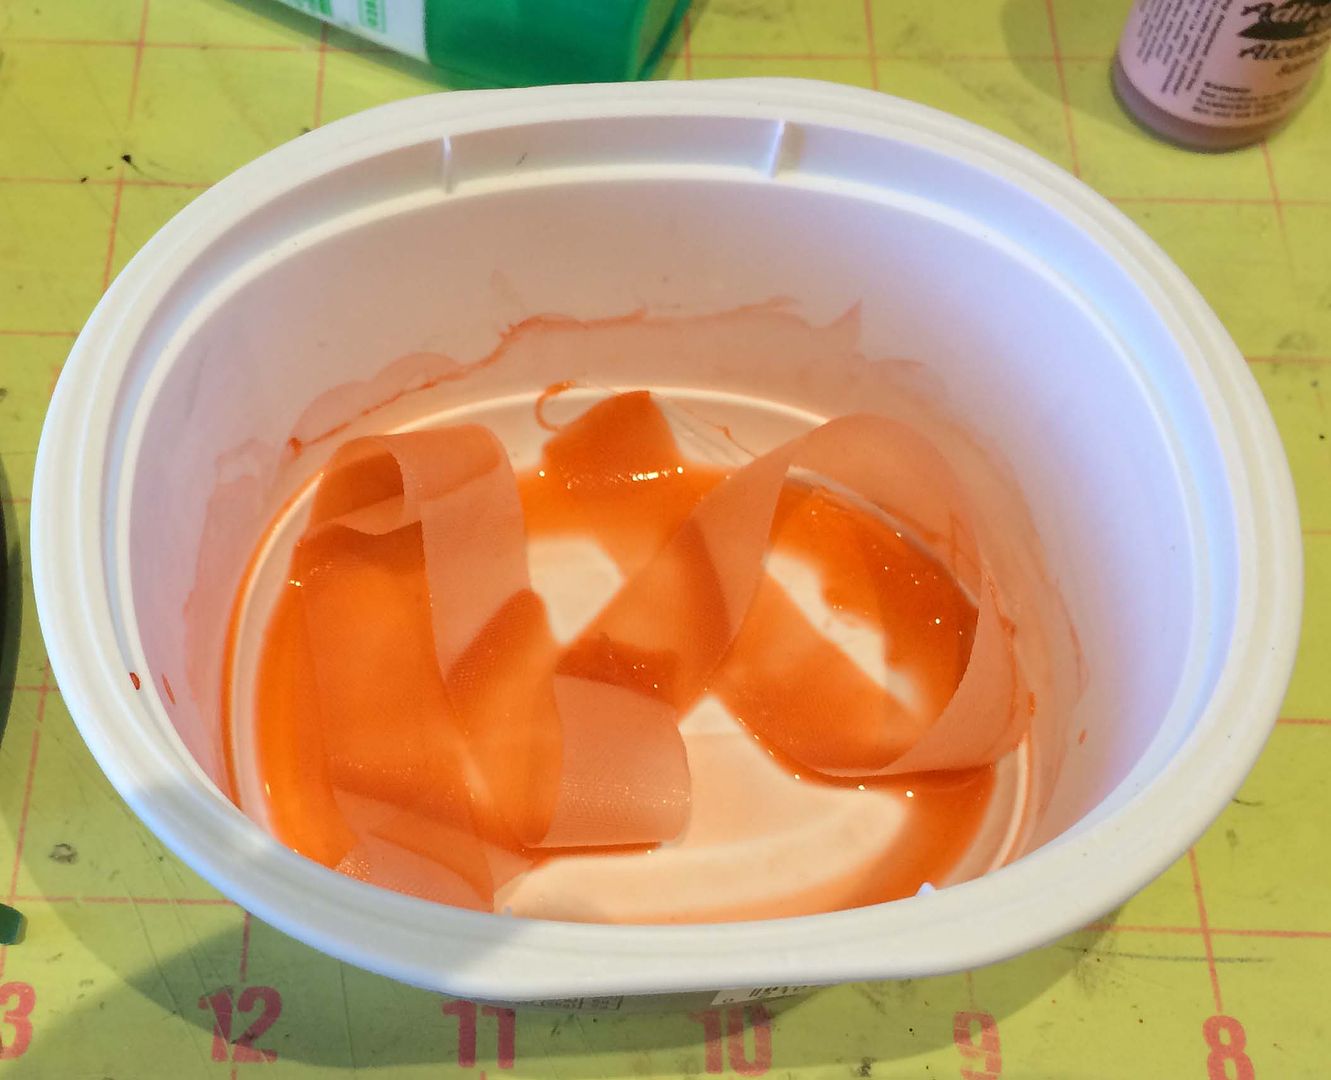
To the
back of the heel I also added a ribbon which I dyed with Mountain Rose alcohol
ink. Hanging from the bow of the ribbon
is a fleur de lys.
Other options for the toe and back of the
heel are:
Other options for the heel are:
Alpha Stamps Products Used For the Paper Shoe